

Wondering how to edit files as root using GUI file manager on Ubuntu? Don’t worry, we got you covered!
Advancements in the graphical user interface of Linux distributions have led to Linux getting adapted as the mainstream operating system in many places.
Being open-sourced and managed by a community that focuses on updates, Ubuntu has cemented itself as one of the most reliable, secure, and beginner-friendly Linux distributions out there.
That being said, you might find yourself in a situation where you’d want to edit some files. While this can be achieved via the GUI, you’ll need to provide some permissions as root before making any noticeable edits.
This guide is meant to help you learn how to edit files as root using GUI file manager on Ubuntu. We’ll cover the prerequisites, along with the steps required.
With that being said, let’s begin!
Requirements for Editing Files Using GUI File Manager.
Before you learn how to edit files as root using GUI file manager, it’s better to know what you’ll need for this guide.
First and foremost, you’ll need a system with Ubuntu installed. For this guide, we’ll be using Ubuntu 22.04. However, you shouldn’t face any problems using any previous version of Ubuntu.
The next thing you’ll need is an account that has sudo or root privileges. These are mandatory as some commands require certain permissions before execution.
Lastly, you’ll require a software named Nautilus. Nautilus is a file manager that was developed for the desktop environments supported by GNOME, which includes Ubuntu as well. It’ll probably come installed on your Ubuntu system by default.
Why Use Nautilus?
Nautilus is not just useful for the creation and management of files but also for previewing files of different types and giving access to network drives. It comes equipped with an extensions interface, meaning that you can add to its functionality based on your preference.
You can access Nautilus in different ways. While the most common method would be to do it via the file manager, you can also do the same with the help of the Command Terminal.
There are some things that you should look out for when using Nautilus. For starters, you can’t use Nautilus to view the hidden files by default. You can change this by pressing Ctrl + H on your keyboard. This shortcut can be used to toggle the hidden status of the files.
Nautilus also doesn’t allow editing system files by default. Luckily for you, this guide will cover how to get around this predicament. Now that you’re aware of Nautilus and its features, let’s take a look at the steps.
Step 1: Installing the Nautilus Extension for Admins.
This guide’s first step is installing the admin extension for Nautilus.
This step is necessary as the extension will provide a gateway toward editing the files using the file manager.
Follow these steps to install the Nautilus extension on your system.
- Start by opening the Command Terminal by pressing Ctrl + Alt + T on your keyboard.
- Once that’s done, type the following:
$ sudo apt update && sudo apt upgrade

This will update all packages and repositories to their latest available versions.
- Once you’re done updating the packages, type the following to install the Nautilus extension on your system:
$ sudo apt install nautilus-admin
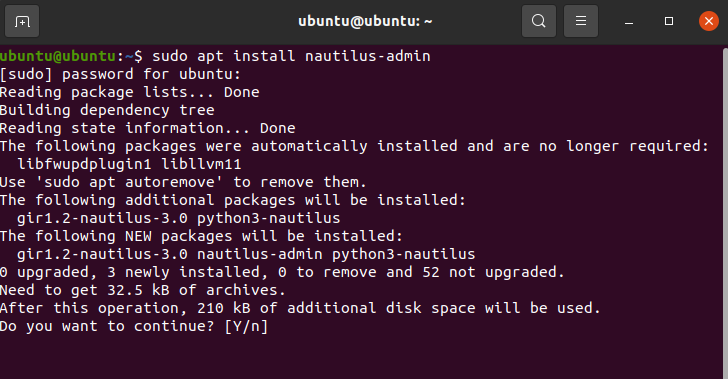
Wait for the installation to finish.
If you followed the steps correctly, then you should have Nautilus installed on your system. With this, you can proceed to the next step.
Step 2: Restart Your System.
Now that you’ve installed the admin extension for Nautilus, you’ll need to reboot your system to finalize the changes.
This can also be done with the help of the Command Terminal.
Follow these steps to reboot the system with the help of the CLI:
- First, open the Command Terminal by pressing Ctrl + Alt + T on your keyboard.
- Next, type the following command:
$ sudo reboot
If you followed the steps correctly, your system should proceed to reboot itself. Once the reboot is complete, you can move on to the next step.
Step 3: Using the GUI to Edit Files.
With the reboot finished, you’re ready to move on to the main step, i.e., using the GUI file manager to edit the file.
As mentioned earlier, make sure you have root privileges otherwise, this method won’t work.
Follow these steps to use the GUI to make edits:
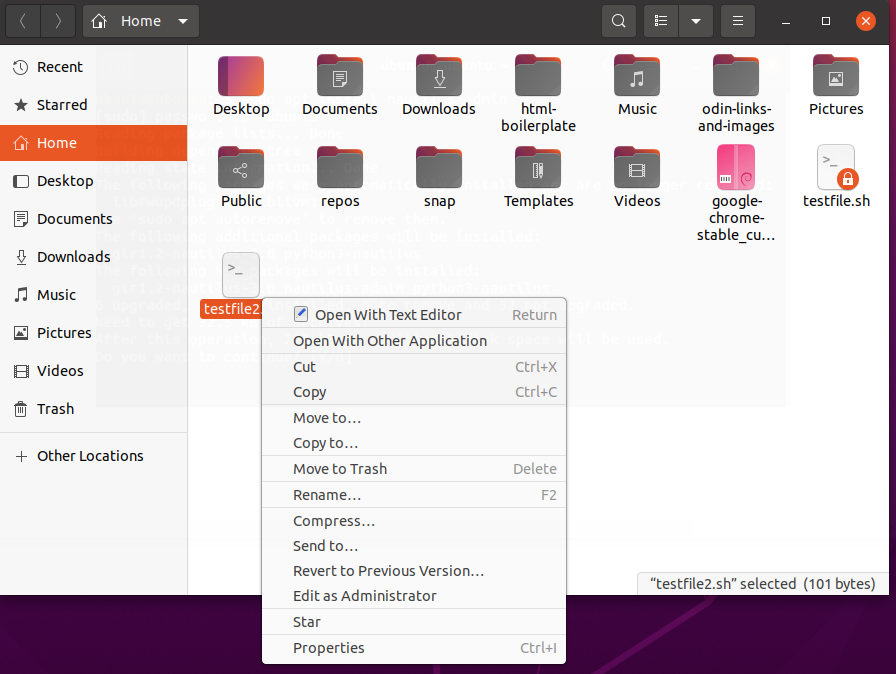
- Start by navigating to your File Manager and opening it. This can be done directly from the desktop or by using the Search Bar.
- Next, right-click on the file that you wish to edit. You should see an option titled “Edit as Administrator”
- Enter the password for the sudo account.
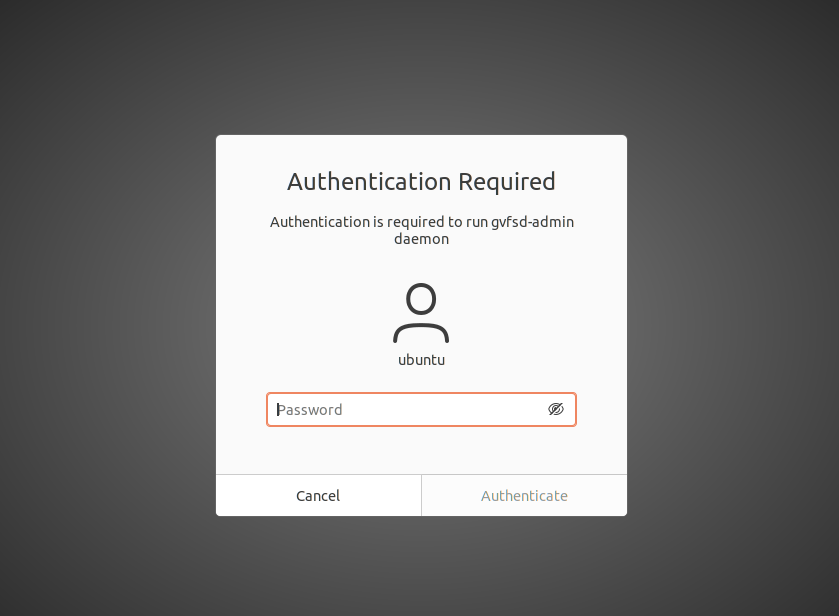
If you followed these steps correctly, then congratulations! You have successfully managed to edit files as root using the GUI file manager.
Disabling the Edit Files Feature.
Once you’re done with the edit files feature, we recommend you disable it to make sure no one else can make changes to your files.
This can also be achieved via the Command Terminal.
Follow these steps to disable the Edit Files feature for the GUI:
- Start by opening the Command Terminal by pressing Ctrl + Alt + T on your keyboard.
- Type the following:
$ sudo apt remove --purge nautilus-admin
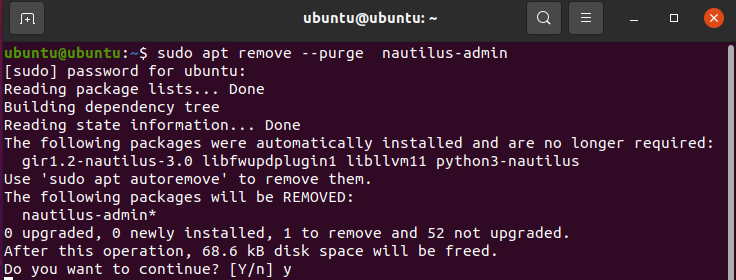
This will disable the GUI removing feature by uninstalling your system’s admin privileges for Nautilus.
Aside from the usual file management tricks, you might want to take a look at your file system. While the default file system is designed to cater to most needs of the average user, others are designed with specific tasks in mind.
An example of such a file system is Btrfs. Learning more about this file system and its benefits can prove to be useful to you in the long run.
This concludes our guide on how to edit files as root using GUI file manager. If you have any questions or suggestions, let us know in the comment section down below.
If this guide helped you, please share it. 🙂
