

Wondering how to fix error code 0x643 on Windows 10 on your PC?
There are some Windows 10 users who receive the error code 0x643 when trying to install a 3rd party application (typically, services offered by Microsoft Office and Adobe). In most cases, the problem occurs when using SCCM (System Center Configuration Manager) to deploy a program on several computers simultaneously.
We had a look into this issue and discovered that it can be caused due to a number of reasons, including the ones mentioned below:
- Invalid .NET dependencies
- Incorrect Command Line Interpreter path
- .NET Framework 3.5 / .NET Framework 4.8 is disabled
In this guide, we will walk you through different relevant troubleshooting methods in detail. All the methods are easy to execute, and should not take much of your time!
Let’s get started!
1. Point to the Command Line Interpreter.
If you are experiencing this problem when trying to install a program on multiple computers using the SCCM utility, you should refer to the list in COMSPEC in order to find the location of the command line interpreter.
It has been reported that some users were able to resolve this issue by first running COMSPEC in Command Prompt as an administrator before deploying SCCM, which is why we recommend giving it a shot.
Here is you can do that:
- Type cmd in the search bar and click on Run as administrator to launch elevated Command Prompt on your PC.
- Once you are inside the Command Prompt window, type the command mentioned below and hit Enter.
%ComSpec%="C:\WINDOWS\COMMAND.COM
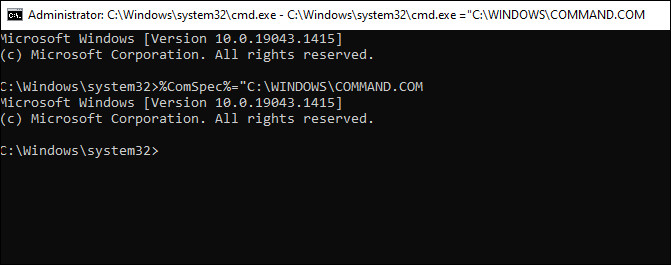
Once the command is executed, try deploying applications using the SCCM utility again and check if the issue at hand is resolved.
2. Run the .NET Repair Tool.
In case you are facing the issue when attempting to install a service provided by Adobe, there’s a chance that the 0x643 error you’re seeing is caused by an incompatibility in the .NET framework.
SCCM fails occasionally due to remnants of an old .NET framework installation or a partially installed bad update. The fix is simple, all that you need to do is run the .NET Framework Repair Tool.
Here is how you can do that:
- Launch your browser and navigate to the Microsoft .NET Framework Repair tool download page.
- Scroll down and click on the Download button to download the repair tool.

- Once the download is complete, double-click on the downloaded file, and in the first window, checkmark the box associated with I have read and accepted the license terms.
- Now, click on Next and wait for the tool to complete scanning.
- If the tool detects issues, it will recommend repairs. Click on Next to apply the recommended fixes automatically.
Hopefully, doing so will resolve the error at hand.
3. Try Using CleanMyPC.
Do you regularly clean your computer thoroughly? You should remove corrupted files if you haven’t done so recently, because they may cause serious damage to your computer. Furthermore, junk files on your PC are mostly to blame for the issue at hand.
You can get rid of these files and the problems they cause by using a good PC cleaner.
Online computer cleaners can scan for errors and automatically fix them as they appear. We tested some of the best online cleaners and found CleanMyPC to be the best.

By using CleanMyPC, you can eliminate all types of junk files and improve the performance of your PC. The best thing is that this tool is quite simple to use. As soon as CleanMyPC runs a scan, it will identify the problems within minutes and fix them without needing your input much.
Give your PC a performance boost by installing CleanMyPC!
4. Enable .NET Frameworks 3.5 and 4.8.
In the event that repairing the existing .NET framework wasn’t able to resolve the issue, you should also consider that you might have an existing .NET framework on the computer needed to run the program. If this framework is disabled, you might have the issue at hand.
Affected users have reported that this error normally occurs because preinstalled .NET frameworks 3.5 and 4.8 are disabled, preventing the installation from finishing. You can resolve the error by enabling the framework directly from the Windows Features screen.
Here is what you need to do:
- Open a Run dialogue box by pressing Windows + R keys simultaneosuly on your keyboard.
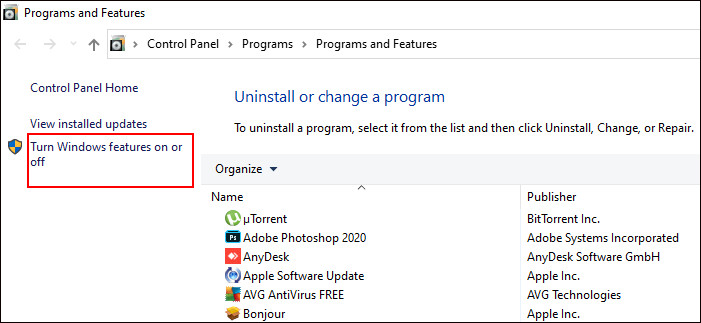
- Inside the text field of the dialogue box, type appwiz.cpl and hit Enter. This will launch Programs and Features window on your PC.
- Once you are inside Programs and Features window, click on turn Windows features on or off.
- Now checkmark the boxes associated with NET Framework 3.5 (includes .NET 2.0 and 3.0) and hit OK.
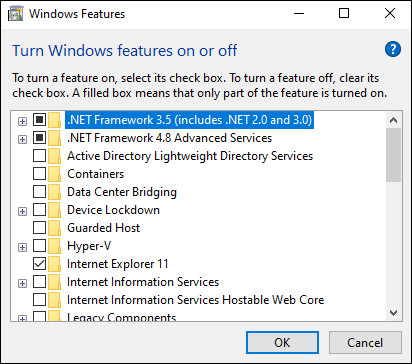
- If a confirmation prompt appears, click on Yes to proceed.
- Repeat the steps 3 and 4 with the .NET Framework 4.8 Advanced Services and once done, restart your PC.
Hopefully, doing so will fix the error under consideration.
This brings us to the end of our guide on ways to fix the error code 0x643 on Windows 10. We tried walking you through all the steps in detail and hope that one of the methods mentioned in this post did the trick for you. In case you still have any confusion about the steps, please let us know in the comment section below!
If this guide helped you, please share it. 🙂
