

Looking for ways to fix the error code 800F0922 on Windows 7 / 8.1 / 10?
Windows releases new updates with the latest features and security patches quite often, and installing them is necessary to maintain your PC’s smooth functionality. Most users dread time-consuming and potentially destabilizing updates, but that’s not always the case. The majority of Windows updates are lightweight, making it easier for users to install them.
However, recently several users reported that their screens display error code 800F0922 upon their attempt to install the latest updates. This can be frustrating, mainly if you rely on the new update to complete a pending task.
If you are facing a similar situation, then you are in the right place. We have listed a few easy yet practical solutions below to help you resolve the issue in no time.
Let’s get started.
1. Run the Windows Update Troubleshooter.
If your screen displays the error under consideration while attempting to install and update, then the first thing you should do is run the windows update troubleshooter.
Essentially, the Windows Update Troubleshooter shuts down the Windows Update service, clears the cache, and then restart the update service on your PC. If any errors are found in the process, it will resolve them with little to no user input.
here is how you can run the Windows Update Troubleshooter to fix the error at hand:
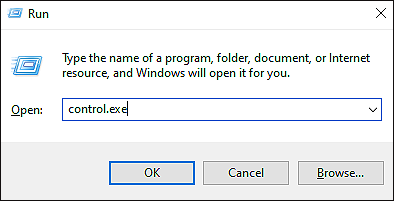
- Press Windows + R keys simultaneously on your keyboard to open a Run dialogue box.
- Inside the text field of a dialogue box, type control.exe and hit Enter.
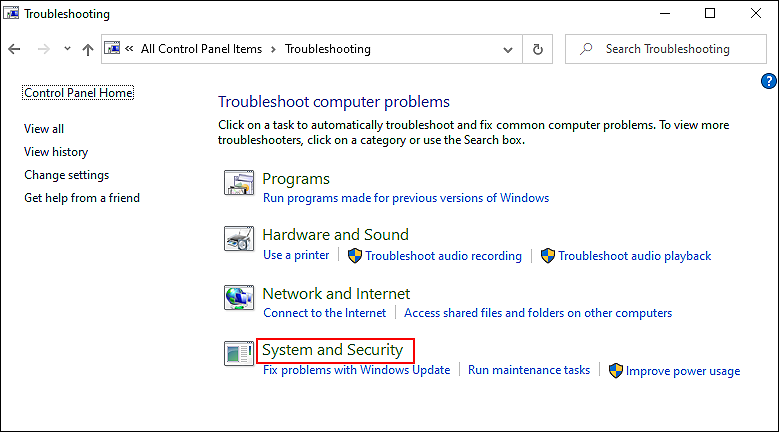
- Doing so will take you to the control panel window. Inside the window, type Troubleshooting and the search bar and hit Enter.
- Click on troubleshoot, and inside the troubleshooting window, click on system and security.
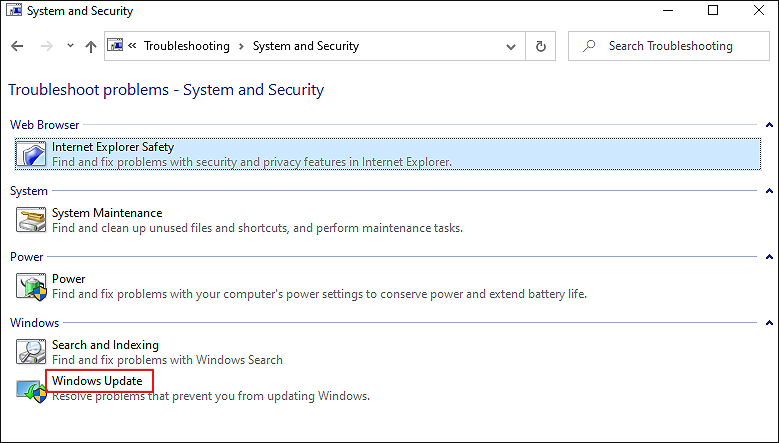
- Now select Windows update and then click on Windows update troubleshooter.
- Checkmark the box against Apply repairs automatically, and then click on Next.
- Now, wait for the troubleshooter to complete the scanning. If the troubleshooter detects any issues, it will suggest fixes. Click on Apply the fixes to complete the process.
- Once done, restart your PC and check if doing so resolve the error.
If a corruption error or a bug within the Windows Update service prevents you from installing the new Windows updates, then running the troubleshooter will fix it.
2. Run DISM and SFC Scans.
Like the windows update troubleshooter Windows, several other troubleshooting utilities come in handy in case of errors like the Error Code 800F0922 on Windows 7 / 8.1 / 10.
Two such utilities are the Deployment Image Servicing and Management Tool (DISM) and System File Checker (SFC). Both the tools scan through the system files, identify the issues, and resolve them automatically.
We suggest running an SFC scan first. If the system file checker does not fix the issues, you can run the DISM scan.
Here is what you need to do:
- Type cmd in the search bar and click on Run as administrator.
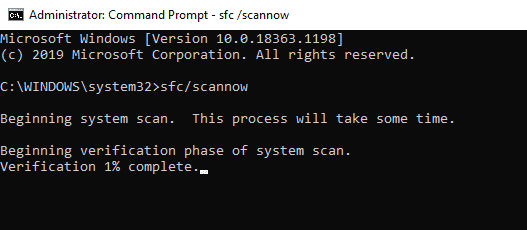
- In the elevated Command Prompt window, type the command listed below and hit Enter to execute it.
sfc /scannow
- Once the operation is complete, restart your PC.
- Now open Command Prompt as administrator again and execute the command mentioned below.
Dism /Online /Cleanup-Image /RestoreHealth
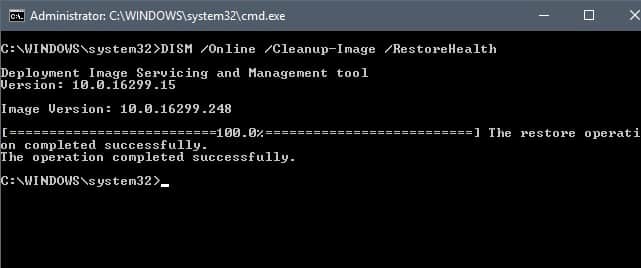
- Finally, restart your PC and check if running the scans resolved the issue.
You should now be able to install the latest updates without any issues.
3. Reset Windows Update Components.
Another common reason behind the error code 800F0922 on Windows 7 / 8.1 / 10 are the corrupt Windows updates components that prevent users from installing the latest updates on their PC. If the troubleshooter did not resolve the issue, then you can try resetting the windows update components manually.
Here is what you need to do:
- Type cmd in the search bar and click on Run as administrator to launch Command Prompt with administrative rights.
- Inside the Command Prompt window, type the commands mentioned below and hit Enter after each to execute them. These commands will stop all the Windows Update Services.
net stop wuauserv
net stop cryptSvc
net stop bits
net stop msiserver
- Once done, execute the commands mentioned below one by one.
net start wuauserv
net start cryptSvc
net start bits
net start msiserver
- Finally, restart your PC and check if resetting the update components resolved the error.
Hopefully, resetting the Windows Update components will allow you to install the latest updates without any issues.
4. Disable the Secure Boot Feature.
Secure Boot feature helps prevent the interference of viruses and malicious software in your operating system, and there are real security advantages linked to this feature.
However, several users discovered that the secure boot feature on their Windows was the culprit behind the error code 800F0922. These users managed to resolve the issue by disabling this feature, and if you have the secure boot feature enabled on your PC, we recommend disabling it.
Here is how you can do that:
- Reboot your PC, and during the bootup sequence, press the Setup key repeatedly. It is essential to note that the setup key can vary depending upon your motherboard manufacturer.
- Enter the Recovery menu during boot and click on Troubleshoot.
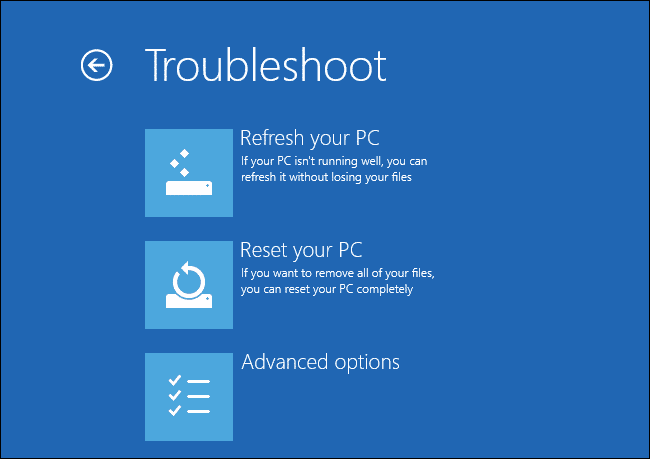
- Now select Advanced Options, and if your computer is using UEFI by default, click on the UEFI Firmware Settings.
- Now locate the secure boot feature Inside the security tab and disable it.
- Once done, save the changes and start your PC normally.
- Attempt to install the required update and check if the error is resolved.
If the secure boot feature is causing the issue, disabling it will resolve the error. Once the update is installed, we suggest enabling the secure boot feature following the process mentioned above.
5. Update Drivers.
You probably know that keeping your drivers updated at all times in Windows is essential to ensure smooth functionality and protection from critical problems down the line.
If you haven’t updated your drivers in quite a while, then now might be the right time to do so because outdated drivers can cause severe problems within the operating system, including the one under consideration.
Here is how you can update drivers on your Windows:
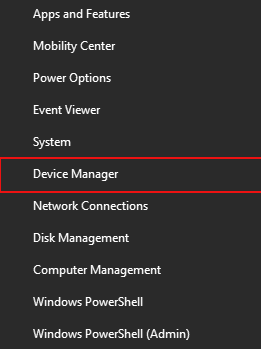
- Right-click the Start icon on the taskbar and select Device Manager from the list of options available.
- Click on the driver that you want to update and expand it. Click on the device within the driver and select Update driver.
- Finally, select Search automatically for updated driver software and Follow the on-screen instructions to complete the installation process.
- Once all the drivers are updated, try installing Windows update again.
That’s it. Hopefully, updating the drivers will help you fix the Windows update error on your PC.
6. Clear the .CBS Logs.
Windows maintains a log file named. CBS that stores information related to the Windows trusted installer. Since this file contains detailed information regarding the updates, it also is a great place for troubleshooting relevant issues.
If you have been unable to fix the error code 800F0922 on your Windows using the processes we listed above, try clearing the .CBS logs as there is a chance that a corruption error within this file is causing the issues.
Here is what you need to do:
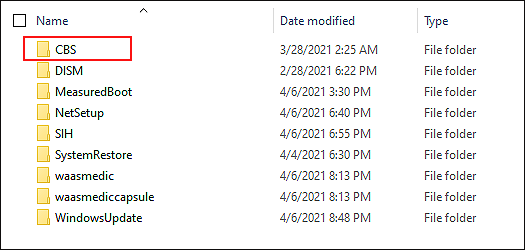
- Open File Explorer and navigate to the location mentioned below.
C:\Windows\Logs\CBS
- Once you are inside the CBS folder, delete all its contents and close File Explorer.
- Now type Command Prompt in the search field on the taskbar and click on Run as administrator.
- Copy the command mentioned below and paste it inside the Command Prompt window.
Dism.exe /online /enable-feature /featurename:NetFX3 /source:C:\
- Once the command is executed, restart your PC and check if you can now install the update.
If you are still unable to install the update, proceed to the following method below.
7. Try Using CleanMyPC.
We may not realize it, but several junk files get piled up in our PC over time. These supposedly harmless junk files have the potential to cause program failures and result in system crashes. If you notice that your system is running slow and the functionality has been compromised, it could be due to corrupt system files or malware within the system.
The easiest yet most effective solution to eliminating corruption errors and viruses is by decluttering your system. However, doing this manually can be a laborious process, not to mention quite tedious. This is why we recommend using a reliable PC cleaner and if you’re looking for suggestions, try using CleanMyPC.

CleanMyPC comes with a wide range of system maintenance tools that can handle everything from your PC’s slow speed to viruses and functionality issues. All that you need to do is run a scan using CleanMyPC. It will identify the errors and attempt to resolve them automatically.
Install CleanMyPC now and give your system a much-needed performance boost.
7. Reinstall Windows.
If none of the methods mentioned above works for you, this implies that the corruption error cannot be resolved using conventional troubleshooting steps. In this scenario, we encourage you to go ahead and reinstall Windows.
Reinstalling Windows means starting over with a clean copy of the operating system, without any viruses or other system problems. However, reinstalling Windows will remove specific files from your system but don’t worry; you would not lose all your data in the process.
This brings us to the end of our guide on fixing the error code 800F0922 on Windows 7 / 8.1 / 10. We tried walking you through all the steps in detail and hope that one of the methods helped you fix the issue once and for all. If you have any questions regarding the troubleshooting steps, please let us know in the comment section below!
If this guide helped you, please share it. 🙂
