Can’t figure out why the insert cell column option is greyed out on Excel?
Microsoft Excel is powerful spreadsheet software used for data analysis and documentation. It features pivot tables, calculation formulas, graphing tools, and more. Without a doubt, Excel is one of the most useful applications in the Microsoft Office suite.
However, like any software or tool, Microsoft Excel can suffer from occasional errors and problems.
Recently, users were encountering a weird issue on the app, which prevents them from inserting additional cell columns. Based on the reports, the insert cell column option is greyed out on Excel.
Based on what we know, there are a handful of reasons why this problem occurs. Most of the time, this problem is caused by a corrupted ‘.xlb’ file in your directory. On the other hand, it can also be due to improper configurations and incorrect usage.
In this guide, we’ll show you what to do if the insert cell column option is greyed out on Microsoft Excel.
Let’s get right into it!
1. Reset Microsoft Excel XLB File.
The most effective way to address this problem on Microsoft Excel is to reset the XLB file in your storage. This should reset Excel’s app data and eliminate errors that may have occurred during use.
Here’s what you need to do:
- First, press the Wi\ndows + R keys on your keyboard to launch the Run window.
- After that, type ‘%appdata%\Microsoft\Excel’ and hit Enter to open the path.

- Lastly, look for the .XLB file inside the folder and move it somewhere else.

Restart your system afterward and check if the problem is solved.
2. Unprotect Your Excel File.
A protected workbook or worksheet will cause the insert cell column option to be greyed out since any modification on the Excel file is prohibited. To fix this, unprotect your file to allow modifications.
Follow the guide below to unlock your file:
- Launch Microsoft Excel on your computer and open the file.
- Next, click on the Review tab in the navigation bar.
- Finally, click on Unprotect Sheet and Unprotect Workbook.
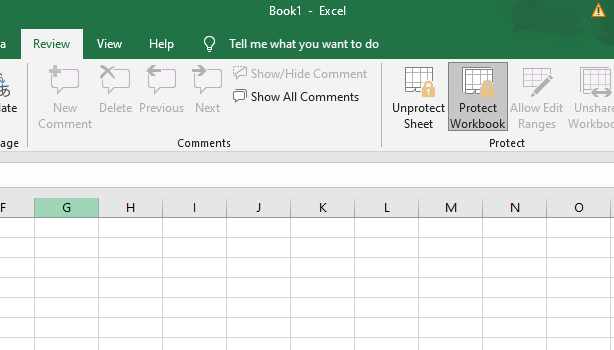
Restart Excel and see if the insert cell column option is available.
3. Check for Selected Columns.
When you need to insert a new column, you must select an existing column and insert the new one below or above it. However, if you have selected a row in your spreadsheet, the insert cell option will be greyed out.
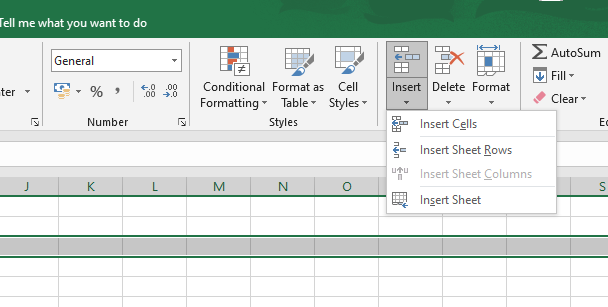
If the insert cell column option is greyed out on Excel, ensure that you have not selected a row in the spreadsheet.
4. Exit Cell Edit Mode.
If you want to insert a new column in Microsoft Excel, your cursor should not be in Cell Edit mode. If you are in cell editing mode, you should exit the mode by pressing the ESC button on your keyboard.
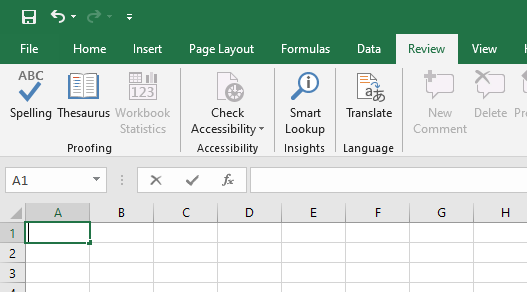
Once done, you’ll notice that the insert cell column option will be available.
5. Check Your Configurations.
The insert column option might not be enabled in your settings, explaining why the feature is greyed out in the toolbar.
Here’s what you need to do:
- First, open Microsoft Excel.
- After that, click on File > Options.
- Go to the Advanced tab afterward and look for the Display Options section.
- Lastly, select All and click OK to save the changes.
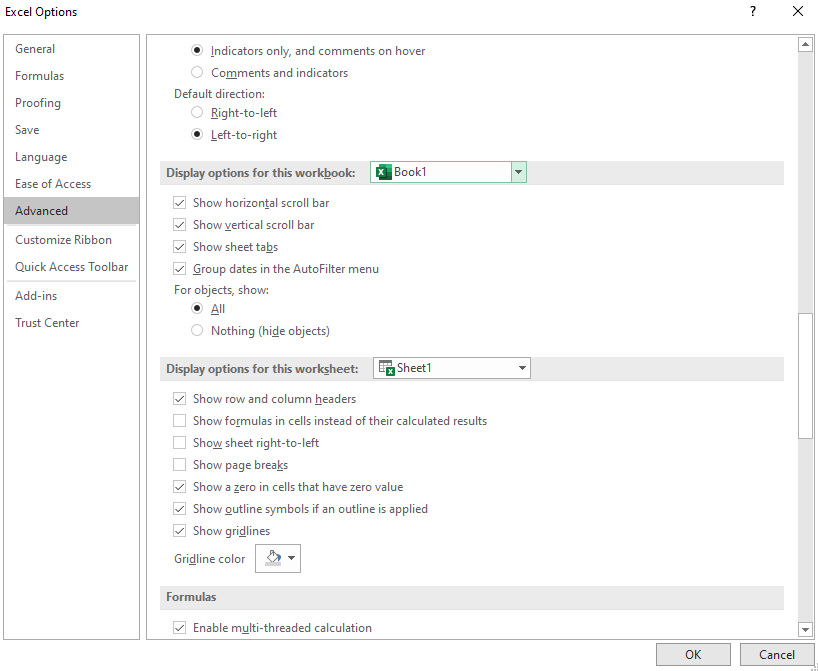
Go back to your file and see if the insert cell column option is available.
6. Disable Excel Add-ins.
Microsoft Excel Add-ins are third-party tools that provide extra functionality to your spreadsheet. They can perform various functions, which makes your overall experience better. However, you might be using an add-in that disables the insert cell option.
To rule this out, we suggest disabling any add-in you are using on Excel.
- Launch Microsoft Excel on your computer.
- Next, click on the File tab and choose Options.
- Access the Add–ins tab afterward and disable your add-ins.
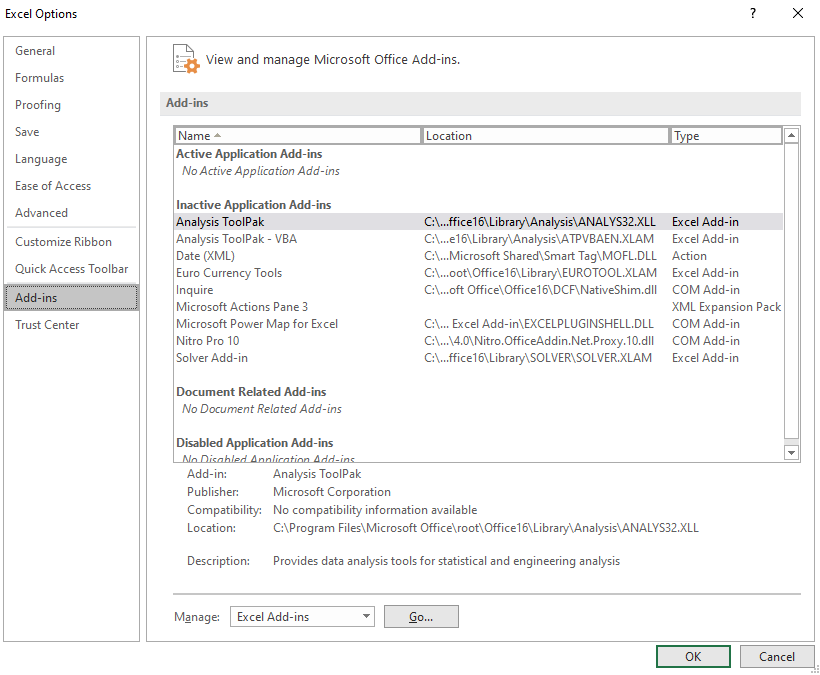
Restart Microsoft Excel and see if the problem is solved.
That ends our guide on what to do if the insert cell column option is greyed out on Microsoft Excel. If you have questions, please drop a comment below, and we’ll do our best to help.
If this guide helped you, please share it. 🙂


