

Wondering how to remove recently added apps from the Start menu in Windows 10?
Windows 10 comes with a recently added section that displays all your recently installed applications. This appears on the left side of the Start Menu. The feature displays three of the most recent apps installed, but by clicking on the Expand button beneath it, users can view more.
The feature enables you to launch recently installed programs quickly. However, if your PC is used by several users, it is best to remove this option for obvious privacy reasons.
In this guide, we will walk you through easy methods of doing so in detail. All the methods are fairly easy to execute, and should not take much of your time!
1. Use the Remove from the List Option.
The following method can be used to remove a recently added application from the Start Menu. Right-click the application in the recently added list to bring up this feature.
Here is how you can do that:
- Launch Start Menu by clicking on the Start icon or by pressing the Windows key.
- Now right-click on the targeted application and choose the More option.
- Next, click on the Remove from the list option.
This should remove the application without any issues.
2. Using the Windows Settings App.
The easiest to execute the task under consideration is via Windows Settings. However, this method can be used by standard users as well. If you wish to make administrative-level changes, perform one of the methods mentioned below.
Here is what you need to do:
- Press Windows + I keys on your keyboard together to launch Windows Settings. Then head over to the Personalization.
- In the left pane, click on the Start, and now turn Off the toggle for “Show recently added apps“.
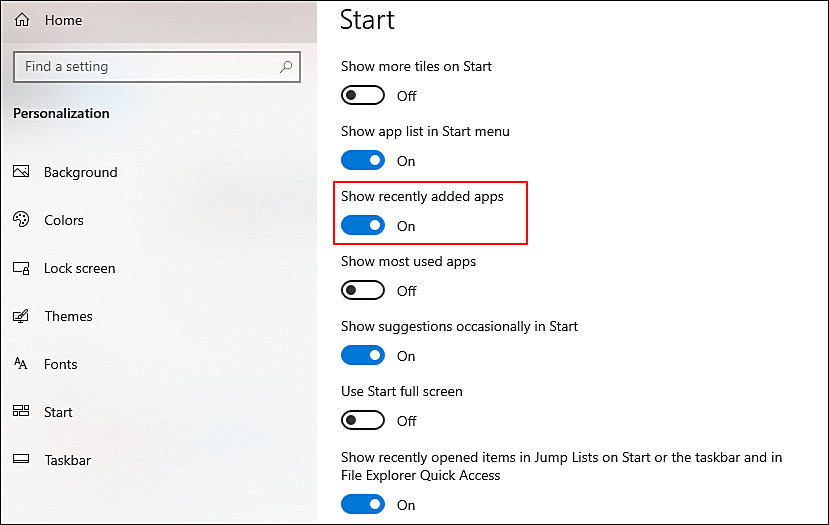
This will disable the list of the recently added applications from the Start Menu.
3. Using the Local Group Policy Editor.
Another way to remove recently added apps from the Start Menu is by using the Local Group Policy Editor. GPE is an administrative-level tool that allows advanced users to customize their operating systems.
However, the Local Group Policy is only available for the Windows Pro, Enterprise, and Ultimate versions, and thus might not work if you are using Windows Home operating system.
- Open the Run dialog box by pressing the Windows + R keys together.
- In the text field of the dialog box, type “gpedit.msc” and hit the Enter key to open the Local Group Policy Editor window.
- In the Local Group Policy Editor window, navigate to the following path:
Computer Configuration\ Administrative Templates\ Start Menu and Taskbar\
- Double-click on the setting named Remove “Recently added” list from Start Menu and it will open up in another window.
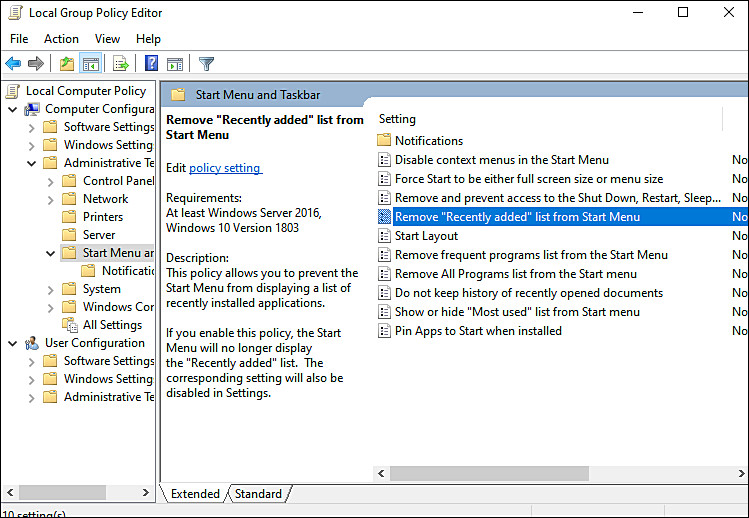
- Now change the toggle option from Not Configured to Enabled.
- To apply the changes, click on the Apply or OK button. Doing will disable the apps list from Start Menu.
This should make the desired changes.
4. Try Using CleanMyPC.
The system may be corrupt if you have tried the methods described in this guide and are still having problems.
It is recommended that you thoroughly clean your computer before attempting this guide. By doing so, your computer will be free of bugs and corruption errors. Using a good PC cleaner when this happens can be a good idea since manual cleaning is time and energy-consuming.
We recommend CleanMyPC if you have never used one before.

CleanMyPC allows you to fix all kinds of PC issues in a quick and efficient manner. The program includes many tools, such as a Multi-Uninstaller, a Speed Booster, and a Registry Cleaner, which allow you to fix the majority of problems with your system and enhance its performance.
If this sounds like something you need for your PC, you can install CleanMyPC right now and see how much faster your PC will be!
5. Using the Registry Editor.
Registry refers to a database used by Windows to store low-level details about an operating system’s processes and applications. Windows relies on the Registry Editor for important information while performing relevant operations. This makes the Registry Editor an important component of our operating system.
Here is how you can modify Windows Registry to make the desired changes:
- Press Windows + R keys simultaneously on your keyboard to open a Run dialogue box.
- Inside the text field of the dialogue box, type regedit and hit Enter. This will launch Windows Registry on your PC.
- Navigate to the following path in the Registry Editor window:
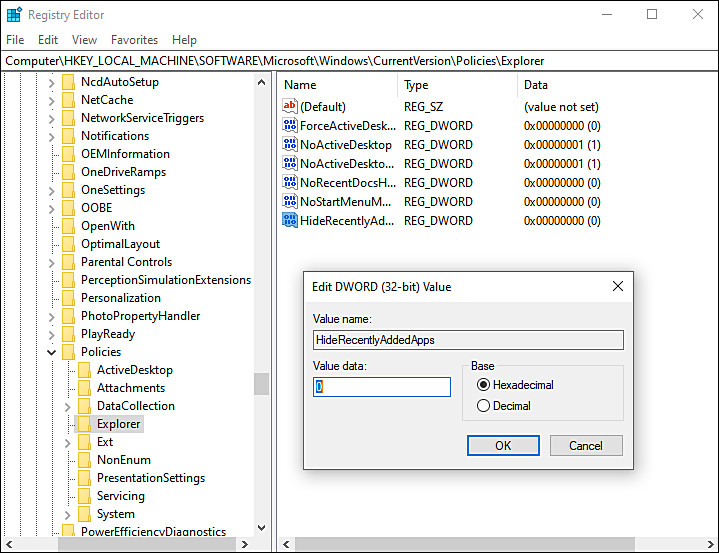
HKEY_LOCAL_MACHINE\Software\Microsoft\Windows\CurrentVersion\Policies\Explorer
- In the Explorer key, right-click on the right pane and choose New > DWORD (32-bit) Value option.
- Rename this value as “HideRecentlyAddedApps“.
- Double-click on the newly created value and under Value data, type 1.
- Once done, restart your PC to save the changes.
- You can always enable the feature back by changing the value data to 0 or removing this value from the Registry Editor.
This brings us to the end of our guide on ways to remove recently added apps from the Start menu in Windows 10. We tried walking you through all the steps in detail and hope that one of the methods mentioned in this post did the trick for you. In case you still have any confusion about the steps, please let us know in the comment section below!
If this guide helped you, please share it. 🙂
