Trying to fix the Software Update failed on the iPad problem?
iOS software updates are crucial to keep your Apple devices in check with the latest technology. In addition, these updates provide new features, previous bug fixes, and protection for your iPad.
It can be quite upsetting to see the ‘Software Update Failed’ error occur on your device when installing the latest version of iOS. This error may be due to insufficient storage space, damaged system files, or misconfigured network settings.
However, you need not worry! We have provided some of the most effective fixes for the error in this guide.
So, let’s begin!
1. Check If Your iPad is Compatible With the Update.
The first thing you need to do if you’re unable to update your iPad is to check whether it’s compatible with the iOS version you’re trying to download. If you own an old iPad, it might be possible that your device doesn’t support the latest iOS version.
Therefore, check the list of compatible devices with the latest iOS version before heading to the next troubleshooting method.
2. Check Your Network Connection.
An unstable network connection tends to hamper the updating and downloading process. That’s why it’s essential that your device is running on a stable internet connection before updating your iPad’s software.
So, check your network status and switch from Wi-Fi to Cellular Data or vice versa if your internet strength is poor. Here’s how to do it:
- Go to Speedtest by Ookla.
- Click on GO from the center of the screen.
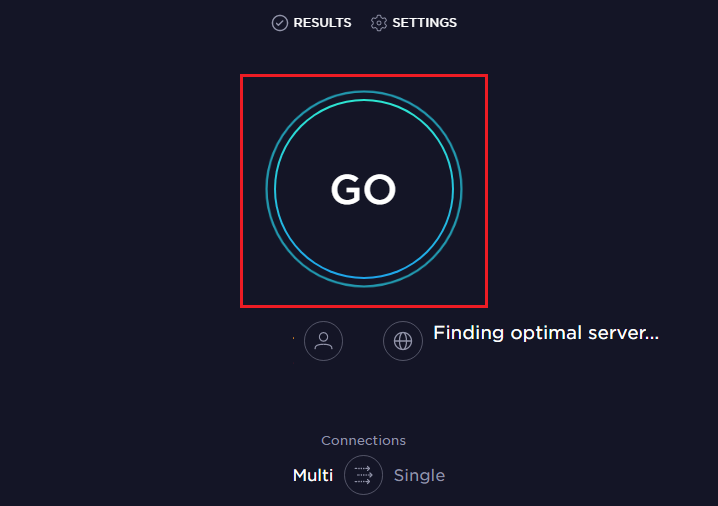
- Wait for a while for the site to show your current internet strength.
- If there’s a poor connection, switch to Cellular Data or vice versa by going to Settings from your iPad.
- Tap on Wi-Fi and turn off the toggle next to Wi-Fi.
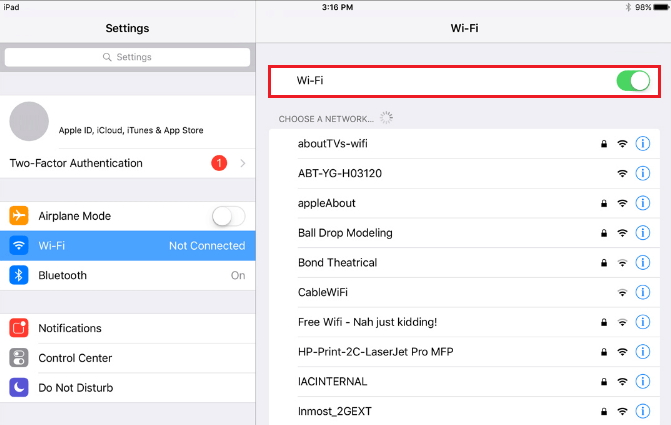
- Head back to settings and select Cellular.
- Lastly, turn the toggle on for Cellular Data.
Once you’re done, try installing the latest iOS update again on your iPad.
3. Force Restart Your iPad.
Force rebooting your Apple devices at times helps to resolve various issues, such as the Software update failed on the iPad. This method will come in handy if your iPad becomes unresponsive while updating its software.
The process of force restarting is a bit different for iPads with and without the home button. For iPad with a home button, here are the steps you must follow:
- Press and hold the Home button and Top button at the same time.
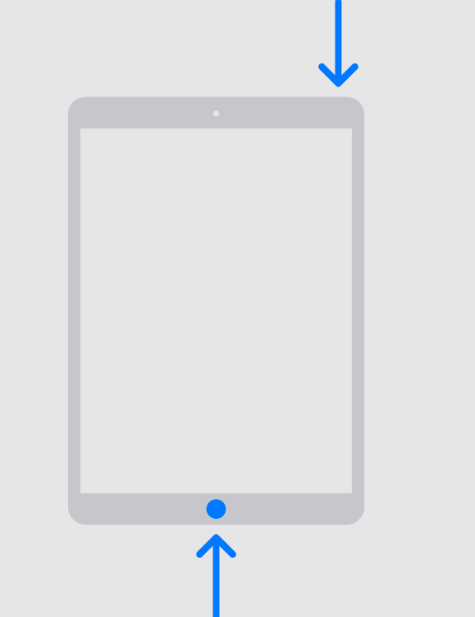
- Release the buttons once you see the Apple logo on your screen.
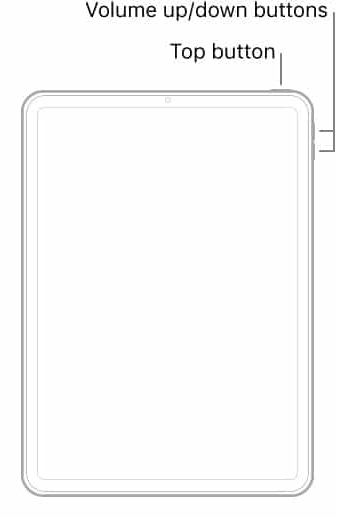
Follow the steps below for iPad without a home button:
- First, press and let go of the Volume Up button.
- Then, press and let go of the Volume Down button.
- Next, press and hold the Top button until you see the Apple logo appear on the screen.
4. Enable and Disable Airplane Mode.
Another fix to the Software update failed on iPad issue is to enable and disable the Airplane mode. This is like a refresh or restart on your Wi-Fi and cellular networks. Doing so will eliminate any network glitches within the system, which may have been the reason behind your iPad not updating.
Follow the instructions below to do it:
- Go to the Settings app on your iPad.
- Select Airplane Mode.
- Switch on the toggle to turn on Airplane Mode.
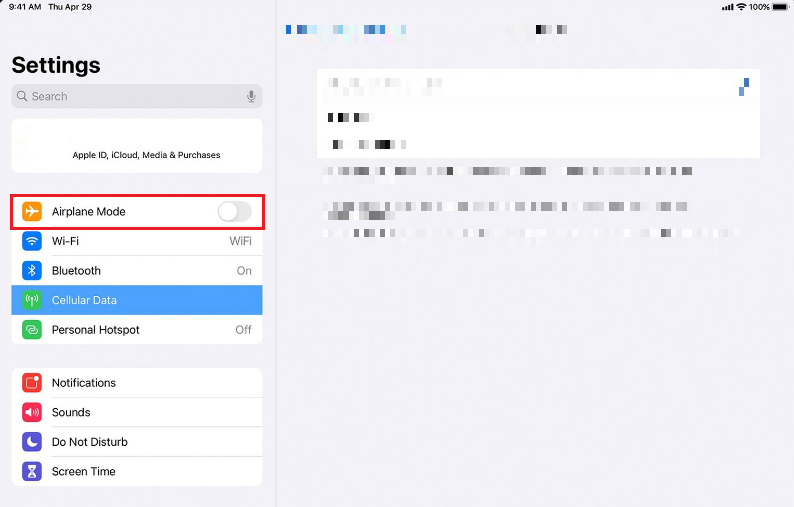
- Wait for a few seconds, then tap on the toggle to turn it off.
- Alternatively, you can also swipe down from the top-right side of your screen to bring down the Control Center.
- From there, simply press on the Airplane icon, wait a few seconds, and press it again to disable it.
After you’re done, you should be able to update to the latest iOS version on your iPad.
5. Check Apple System Status Page.
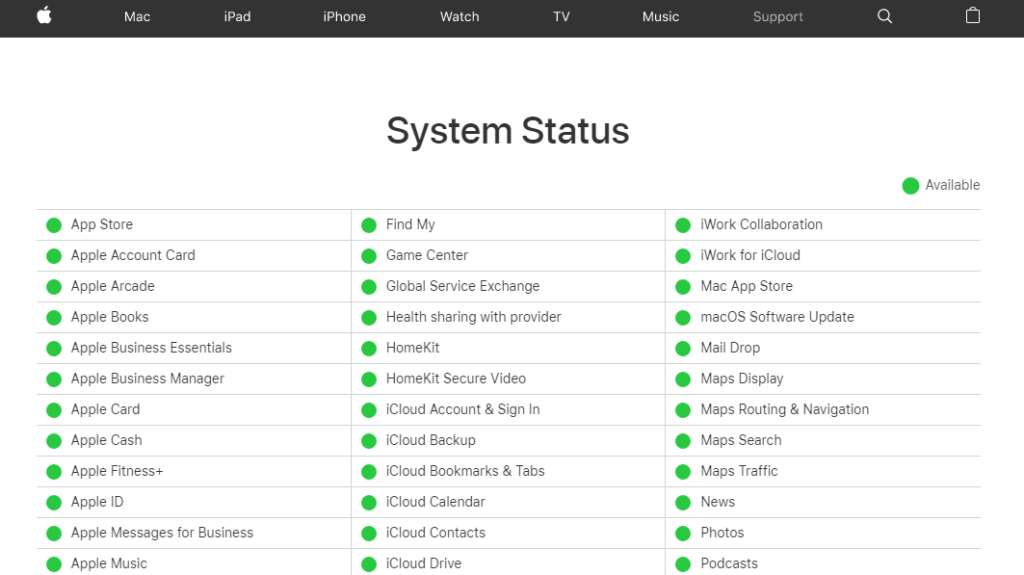
If the software update continuously fails every time you try to upgrade your iPad, there may be something wrong from the developer’s end. The server may go down for several reasons, such as when many people try to download the latest update at the same time.
So, head over to the Apple System Status page and see if the server is down. If it is, wait it out til Apple fixes the issue from their end.
6. Free Up Storage Space.
Software updates require a specific amount of free storage space for the update to download. So, if your iPad is running out of storage space, it may cause hindrances in updating your iOS to the latest version.
Even if you do have enough space, it’s generally a good rule of thumb to have 5-10GB of extra storage. This is to ensure that your iPad doesn’t end up lagging or crashing when your storage is full.
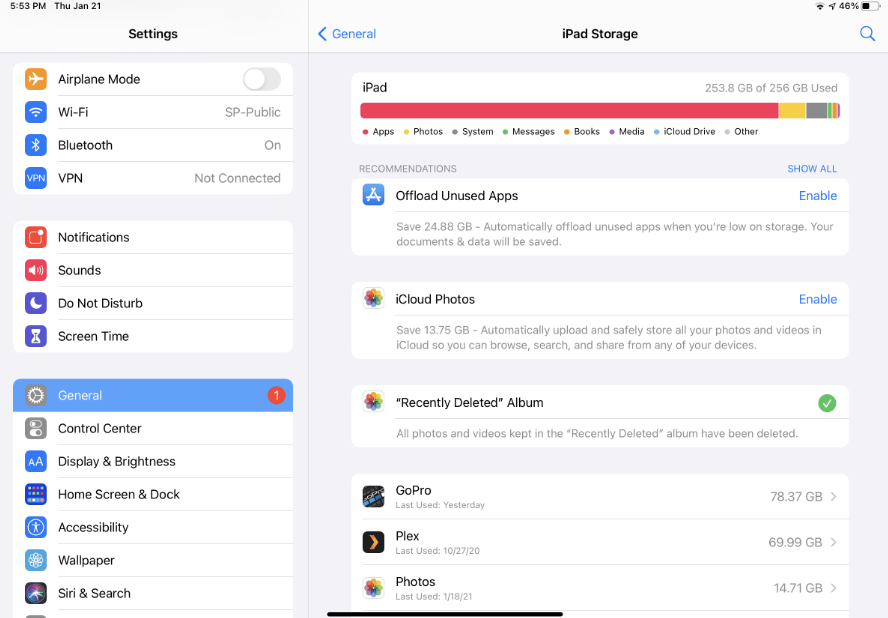
Here’s how to check and free up storage space in your iPad:
- Launch the Settings app on your iPad.
- Go to the General tab.
- Then, look for iPad Storage and tap on it.
- Now, you may either delete unnecessary apps on your own or follow the Recommendations section to free up storage.
7. Reset Your iPad’s Network Settings.
Network connectivity problems, such as invalid or corrupt Wi-Fi and Cellular configurations, may be the root cause behind Software update failed on iPad. So, if you’ve tried various fixes and were unable to resolve the issue, consider resetting your iPad’s network settings.
Here’s how:
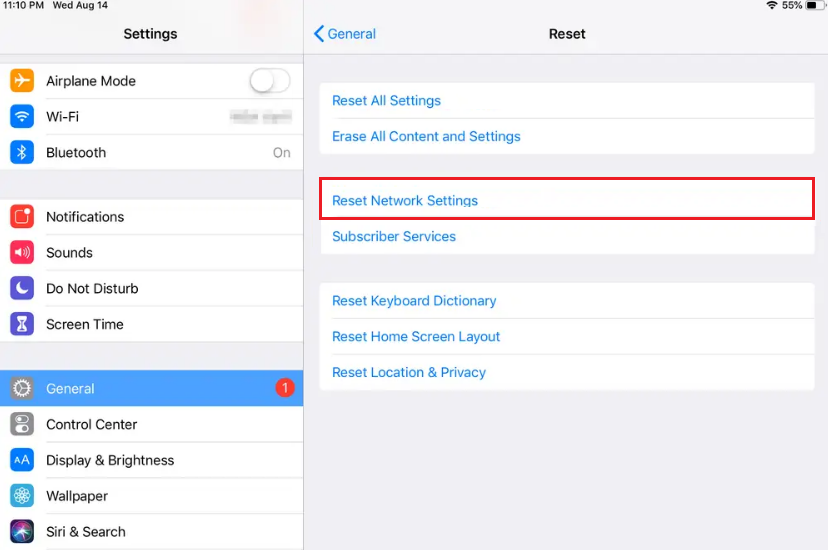
- First, open Settings on your device.
- From there, go to General.
- Then, select the Reset option.
- Tap on Transfer or Reset iPad.
- Next, select Reset Network Settings.
- You will be asked to enter your iPad’s passcode.
- Finally, tap on Reset and follow the on-screen instructions to reset the network settings on your iPad.
This method resets all saved network preferences, Wi-Fi passwords, cellular settings, etc. So, you will have to connect to Wi-Fi again before updating your software.
8. Manually Update Your iPadOS.
If you’ve made several attempts to get the latest iOS version on your iPad but have been unsuccessful every time, consider manually downloading the updates via iTunes. This will surely fix the Software update failed on iPad problem.
Below are the steps you must follow:
- Start by connecting your iPad to your Mac or Computer through a USB.
- Then, choose your device in either iTunes or Finder.
- Choose Trust if this is your first time connecting your iPad to the computer.
- If you wish to back up your data, you may select Back Up Now.
- Then, click on the Check for Update option.
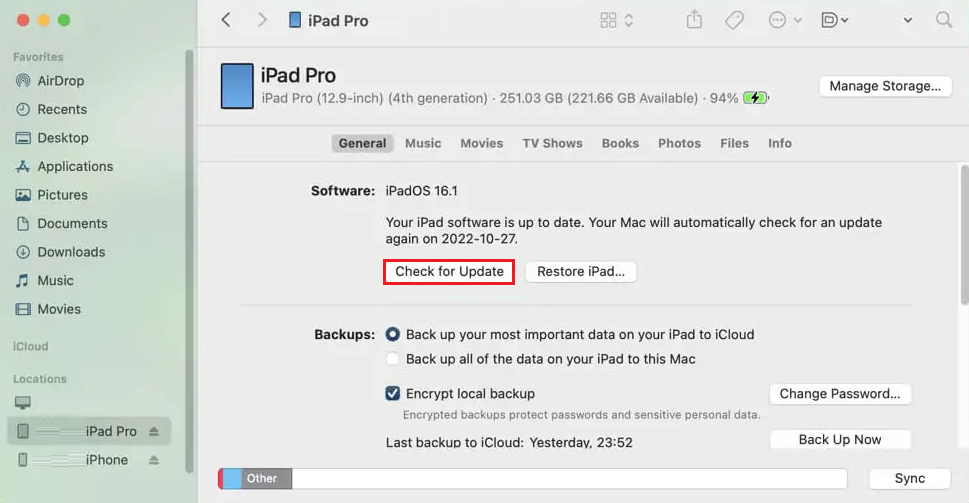
- Next, select Update Now.
- Then, click on the Download and Update button.
- After that, select Agree to accept the terms of the update.
Once the latest version of the software is downloaded, your iPadOS will update automatically.
This brings us to the end of our guide on how to fix Software update failed on iPad. If you have any further queries regarding this topic, feel free to use the comments section below. We’ll get back to you in no time.
If this guide helped you, please share it. 😊


