

Want to fix Sysprep was not able to validate error on Windows 11?
One of the most useful installation tools in Windows systems is Sysprep or System Preparation Tool. It’s a command line utility that allows you to omit data specific to your computer from the Windows installer and prepare a Windows image for deploying, duplicating, and testing an OS on other computers or networks.
However, at times you may end up encountering the Sysprep was not able to validate error on Windows 11. Some common reasons for this issue include installed UWPs, BitLocker or other system encryption being enabled, missing or damaged Spopk.dll file, removal of default Windows programs, etc.
Keeping these reasons in mind, we’ve concluded this guide to help you combat the issue and get your System Preparation Tool back to working. Carefully follow each method one by one until you fix the Sysprep was not able to validate error on Windows 11.
So what’s the delay for? Let’s get started!
1. Check the Log File.
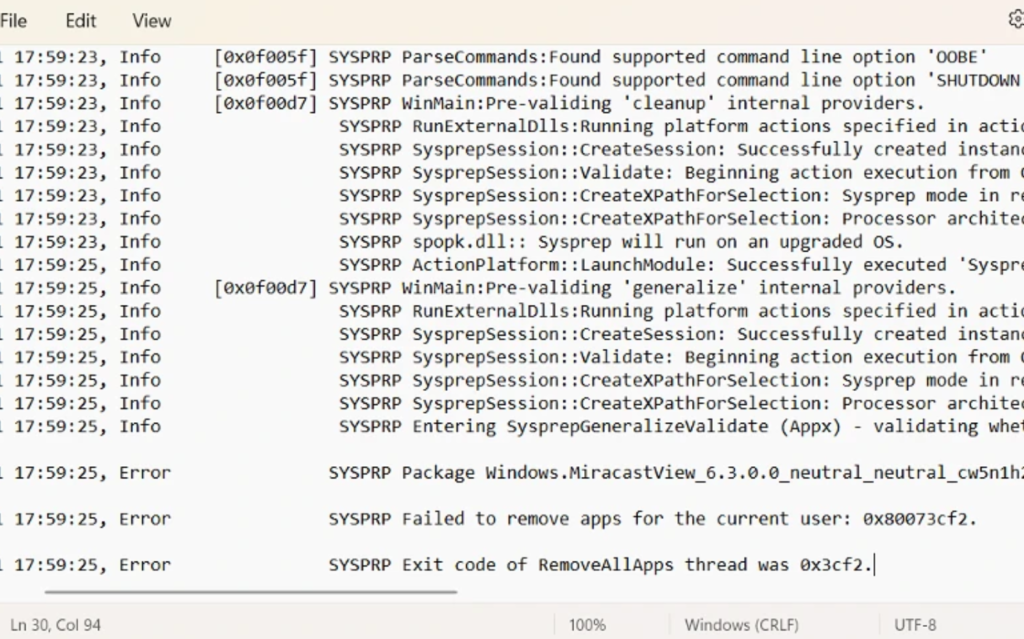
When you come across a Sysprep error, it will show the log file’s location through which you can determine the exact reason behind the error. So, start by looking at the log file using the Run tool. This will help you narrow down the list of potential culprits behind the error.
Follow the steps below to do it:
- Press the Windows + R shortcut keys to open the Run dialog box.
- Then, enter the following command and press the Enter key:
notepad %windir%\system32\Sysprep\panther\setupact.log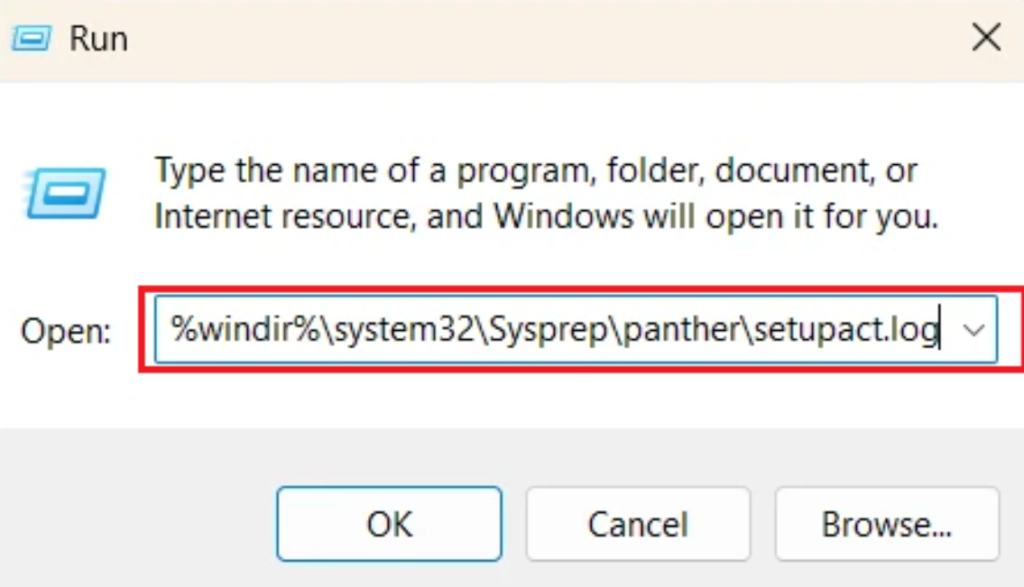
- Review the log file for solutions according to your error.
2. Reinstall Default Windows Apps.
Another reason for the Sysprep was not able to validate error includes deleted or missing default Windows apps. To fix this, consider reinstalling the default apps on your Windows 11 PC.
Windows PowerShell lets you reinstall default Windows apps through Get-AppxPackage. Here’s how:
- First, right-click on the Start menu icon.
- Then, select Terminal (Admin) from the list of options.
- The Windows Terminal will open PowerShell automatically. Once the window opens, paste the following command and press the Enter key.
Get-AppxPackage -AllUsers| Foreach {Add-AppxPackage -DisableDevelopmentMode -Register “$($_.InstallLocation)\AppXManifest.xml”}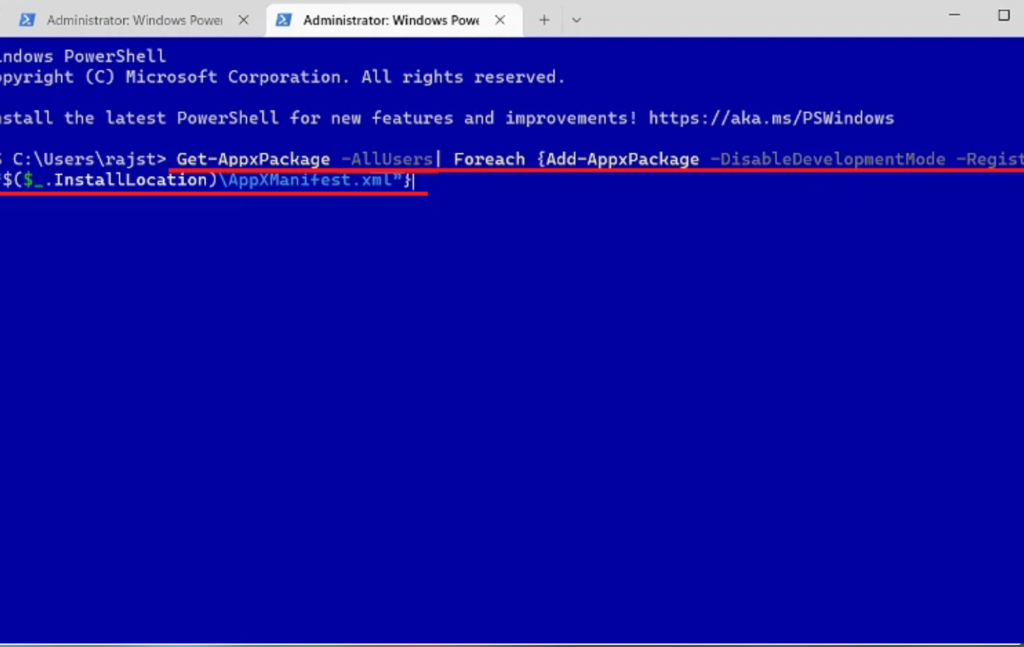
- Wait for a few moments for the packages to be reinstalled. Then, restart your computer to see if it fixed the issue.
3. Remove Upgrade Registry Key.
Microsoft doesn’t allow you to run Sysprep on an updated Windows System. So, if you’ve recently upgraded the Windows system, you may be encountering the error.
To resolve the issue, you’ll have to remove the Upgrade registry key from Windows Registry. So, follow the steps below to do it:
- Start by pressing Windows + R shortcut keys on your keyboard to launch the Run dialog box.
- Type regedit in the command box and click on the OK button.
- If a User Account Control prompt appears, click on Yes to continue.
- Once the Registry Editor window opens, navigate to the following path:
Computer\HKEY_LOCAL_MACHINE\SYSTEM\Setup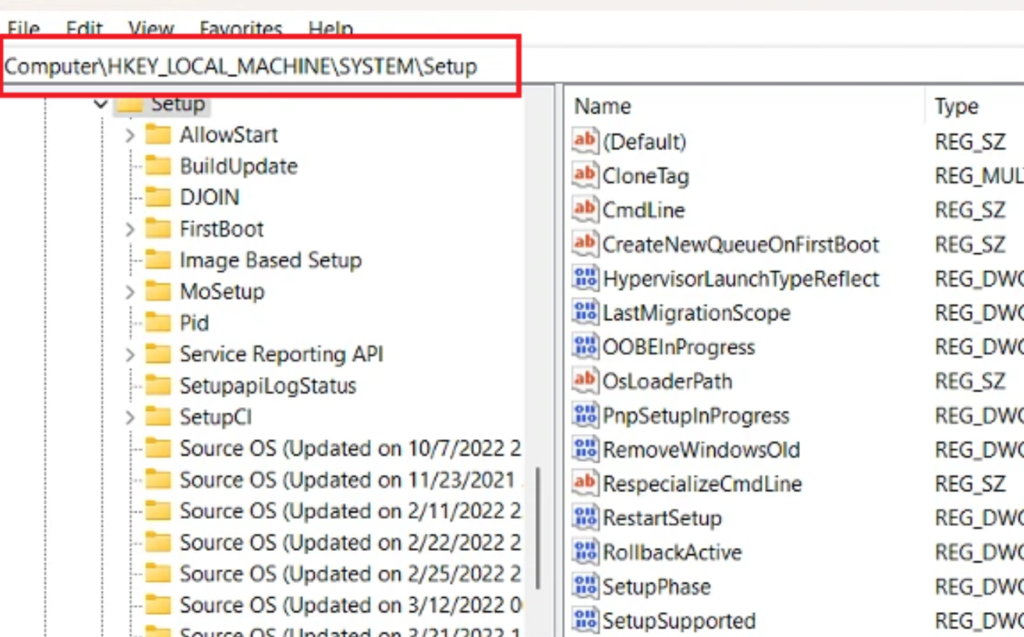
- Now, look for the DWORD named Update in the right pane and right-click on it.
- Select the Delete option.
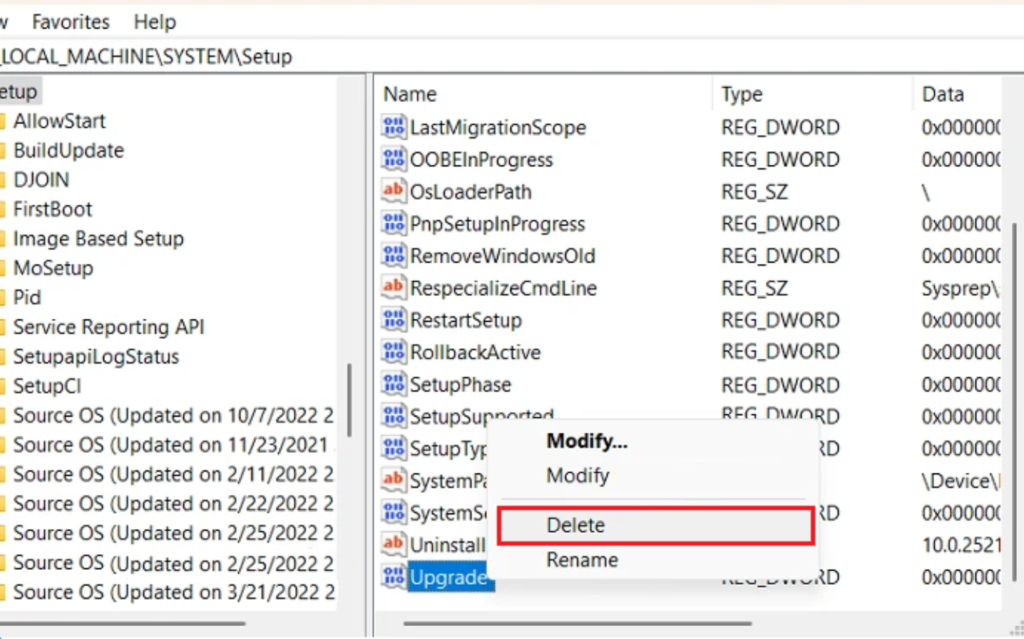
- A prompt box will appear. Click on Yes to confirm the action.
- After that, go to the following path:
HKEY_LOCAL_MACHINE\SYSTEM\Setup\Status\SysprepStatus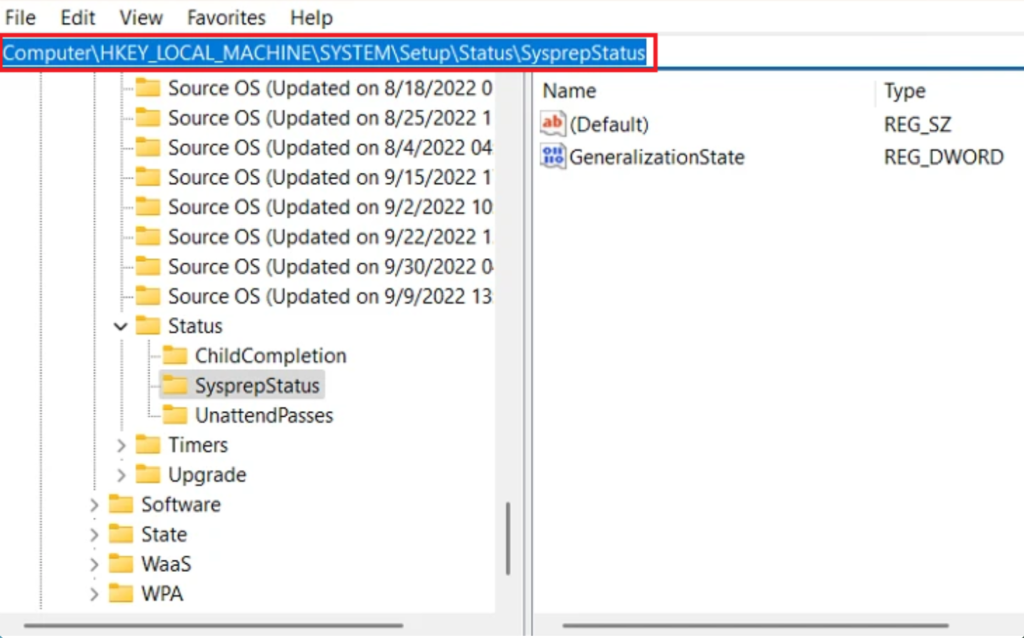
- On the right pane, locate the DWORD called CleanUpState. If there is no such value, create a new one by right-clicking on the empty space and selecting the New option.
- Then, click on DWORD (32-bit) Value.
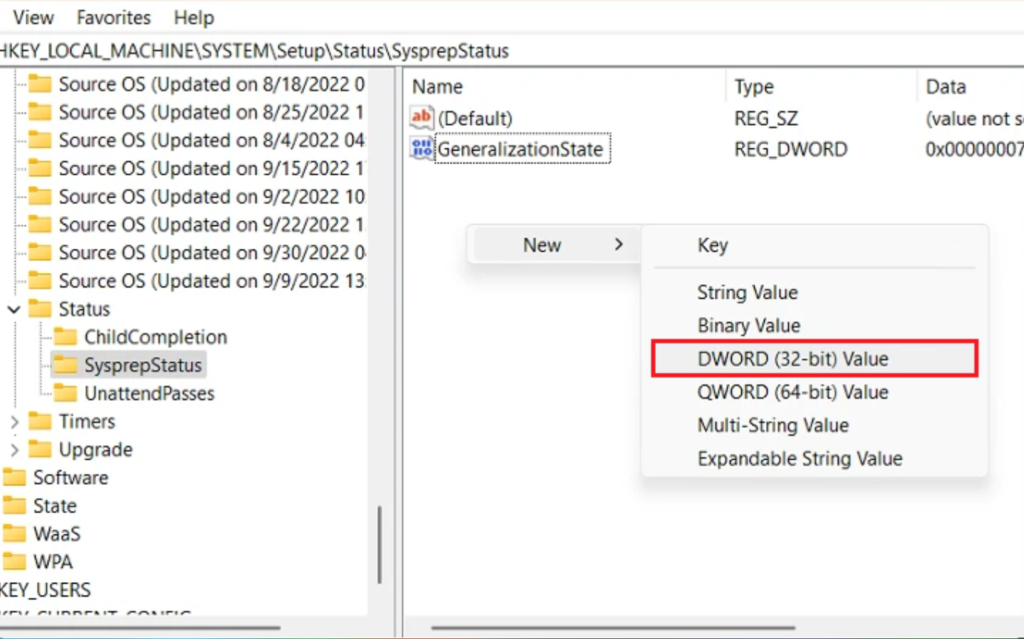
- Rename the key to CleanUpState.
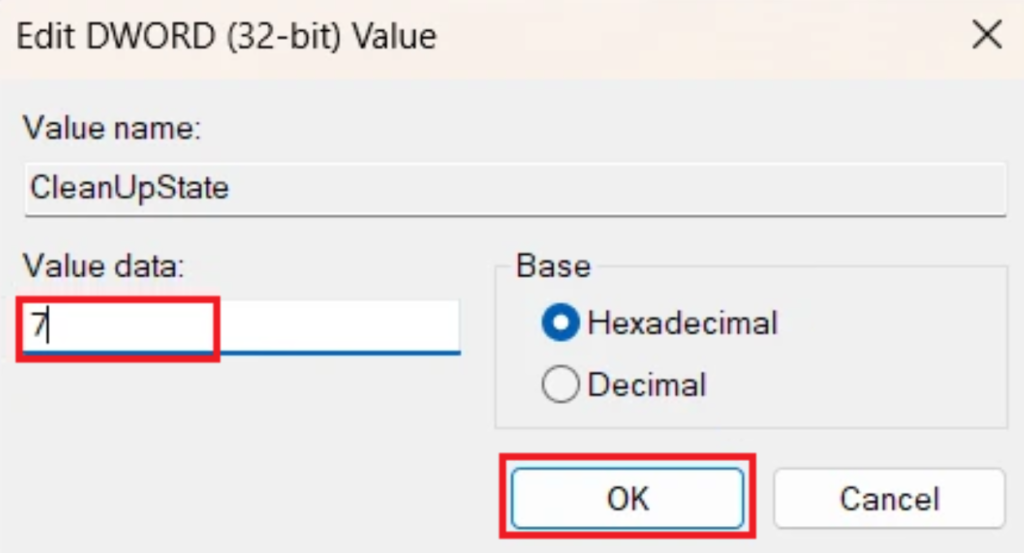
- Next, double-click on it to edit its value and type 7 under value data.
- Then, click on the OK button.
- Afterward, close the Registry Editor Window and restart your PC. Check if the problem is fixed.
4. Uninstall UWP Apps and Packages.
The UWP or Universal Windows Platform applications and packages are meant to be used on all Windows devices, including PCs, Xbox, tablets, etc. However, incorrect installation of such programs can become the reason behind various issues like Sysprep was not able to validate error.
Uninstalling them will hopefully resolve the matter. Here’s how to do it:
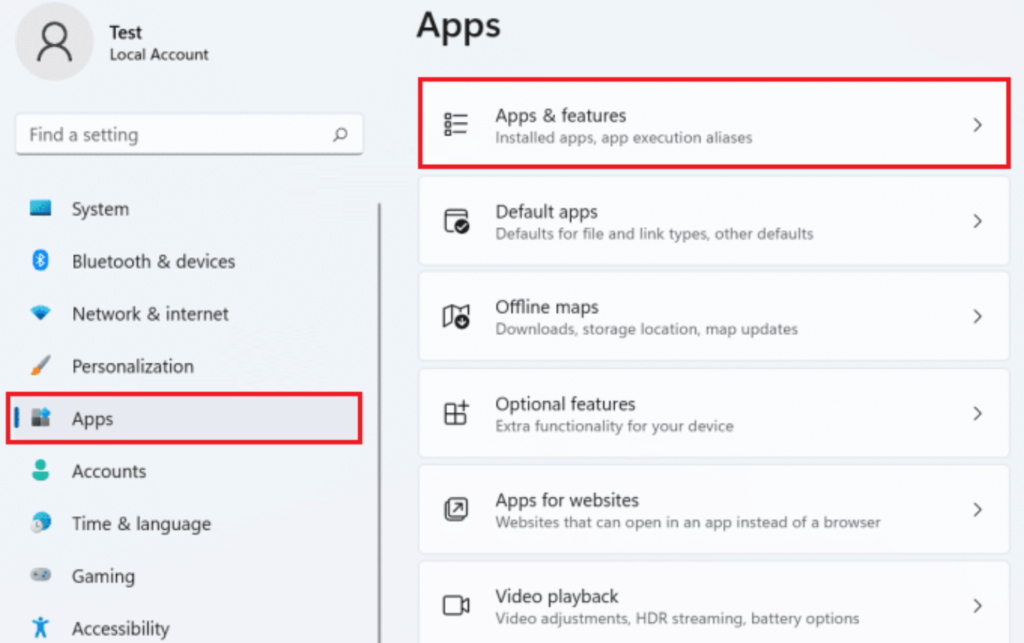
- Press the Windows + i shortcut keys from the keyboard to launch the Settings app.
- Go to Apps from the left pane.
- From there, click on Apps & features on the right side of the screen.
- A list of apps will appear. Find the UWP app that you downloaded from MS Store and click on the three dots icon next to it.
- Choose Uninstall from the menu.
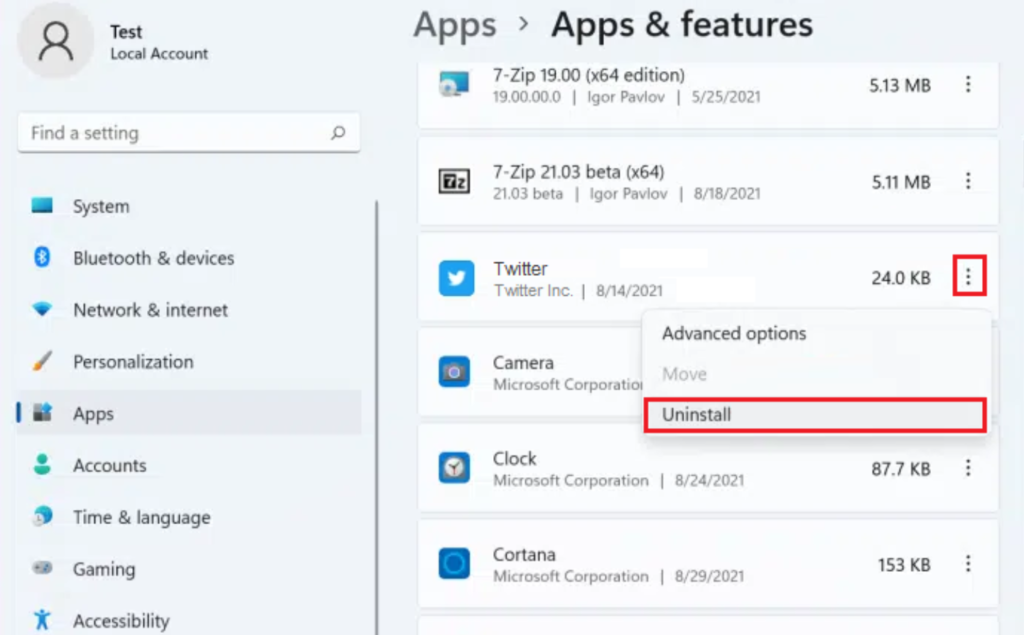
- Click on the Uninstall button to confirm the action.
- In order to delete multiple apps at once, use third-party apps. Restart your PC to see if it fixed the problem.
5. Turn Off BitLocker.
An encrypted system will not allow you to use Sysprep. This means that you won’t be able to run Sysprep if the data protection feature, i.e., BitLocker is enabled. Even if you try, the error message will mention BitLocker and suggest you disable it to fix the issue.
Here’s how to do it:
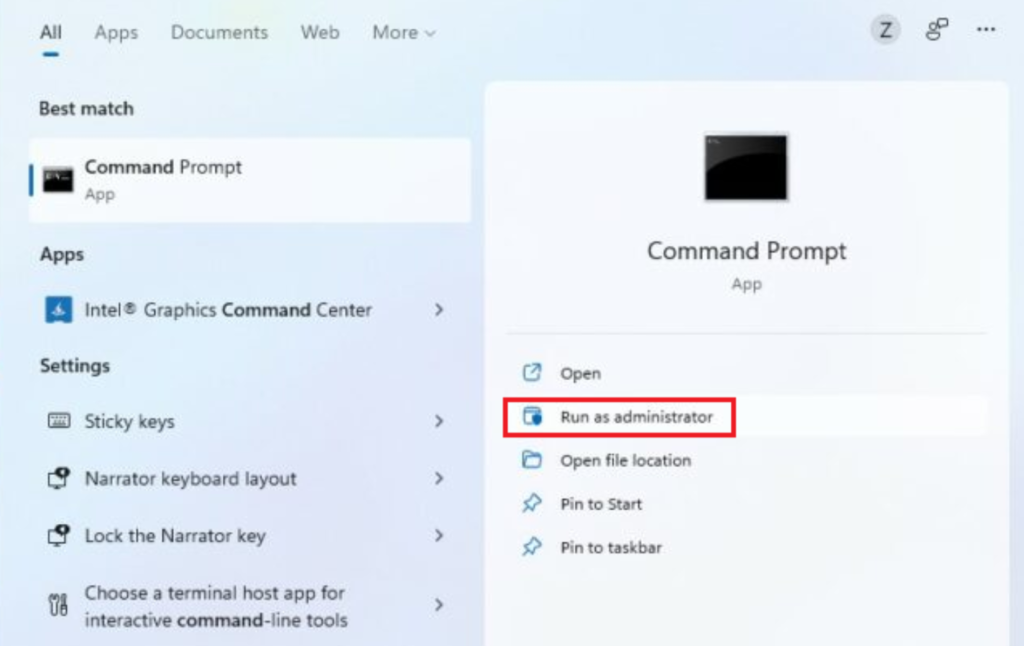
- First, click on the Search icon and type out cmd in the search box.
- Next, right-click on Command Prompt and select Run as administrator.
- Enter the following command and press the Enter key.
manage-bde -status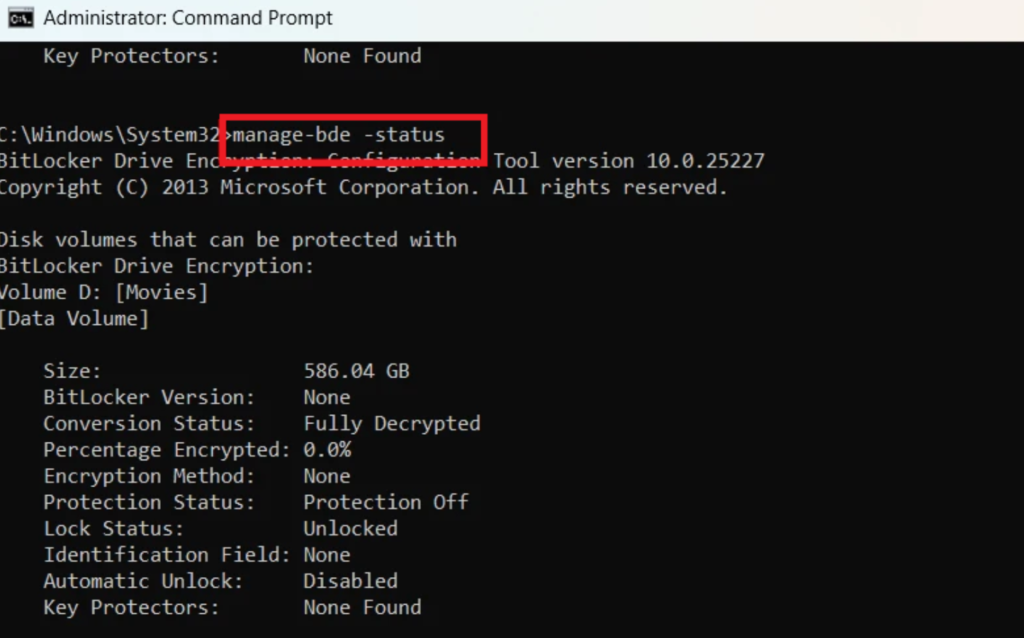
- From the results, find the particular volume in which BitLocker is active (generally the C: drive)
- Paste the following command below, and press the Enter key.
Disable-Bitlocker –MountPoint 'C'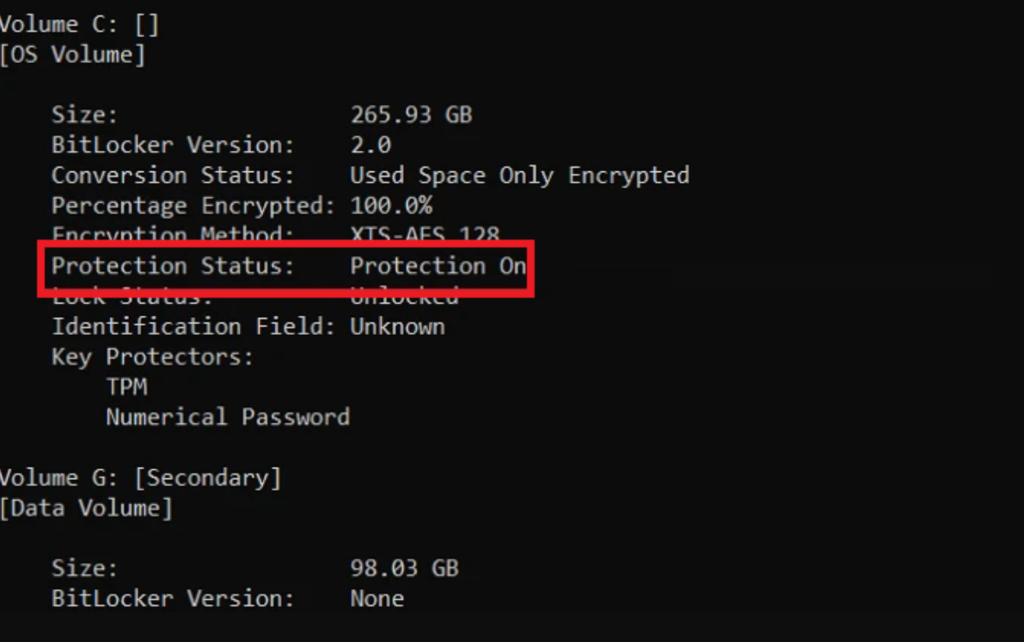
Change the letter C according to the drive location where BitLocker is active. This will turn BitLocker off. Check to see if the problem persists.
6. Disable TPM and PTT.
At times, your system might be detecting BitLocker even when it’s not turned on. The reason behind it is enabled TPM that causes the BitLocker to go into sleep mode or waiting state.
You can fix the error by either turning the BitLocker on and off or disable TPM. To do the latter, follow the steps below:
- Enter the BIOS or UEFI mode on your computer.
- As the BIOS menu differs for each manufacturer, look for TPM under the Advanced, Security, or Trusted Computing tab.
- From there, disable TPM.
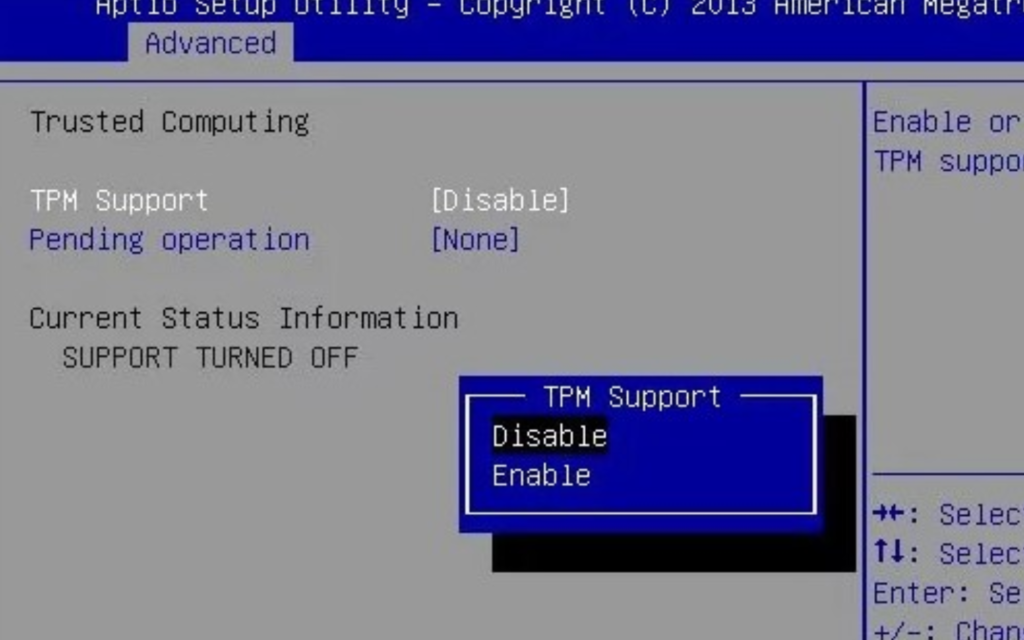
- For some systems, you may also need to disable PTT.
7. Run SFC Scan.
Running an SFC scan is a quick fix to various common Windows 11 issues. So, if you can’t eliminate the Sysprep was not able to validate error, run the SFC scan to detect and resolve the problem.
Follow the steps below:
- Start by clicking on the Search icon from the Taskbar.
- Type cmd in the search box.
- Then, right-click on Command Prompt and select the option that reads Run as administrator.
- Paste the following command below and press the Enter key.
sfc /scannow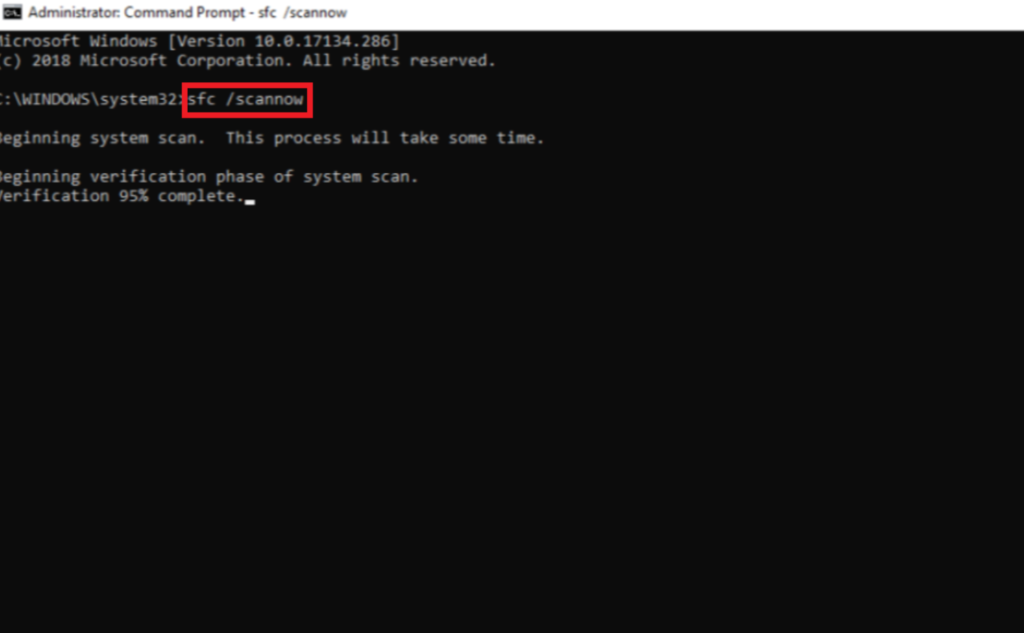
- This will run the SFC scan. Once done, restart your computer.
This concludes our guide on how to fix Sysprep was not able to validate error on Windows 11. If you have any confusion or query, use the comments section below. We’ll get to you as soon as possible.
If this guide helped you, please share it. 😊
