

Don’t know what to do when facing the Tab key not working on Windows 11 issue?
Let’s face it, keyboard shortcuts have been the best tool for a faster and more efficient way of working and managing tasks. The most useful key has proven to be the Alt key. Furthermore, combination with other keys helps navigate Windows, altering any document, switching between tabs, and whatnot.
And you may not realize the dependency on this key until it stops working, an issue that has lately worried many users. Its main reasons include incompatible drivers, interference of programs, hardware issues, etc. Luckily you’ve landed on just the right page. Below we’ve covered all the possible fixes for this issue.
So let’s jump to ‘em right away!
1. Check the Hardware.
Before we begin with some serious fixes, we suggest you take a look at the Tab key and check for any sign of physical or water damage. Also, make sure that no particles or gunk are stuck under the key cap.
Additionally, press the Tab key several times to make sure there isn’t any unusual resistance, or it doesn’t make a crackling sound. If so, you might need to get the key replaced to fix the issue.
2. Connect to an External Keyboard.
To ensure the issue isn’t hardware-based, connect an external keyboard to your Windows 11 PC. If the Tab key works perfectly fine, it indicates that you need to get your default keyboard fixed. You can use this external keyboard until that is done.
3. Disconnect All Peripherals.
Often, the connected peripherals may interfere with other internal components, leading to all sorts of issues. For this reason, removing all the peripherals and checking if that resolves the issue is recommended.
4. Try Keyboard Combinations.
It’s also possible that you may have accidentally pressed some keyboard combinations and disabled the Tab key. Following the same method, you can enable the Tab key as well.
Since the associated keyboard combination varies from keyboard to keyboard and system to system, we’ve listed some general combinations below:
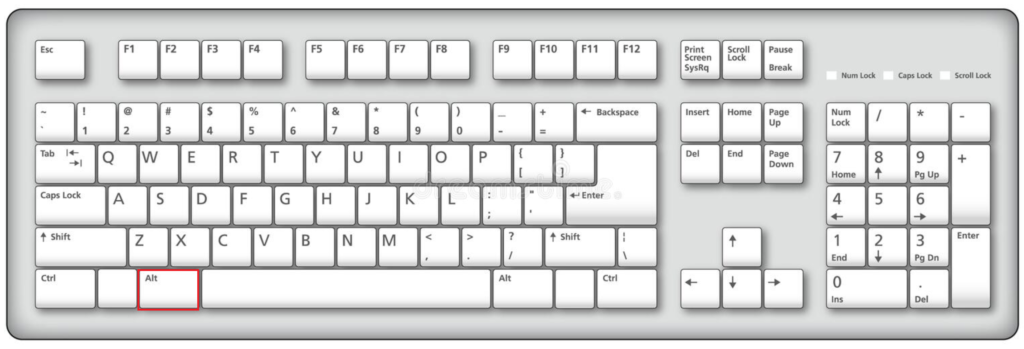
- Press the Alt key two times.
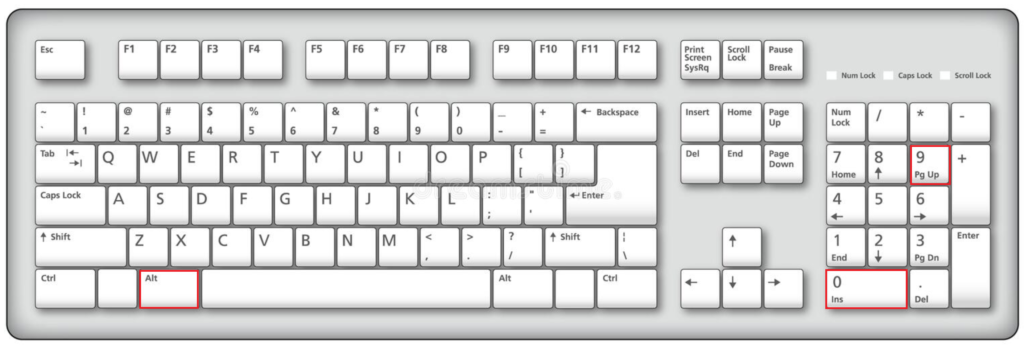
- Press and hold down the Alt key, then press the 0, 0, 9 keys.
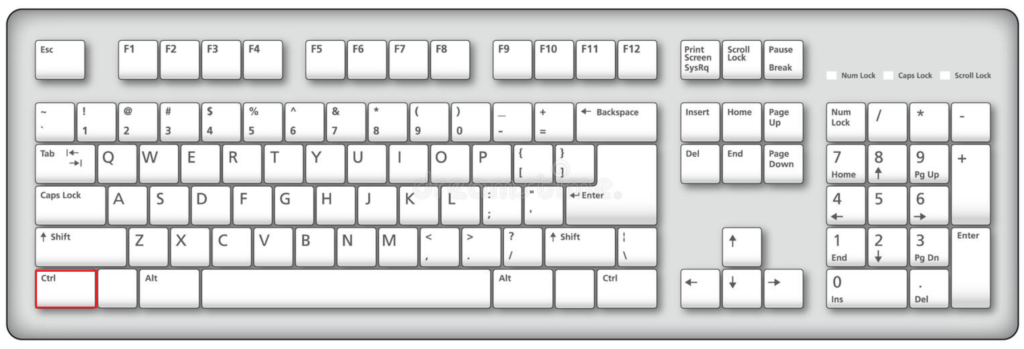
- Press the Ctrl key two times.
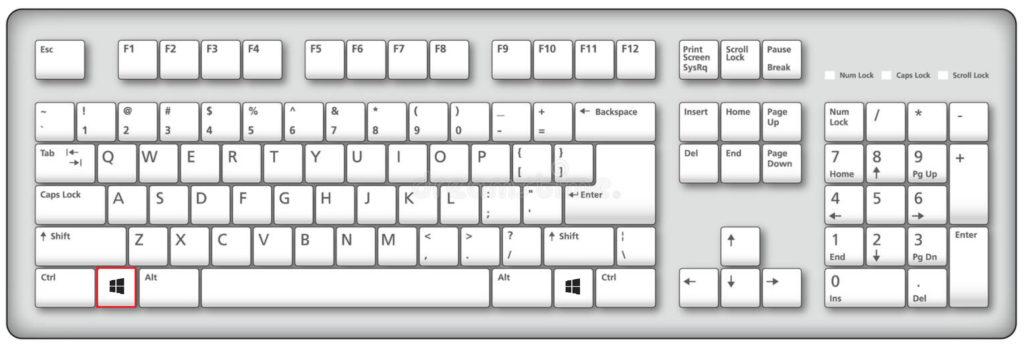
- Press the Windows icon key twice.
If these combinations don’t work, try further methods.
5. Run the Keyboard Troubleshooter.
Windows 11 comes with various pre-installed troubleshooters, including one for the keyboard. Running this built-in tool will allow your system to automatically diagnose and repair any possible configuration issues within.
Here’s how to run this utility:
- Press the Windows key + i shortcut keys to launch Settings.
- Then, go to System from the tabs on the left pane.
- From the left pane, click on the Troubleshoot option.
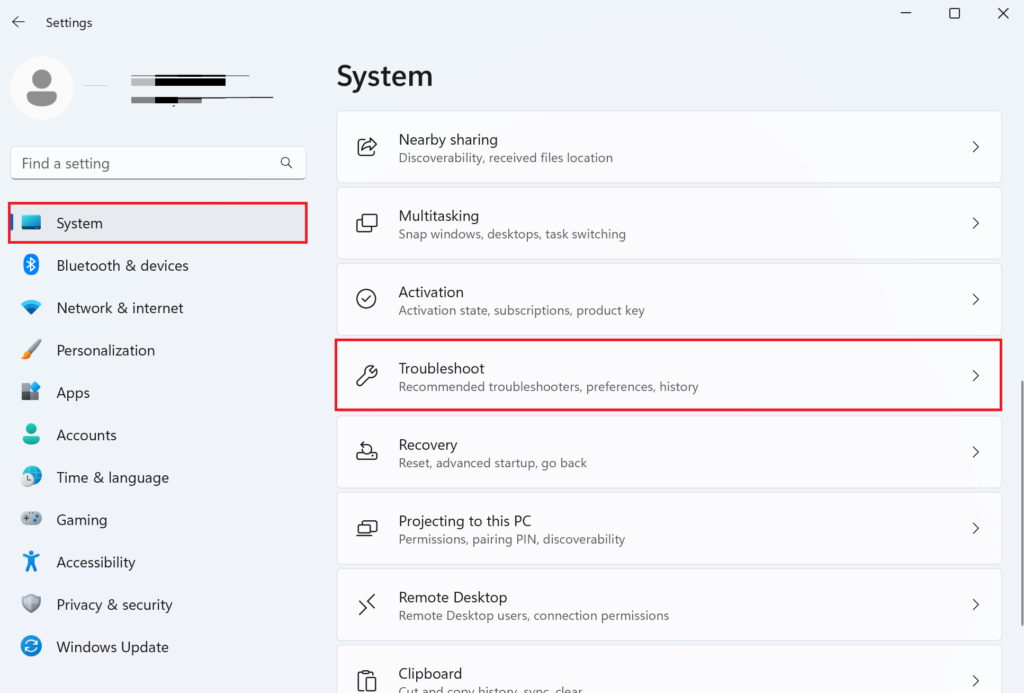
- Then, from the right section of the screen, go to Other troubleshooters.
- From there, click on Keyboard.
- After that, click on the Run button.
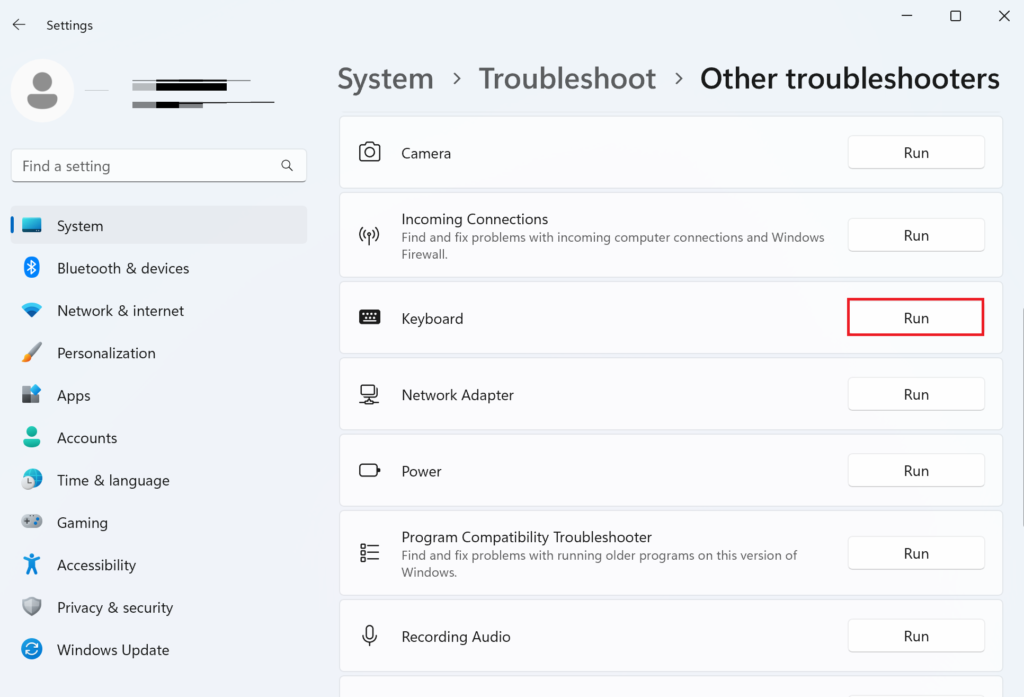
Once the process is finished, try using your keyboard to see if the Tab key is working.
6. Turn Off Sticky Keys.
While Sticky keys is a great Microsoft feature that allows users to refrain from repetitive strain injury, it may interfere with the functionality of some other keys. Therefore, we recommend disabling the Sticky keys and checking whether the Tab key works. This method has resolved the issue for most people, and we hope it does the same for you.
Here’s what you need to do:
- First, press the Windows key + i to open Settings.
- Then, click on Accessibility from the left pane.
- After that, click on Keyboard.

- Look for Sticky keys and switch off the toggle to disable the option.
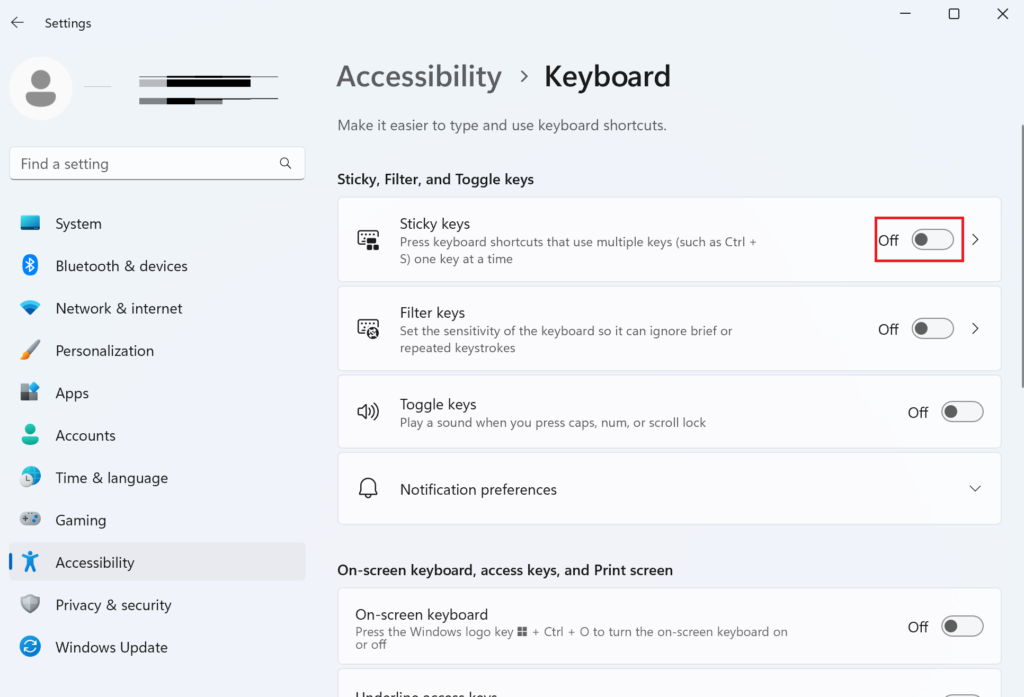
Now check if the Tab key is working or not.
7. Repair Keyboard Drivers.
Outdated or damaged keyboard drivers are another reason why you may encounter the Tab key not working on Windows 11. In that case, you may either reinstall the dedicated driver or allow your system to update it to resolve the problem.
Here’s how:
- Click on the Search icon from the taskbar.
- Then, type Device Manager in the search bar.
- Click on Open on the right pane.
- Then, locate Keyboards and click on the drop-down arrow to expand it.
- Right-click on your keyboard device and select Uninstall to reinstall the driver.
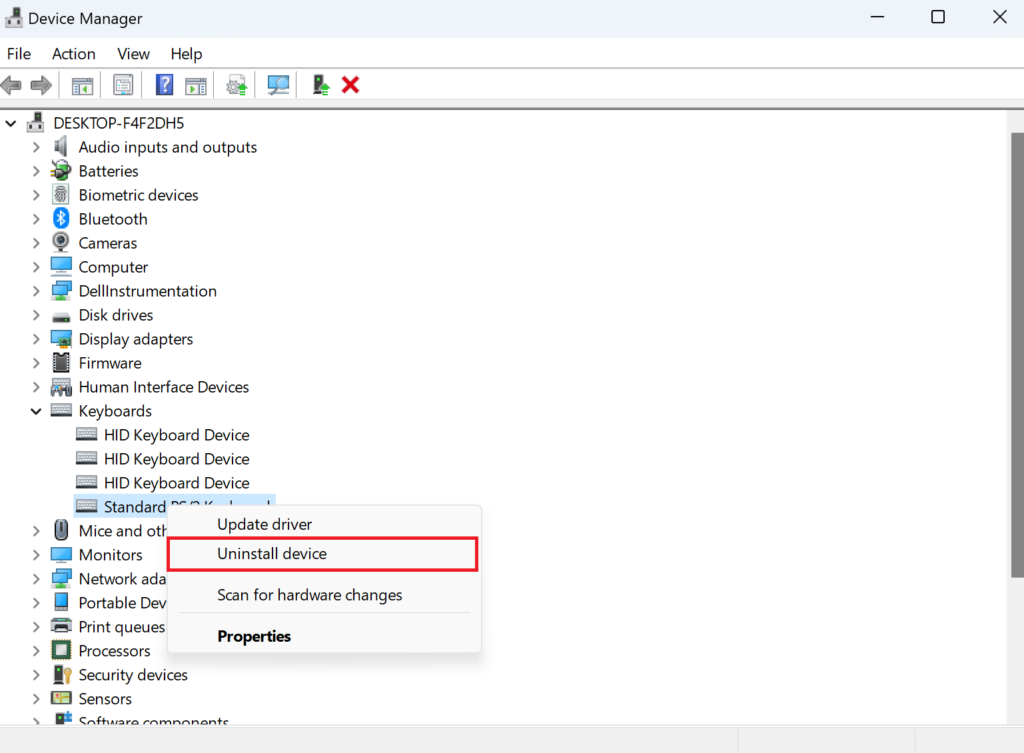
- Once you restart your PC, the driver will automatically reinstall.
- Similarly, you can also update your driver by selecting Update once you right-click on it.
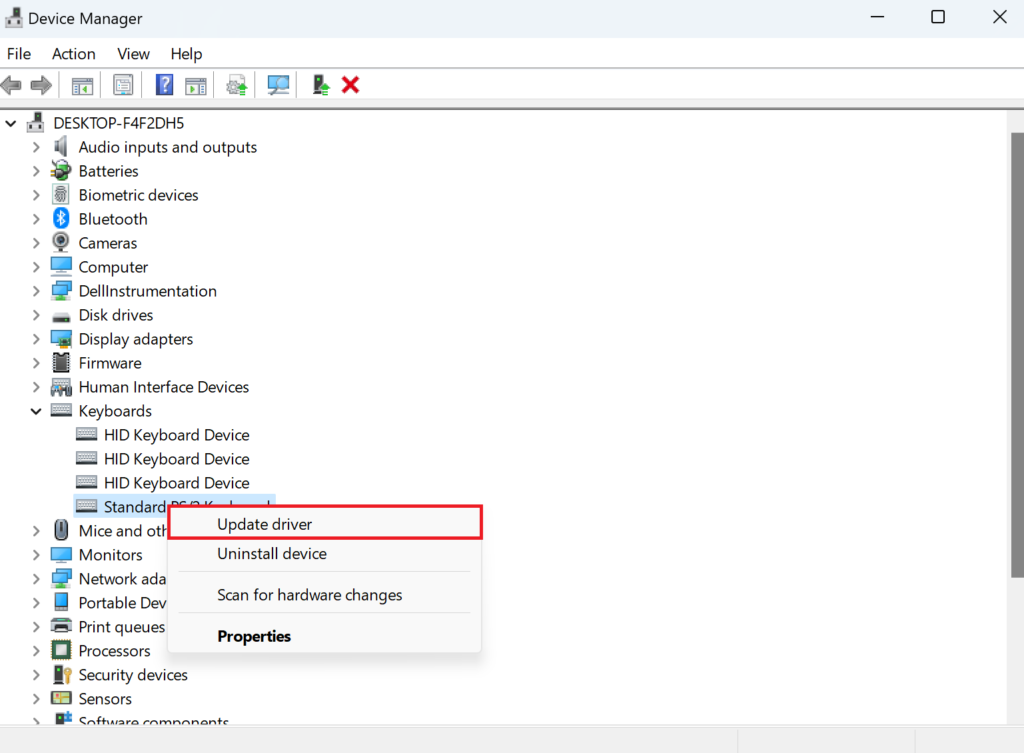
- Then, click on Search automatically for drivers.
After the drivers have been updated, check if the issue is resolved.
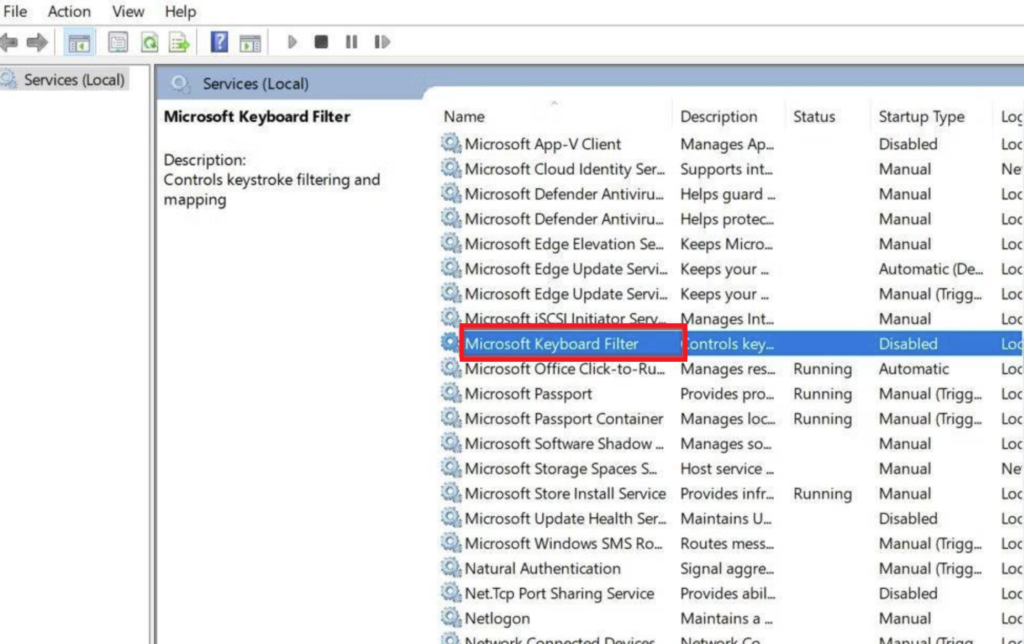
8. Restart Keyboard and Tablet Input Service.
If the problem occurs to other keys along with the Tab key, the problem could lie in the Keyboard service. It may malfunction for various reasons, including a bug or a glitch. Simply restarting the service has seemingly resolved the culprit.
Follow the steps below to do it:
- Go to the Start icon from the taskbar.
- Then, type Services in the search bar.
- Next, click on Open from the right pane to open the application.
- Then, look for Microsoft Keyboard Filter and double-click on it.
- A new window will appear on your screen. For the Startup type, select Automatic from the dropdown menu.
- Then, click on the Apply option.
- Click on OK to confirm the action.
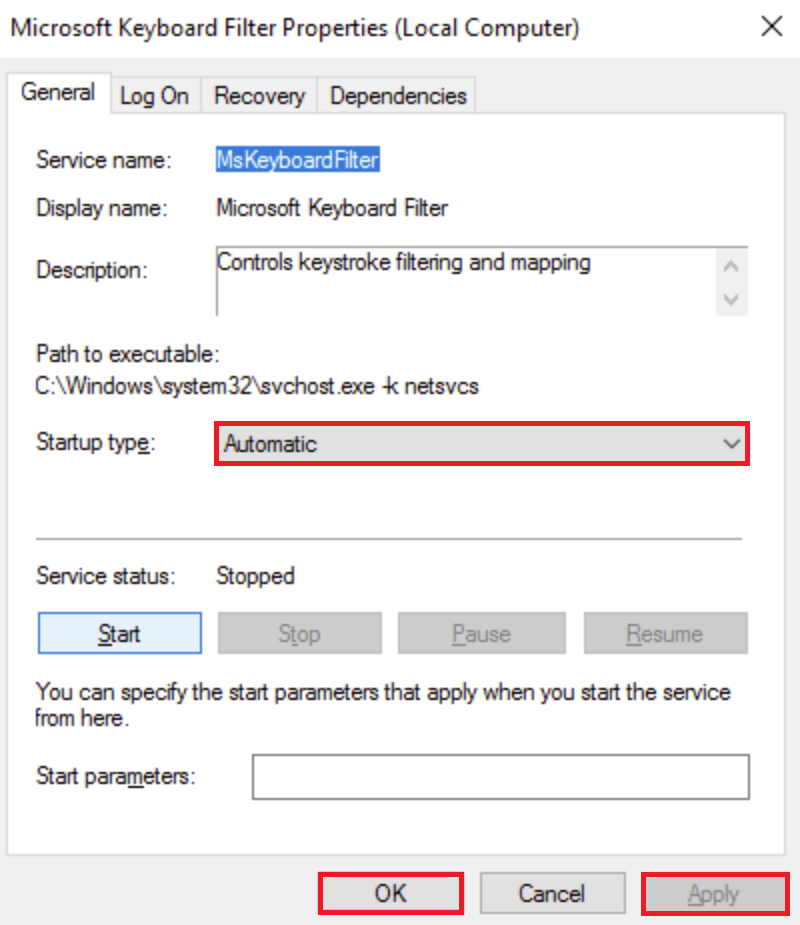
Check to confirm if this solves the Tab Key not working issue. If not, continue to the next solution.
9. Perform SFC and DISM Scans.
There’s also a high possibility that the Tab key not working on Windows 11 issue is due to corrupted Windows files and images. This could occur due to an incomplete Windows update or improper installation of a third-party program.
Fortunately, you can utilize the in-built command-line tools to fix the problem. Here’s how:
- Press the Windows + S shortcut keys to open the Search menu.
- Then, type cmd in the search bar.
- From the left pane, right-click on the app and click on Run as administrator.
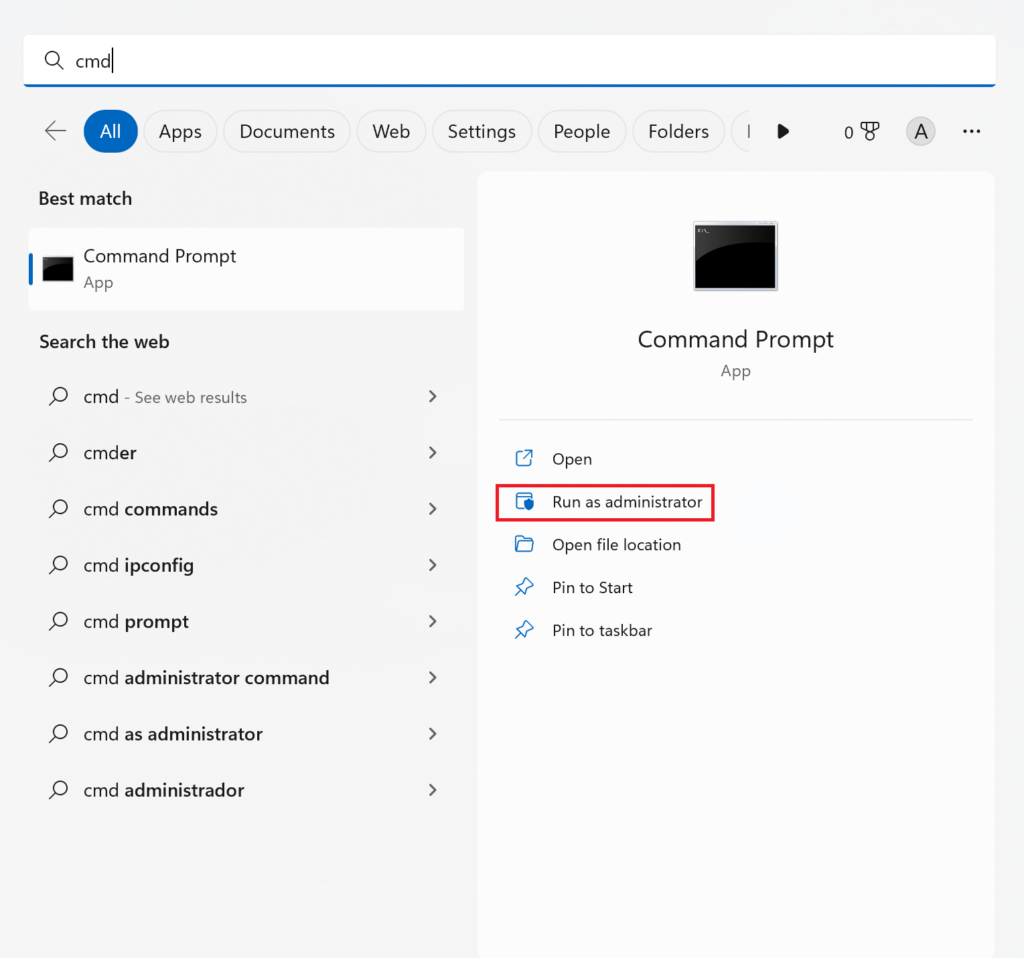
- If a User Account Control (UAC) prompt pops up, click on the Yes option.
- Next, copy and paste the following command and press the Enter key to run DISM:
Dism /Online /Cleanup-Image /RestoreHealth- After that, run the following command for the SFC scan:
sfc /scannow- Once done, restart your computer and ensure the issue is fixed.
10. Shut Down TeamViewer.
For many users, the Tab key stopped working when they launched the TeamViewer, a remote desktop application. If the same happens in your case, closing the application might do the magic.
However, if it doesn’t, use the steps below to force-close TeamViewer on your computer:
- Go to the Search icon from your taskbar.
- Search for Task Manager.
- Then, click on Open to launch the application.
- Then, select TeamViewer and click on End Task.
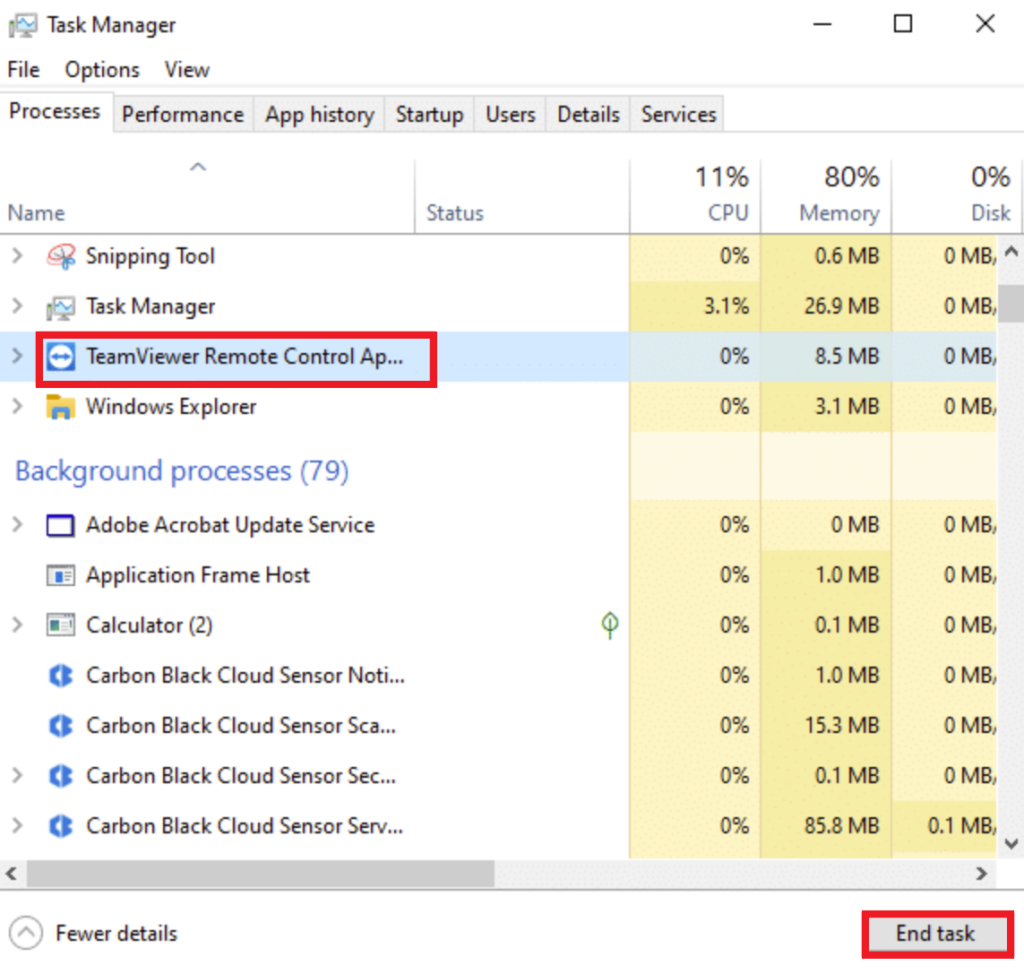
This will force-quit TeamViewer on your PC. Now, check to see if the Tab Key starts to work or not.
11. Use System Restore.
In case you misconfigured system settings or installed third-party software after which the issue occurred. You can restore your system to the point before you make the changes. However, you must already enabled your system to create restore points to revert the changes.
This brings our guide on how to fix the Tab key not working on Windows 11 to an end. Hopefully, you’ve resolved the issue with any of the listed methods. For more queries, head over to the comment section below.
If this guide helped you, please share it.
