

Wondering how to fix the Windows Update error 0x80240023 on your PC?
Installing the latest Windows updates might seem like a tedious task, but it is essential to increase your PC’s overall performance. Updates are packed with improved features that help enhance applications’ stability and security, but unfortunately, there are times when the users fail to update Windows.
This can happen due to a lot of reasons, including corruption errors within the operating system.
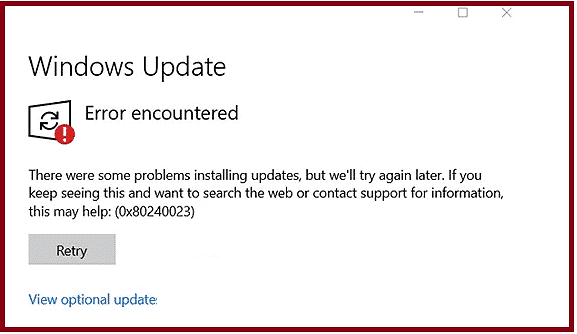
If you are attempting to install Windows or update Windows to the latest build, but your screen displays the Windows Update error 0x80240023, you are in the right place.
This guide will walk you through the process of fixing the Windows Update error 0x80240023 in a few simple steps.
Let’s get started.
- 1. Restart Windows Update Service.
- 2. Troubleshoot Windows Updates.
- 3. Download the Validation Tool.
- 4. Adjust the Date, Time, and Time Zone.
- 5. Install Updates Manually.
- 6. Try Using CleanMyPC.
- 7. Reset and Rebuild Windows Update Cache.
1. Restart Windows Update Service.
If the Windows Update service doesn’t appear to be making any progress while installing updates and your screen displays the 0x80240023 error, try restarting Windows Update services.
It is common for temporary bugs within the Windows Update service to prevent updates from installing. Since these bugs are temporary, restarting the Windows Update service will help you eliminate them in no time.
Here is what you need to do:
- Type ‘services.msc’ in the search bar and hit Enter.
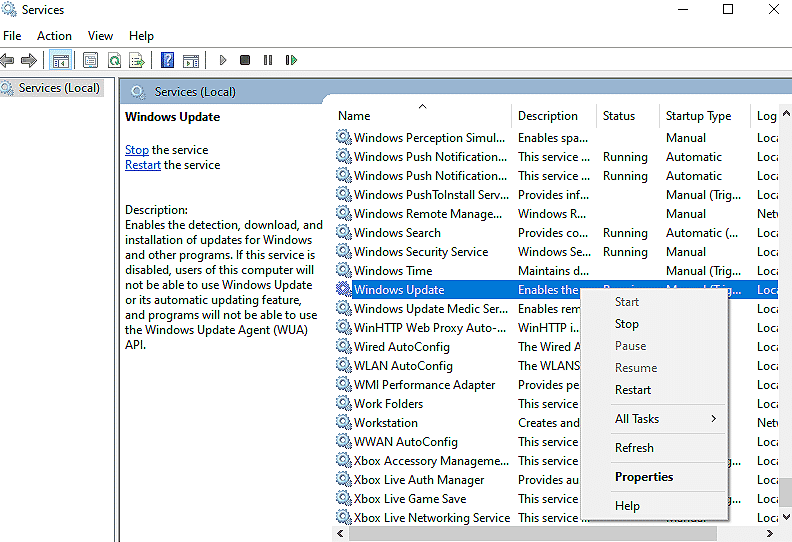
- Locate Windows Update from the list of services available on your screen.
- Right-click on Windows Update and select Stop to stop the service.
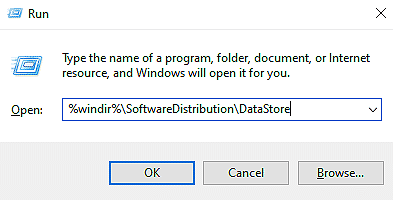
- Once you have stopped the Windows Update service, you need to delete the Windows Update cache folder. To do so, open a Run dialogue box by pressing Windows + R keys simultaneously.
- Copy the command mentioned below and paste it in the text field of the Run dialogue box.
%windir%\SoftwareDistribution\DataStore
- Delete all the files and folders available on your screen.
- Once done, follow the first three steps again to Start the Windows Update services and check if the error is resolved.
You should be able to install pending Windows updates without any error now.
2. Troubleshoot Windows Updates.
Windows comes with various troubleshooters designed to identify and fix the problems with minimum user input. Troubleshooters cannot fix everything, but they are a great place to start by encountering errors such as the Windows Update error 0x80240023.
Here is how you can run the Windows Update troubleshooter to fix the 0x80240023 error on your PC:
- Go to the Settings and click on Update & Security.
- Select Troubleshoot from the left panel and click on Windows Update.
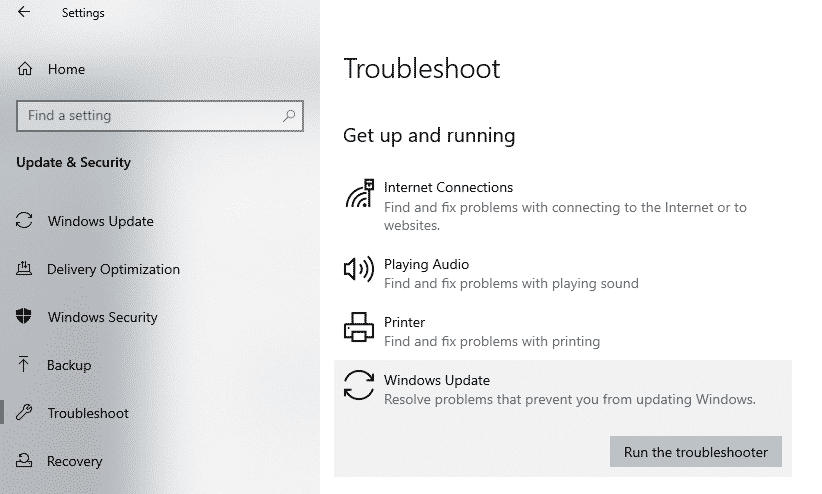
- Now click on Run the troubleshooter to start scanning.
- If the troubleshooter detects any issues, it will recommend fixes. In this case, follow the on-screen instructions to complete the troubleshooting process.
- Once done, reboot your PC and check if the error is resolved.
If a bug in the system was causing the Windows Update error 0x80240023 on your PC, running the troubleshooter will fix it. If the error persists, proceed to the next method below.
3. Download the Validation Tool.
If you have the Microsoft Office 2007 installation on your PC and you chose ‘File Validation’ while installing the Microsoft Office 2007 build, then that is causing the 0x80240023 error.
Choosing the ‘File Validation’ option means that you will have to download the ‘Validation Tool’ before attempting to update Office 2007. If you do not have the Validation Tool, your screen will display the 0x80240023 error upon updating Office 2007.
Here is how you can download the Validation Tool:
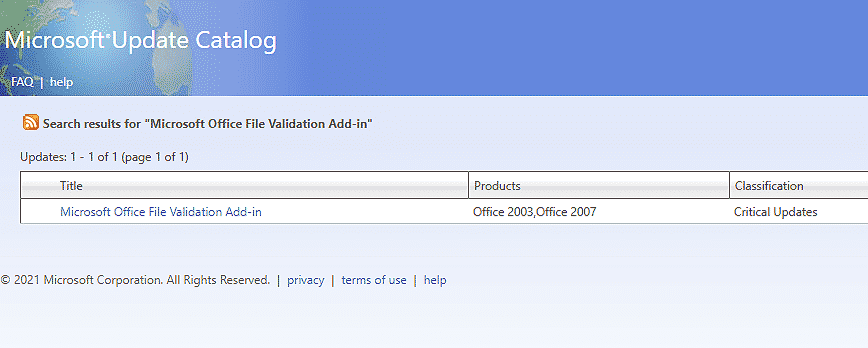
- Go to the Microsoft Update Catalog and type Microsoft Office File Validation Add-in in the search bar.
- Now download the Microsoft Office File Validation Add-in and extract the file on your PC.
- Once the file is extracted, open it and run the OFV file.
- Once the installation is complete, try re-running Windows Update and check if doing so resolved the error.
If the absence of the Validation File was causing the error, downloading the file will resolve it. You should now be able to install updates without any issues.
4. Adjust the Date, Time, and Time Zone.
Accurate time, date, and time zone on your PC are essential as it helps several programs function properly. These programs check if the system for certificates before performing specific actions, and if the time or date is incorrect, the certificates are rejected.
For instance, if the Microsoft Office certificate on your PC was created on 20th February 2021 while the date on your PC right now is set as 20th January 2021, the certificate will be considered invalid. As a result, services like the Windows Update service will reject the certificate and fail to execute operations.
To prevent situations like the one mentioned above, adjust the date, time, and time zone on your PC. Hopefully, it will help you fix the 0x80240023 error.
5. Install Updates Manually.
Another easy yet effective solution to fix Windows Update error 0x80240023 is to install the updates manually. Sometimes, the 0x80240023 error happens when the system is installing all the pending updates automatically.
Installing the updates manually will take some time, but since it has worked for several users, we encourage you to give it a shot.
Here is how you can install the pending updates manually:
- Go to the Settings and select Updates & Security.
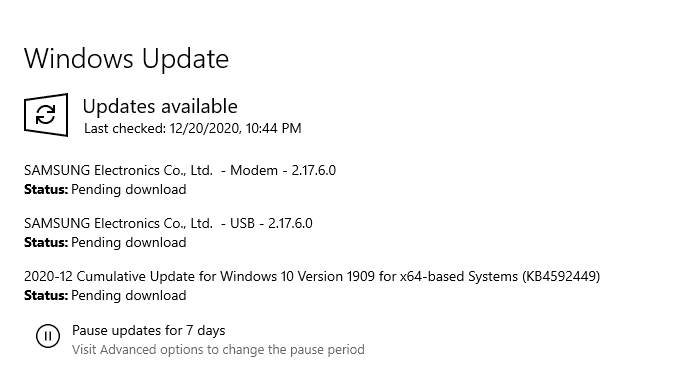
- Check for the pending updates and attempt to install each one by one.
- Once all the updates are installed, reboot your PC.
Hopefully, installing each update manually will prevent the 0x80240023 error from popping up again.
6. Try Using CleanMyPC.
Too many startup items and bloated cached files can gradually decrease the overall performance of your PC and cause errors such as the Windows Update error 0x80240023.
One of the best and quickest ways to get rid of these unwanted, accumulated files that might be causing errors is to download a reliable PC cleaner, and if you are looking for one, CleanMyPC is the best option out there.
CleanMyPC is an easy-to-use yet the most effective cleaning tool that takes care of everything from removing the junk files to organizing the folders and increasing the speed of your PC.
Moreover, it also protects the online privacy of its users to prevent them from scammers, all in a single click.
Sounds like something your PC desperately needs? Install CleanMyPC and improve the performance of your system now!
7. Reset and Rebuild Windows Update Cache.
Deleting the cache data is another easy way of troubleshooting, and it also helps increase your PC’s overall performance.
There are times when the cached files get corrupted and prevent the relevant programs from functioning properly. If you face the 0x80240023 error and none of the troubleshooting steps mentioned above has worked for you, try clearing cached files. Doing so will wipe all the temporary data related to the Windows Update service, including the errors.
Here is how you can reset and rebuild the Windows Update cache:
- Type cmd in the search bar and click on Run as administrator to launch Command Prompt with administrative rights.
- Inside the Command Prompt window, copy and paste the commands mentioned below one by one and hit Enter after each to execute them.
net stop wuauserv
cd %systemroot%\SoftwareDistribution
ren Download Download.old
net start wuauserv
net stop bits
net start bits
net stop cryptsvc
cd %systemroot%\system32
ren catroot2 catroot2old
net start cryptsvc
- Once done, reboot your PC and check if doing so resolved the error.
Resetting the Windows Update cached files should solve the 0x80240023 error once and for all.
This brings us to the end of our guide on fixing the Windows Update error 0x80240023. We walked you through the steps in detail, and we hope that our troubleshooting steps helped resolve the issue. If you have any questions regarding the troubleshooting methods, please let us know in the comment section below.
If this guide helped you, please share it. 
