Can’t figure out why the wrap text feature is not working on Microsoft Excel?
Microsoft Excel is a powerful spreadsheet tool made for students, professionals, and individuals. It has been around since 1985 and is part of the Microsoft Office Suite, a family of client and server software.
While Microsoft Excel is one of the best tools for analyzing, managing, and presenting data, this doesn’t mean that the tool is free from issues.
Like most applications, Microsoft Excel can suffer from errors and downtimes.
If you are reading this, we can assume that the wrap text feature is not working correctly on Microsoft Excel.
Most of the time, this problem is caused by incorrect usage of Excel’s functions and features. On the other hand, it can be due to corrupted data, outdated app versions, or improper configurations.
In this guide, we will show you what to do if the wrap text feature is not working on Microsoft Excel.
Let’s get right into it!
1. Restart Your Computer.
Before tweaking your configurations, we suggest restarting your computer first if you encounter issues with Excel. This should reload your system resources and eliminate temporary issues on the app.
Here’s what you need to do:
- First, press the Windows key on your keyboard to open the Start Menu.
- After that, go to the Power Options tab.
- Lastly, click on Restart.
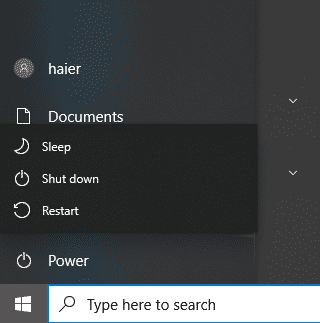
Once done, go back to Microsoft Excel and check if the problem is solved.
2. Apply AutoFit Row Height.
One of the reasons behind the wrap text feature not working is due to the Row Expansion problem.
To fix this, follow the steps below:
- First, add the data you need on the cells.
- After that, select all the rows in your table. Ensure that you are in the Home tab.
- Locate the Format option and choose AutoFit Row Height.
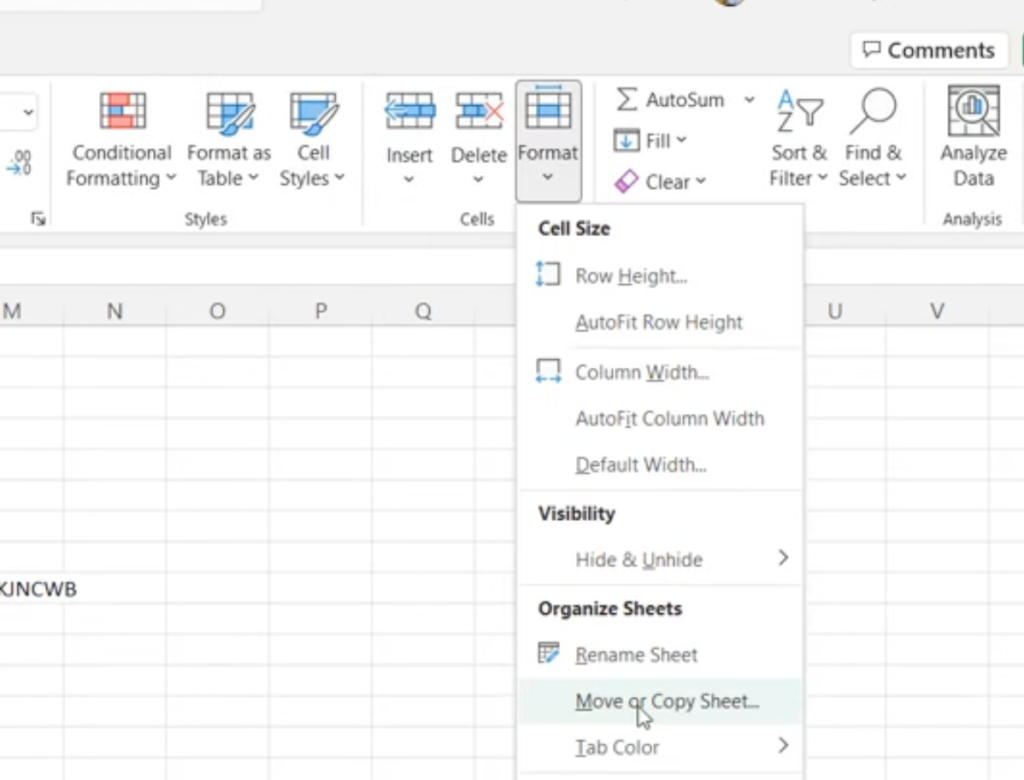
If that did not work, proceed to the next solution.
3. Unmerge Cells.
If you’ve merged cells on your worksheet, you won’t be able to use the Wrap Text feature on Excel since they basically do the same thing. Due to this, you need to unmerge the cells first before using the wrap text option.
Here’s what you need to do:
- On your worksheet, highlight the rows that you’ve merged.
- Next, go to Home > Merge & Center.
- Finally, click on Unmerge Cells.
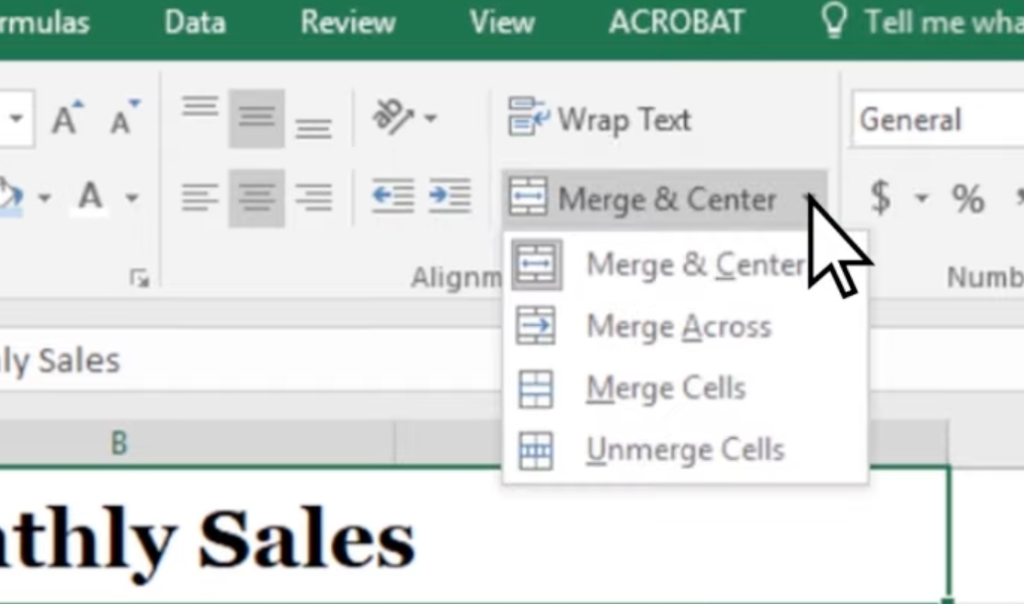
Try using the wrap text feature again to check if the problem is solved.
4. Update Microsoft Excel.
Outdated or faulty versions of Microsoft Excel could also be the reason wrap text is not working on your worksheet. To rule this out, we recommend updating Microsoft Excel to patch bugs and errors.
Follow the guide below to update Excel:
- First, launch Microsoft Excel on your computer.
- After that, click on File > Accounts.
- Lastly, access the Update Options tab and click on Update Now or Enable Updates.
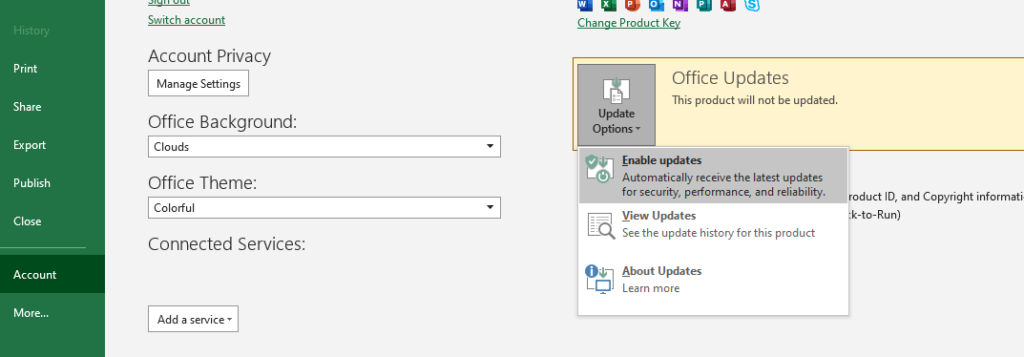
Go back to your worksheet to check if the wrap text option is working.
5. Resize Cells.
The wrap text feature allows users to fit more data in one cell without having to resize it. However, this feature also has a limit and might not work correctly if you are trying to fit a lot of data in one cell.
To fix this, we suggest resizing the cells before using wrap text. You can do this by simply dragging the row indicator on your worksheet.
Try wrapping your text afterward to check if the problem is solved.
6. Repair Your File.
If none of the solutions above worked, we recommend repairing your worksheet or workbook. This should ensure that everything is in order and there are no issues with your Microsoft Excel file.
See the steps below to repair your file:
- Launch Microsoft Excel on your computer.
- Next, click on File and choose Open. Locate the file you want to repair.
- Finally, click on the drop-down arrow beside the Open button and choose Open and Repair.
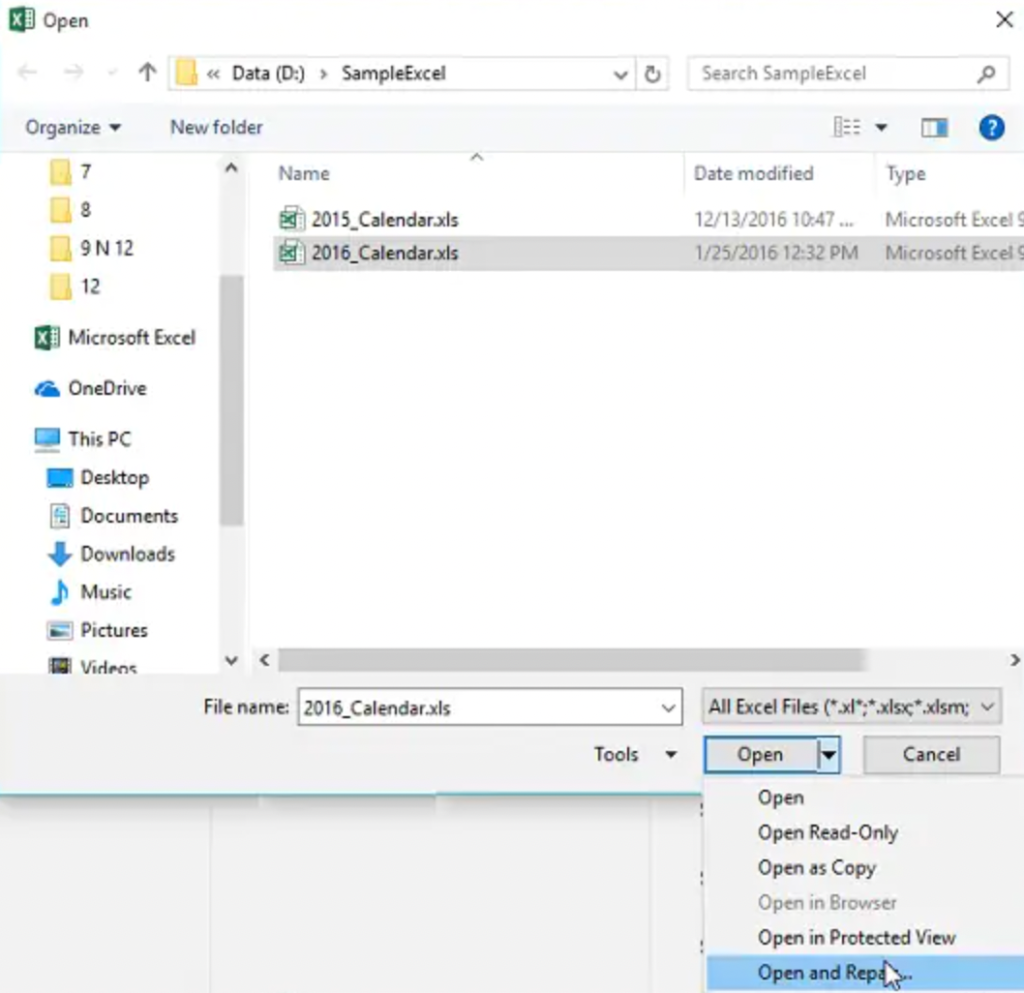
Go back to your workbook to check if the wrap text option works.
That brings us to the end of our guide on how to fix the wrap text feature if it’s not working on Microsoft Excel. If you have questions, please drop a comment below, and we’ll do our best to answer them.
If this guide helped you, please share it. 🙂


