Can’t send photos via AirDrop since it keeps getting declined?
Well, you’re not alone.
This problem has been complained about by iPhone users after updating to iOS 17.
In this guide, I’ll show you the best solutions for fixing AirDrop if it keeps getting declined on your iPhone.
TL;DR Version
If you are struggling to send or receive files via AirDrop, try these solutions:
1. Refresh Wi-Fi & Bluetooth
AirDrop uses Wi-Fi and Bluetooth to send media to other users.
If your file keeps getting declined, try refreshing Wi-Fi and Bluetooth on both receiving and sending devices.
Here’s what you need to do:
- Open the Settings app on your iPhone.
- Tap on Wi-Fi and tap the toggle switch to turn it off.
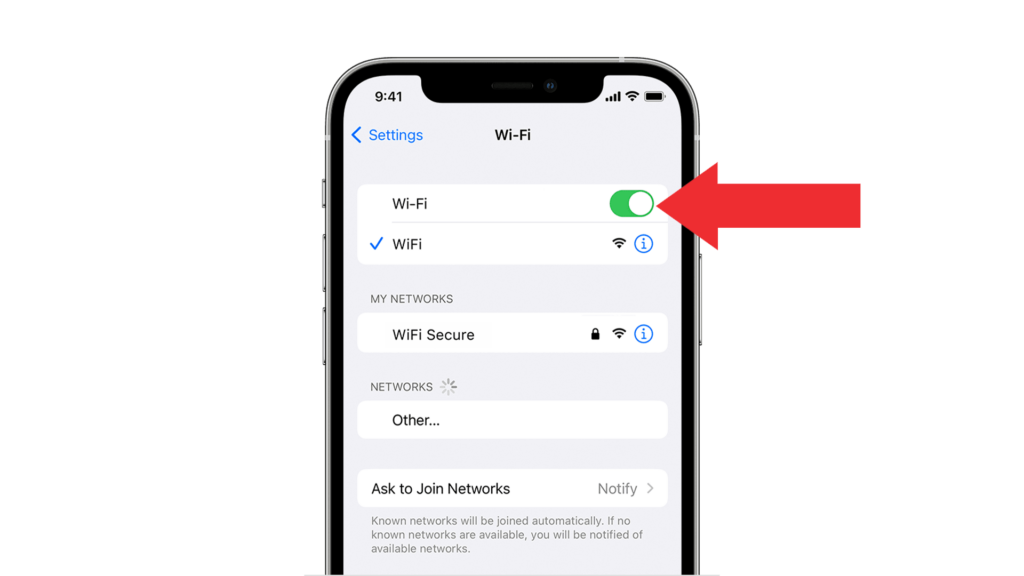
- Go back to the previous page.
- Tap on Bluetooth and turn off the feature.
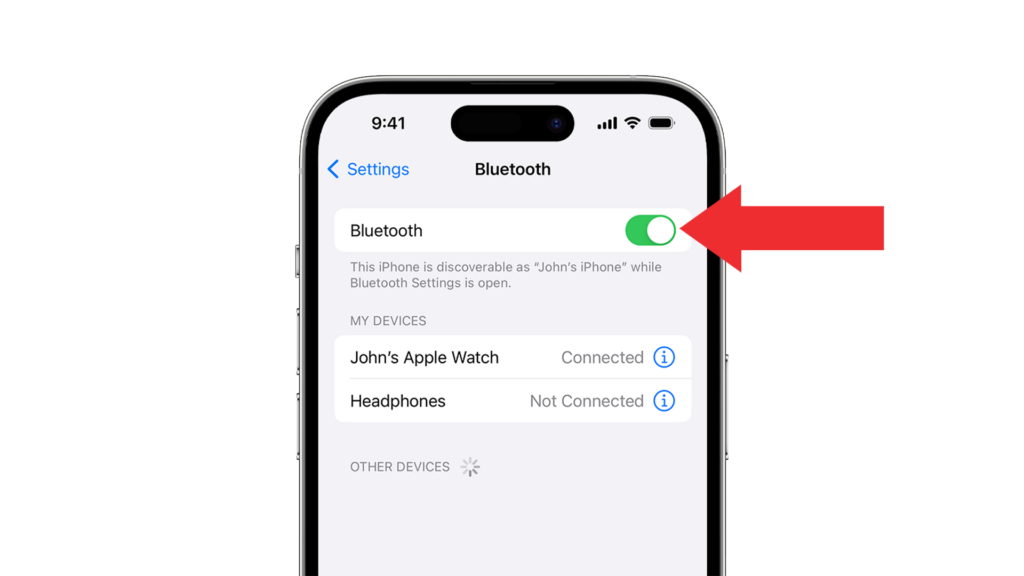
- After 5-10 seconds, re-enable Bluetooth and Wi-Fi.
2. Disable Personal Hotspot
I recommend turning off your personal hotspot before sending files via AirDrop to avoid problems.
This is important because both AirDrop and the personal hotspot feature share the same Wi-Fi radio component in your device. Running them simultaneously can lead to connectivity conflicts, potentially disrupting the AirDrop process.
To disable your personal hotspot:
- Go to your iPhone’s settings.
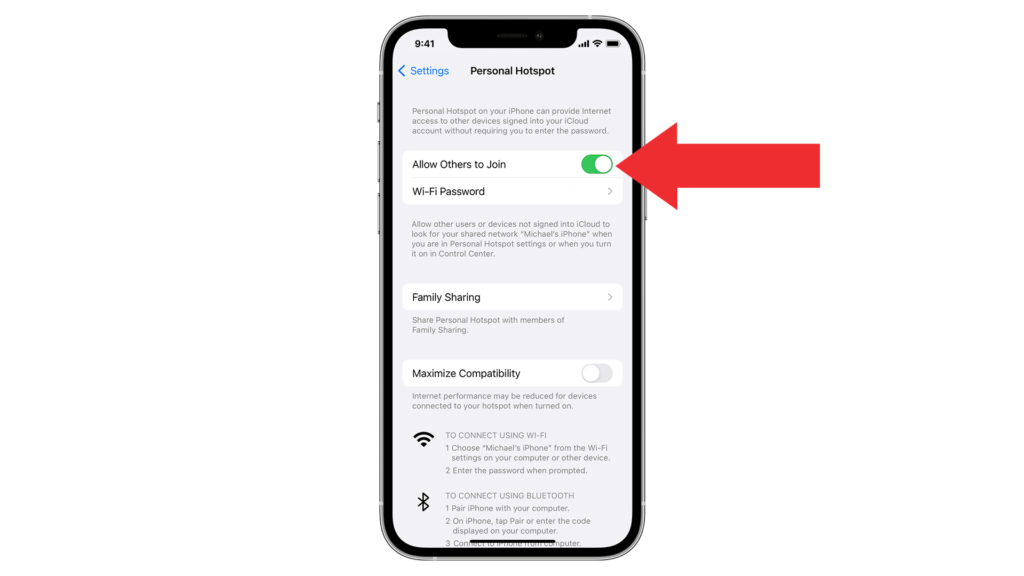
- Now, tap on Personal Hotspot.
- Tap the toggle switch beside Allow Others to Join.
3. Ensure the Receiving Device Is Unlocked
When sending files via AirDrop, the receiving device must accept the transfer before it pushes through.
Before sending files, make sure that the receiving device is unlocked. If not, the file might get declined, which explains the problem.
Keep the receiving device on the home screen and try transferring again.
4. Restart Your Device
If you still can’t send files using AirDrop, try restarting both receiving and sending devices.
A temporary bug may have occurred on either device that causes incoming files to get declined automatically.
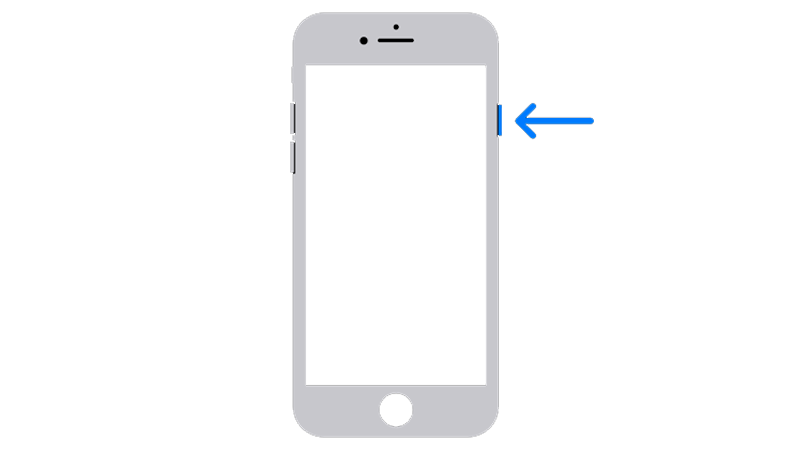
If you’re using an iPhone with Face ID, here’s how you can restart it:
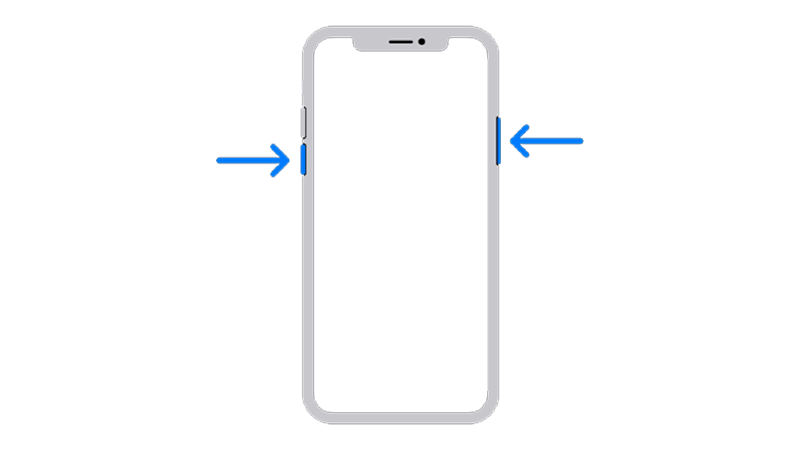
- Hold the Volume Down and Side buttons until the ‘Slide to Power Off’ prompt appears.
- Now, drag the slider to the right and wait for 30 seconds.
- Press the Side button afterward to turn on your device.
For iPhones with Touch ID, you can restart them by doing the following:
- Locate the Power button on your device.
- Hold the button until the ‘Slide to Power Off’ prompt appears.
- Drag the slider to the right and wait 30 seconds before turning on your device.
5. Disable Restrictions (Mac)
Firewalls, antivirus, and other restrictions might interfere with AirDrop and cause file transfers to get automatically declined.
Try disabling restrictions on your Mac before receiving or sending files.
Here’s what you need to do:
- Click on the Apple icon in the upper left corner of your screen.
- Now, go to System Settings.
- Click on Network in the sidebar.
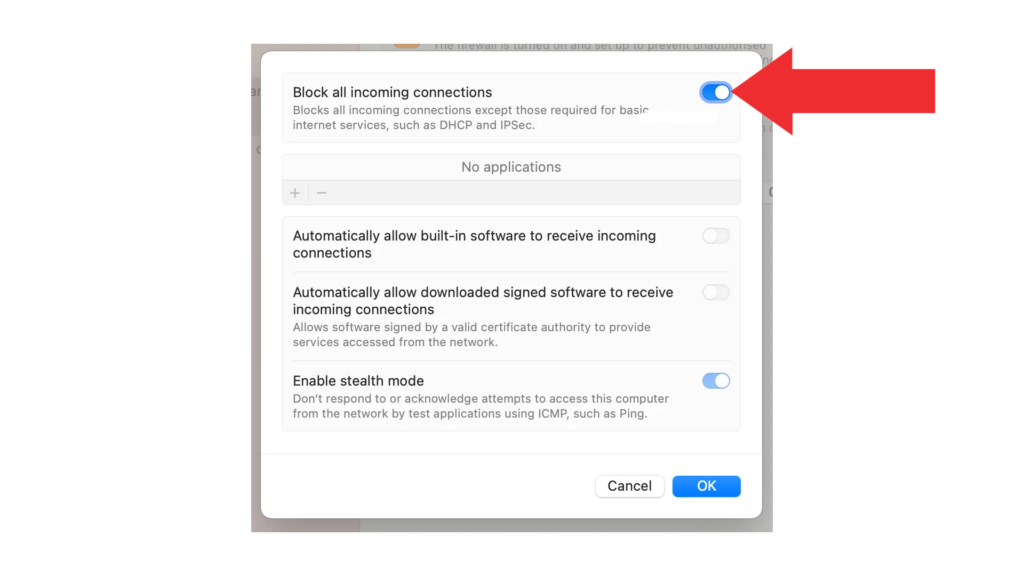
- Scroll down and click on Firewall.
- Disable the Block All Incoming Connections option.
6. Reset Network Settings
If you still can’t send or receive files from AirDrop, try resetting your network settings.
There might be some settings on your device that interfere with AirDrop, causing the transfer to fail.
See the steps below to reset your network settings:
- Open the Settings app on your iPhone.
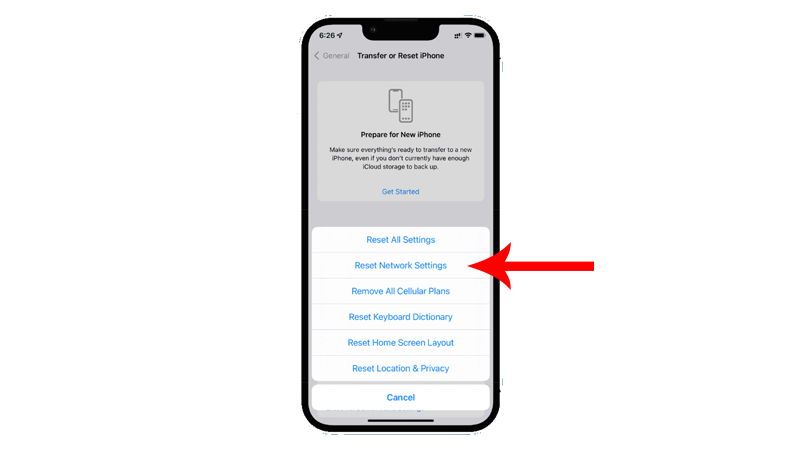
- Go to General > Transfer or Reset iPhone.
- Tap on Reset.
- Select Reset Network Settings and follow the prompts.
Note
- Your iPhone will immediately restart upon resetting your network configurations.
- It may be stuck in the Apple logo. Wait for the process to complete, which usually takes 5 to 10 minutes.
7. Update Your Device
If none of the solutions above worked, try updating your device.
The version of iOS or macOS you’re using might have a problem related to AirDrop, causing file transfers to fail.
To update your iPhone:
- Open Settings on your iPhone.
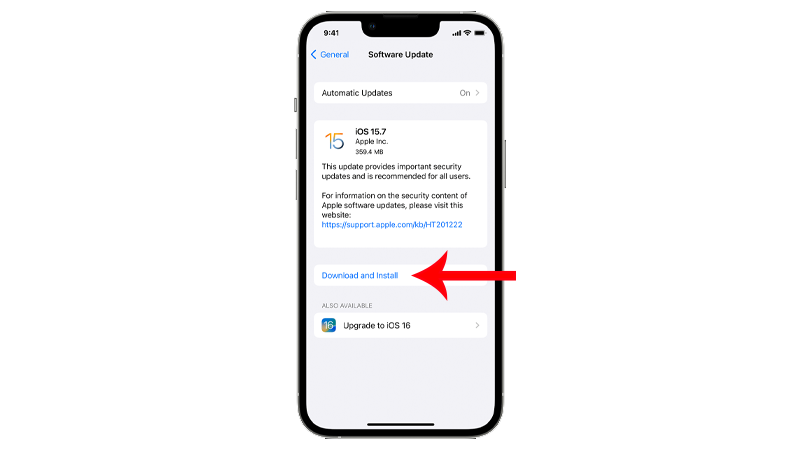
- Navigate to General > Software Update.
- If there’s a new iOS version available, tap Download and Install.
- Once the new software is ready, follow the prompts to install the update.
Note
- Your device can restart several times while installing the update.
- Ensure your iPhone has at least 50% battery before installing updates. It’s best to keep your device plugged into the wall charger to avoid interruptions.
- Allow at least 15 minutes for the update to install, especially if it’s a major update (iOS 15 to iOS 16).
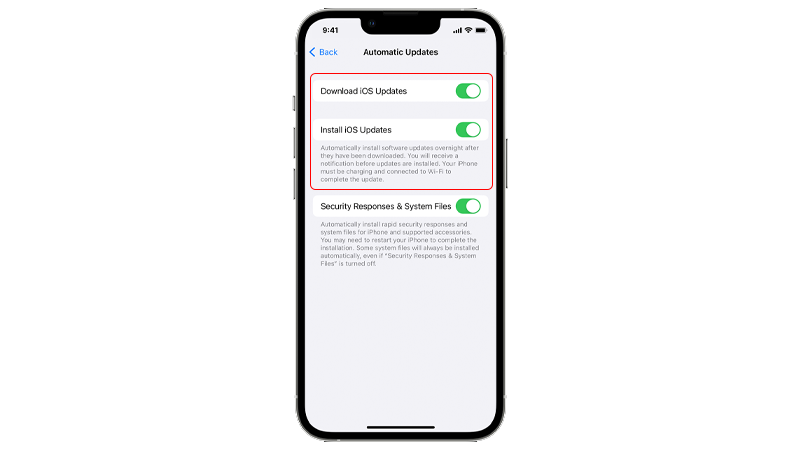
To avoid missing future updates, enable automatic updates on your iPhone:
- Open Settings on your iPhone.
- Go to General > Software Update > Automatic Updates.
- Enable Download iOS Updates and Install iOS Updates.
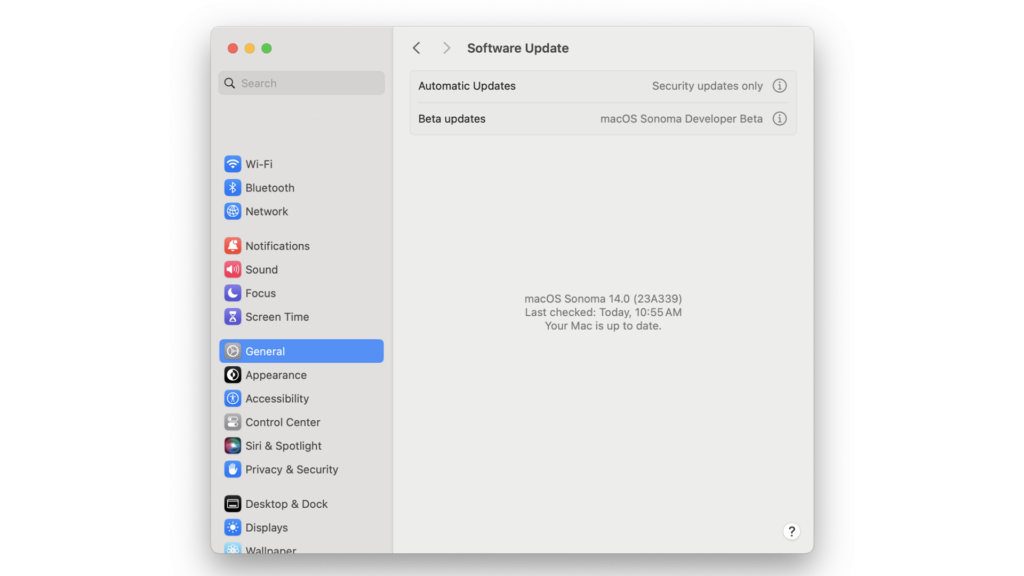
To update your Mac:
- In the upper left corner of your screen, click the Apple icon to open the Apple Menu.
- Now, click on System Settings.
- Inside settings, navigate to General > Software Update.
- If a new version is detected, follow the prompts to install the update.
Note
- Your Mac can restart several times while installing the update.
- The update progress bar might also appear to be stuck. When this happens, don’t do anything. Software updates can take several minutes to complete.
FAQs
Why does my AirDrop keep failing?
AirDrop may stop working for several reasons. Your device might not support AirDrop, or there’s something wrong with your device settings or network. It’s also possible that your personal hotspot is enabled.
Why does my AirDrop keep turning off?
If your AirDrop keeps turning off, try refreshing your Bluetooth and Wi-Fi. Go to your device settings and disable both features for 5-10 seconds.
Does AirDrop have a size limit?
No. You can transfer any file on AirDrop. However, it may take longer for large files to transfer since wireless file transfers are relatively slower compared to wired connection/transfers.
Can I AirDrop 10000 photos?
No. You can transfer any file on AirDrop. However, it may take longer for large files to transfer since wireless file transfers are relatively slower compared to wired connection/transfers.


