Wondering how you can enable internet sharing on Mac?
You’re likely familiar with the personal hotspot feature on mobile devices. Macs also have this feature, allowing you to share your internet with friends and family.
However, internet sharing on Mac is much better compared to mobile phones.
On Mac, you can share your internet coming from multiple sources, including Wi-Fi, cellular data, and ethernet,
Bandwidth management across connected devices is also better, thanks to Mac’s much more powerful network controllers.
Today, we will show you how to enable internet sharing on your Mac.
Let’s begin!
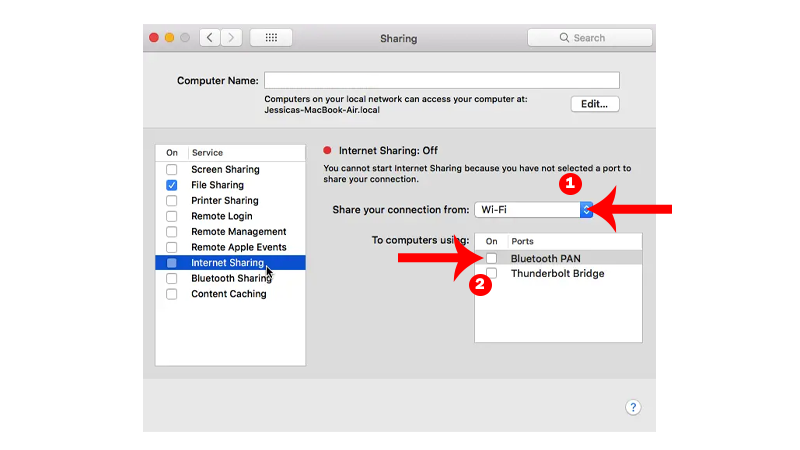
1. Share via Wi-Fi with Ethernet As Source.
In some hotels, there’s a dedicated ethernet port that you can use to connect your MacBook to the internet.
However, your connection would be limited to a single device.
Fortunately, you can use your Mac to set up a personal Wi-Fi hotspot and use ethernet as the source of internet.
Here’s what you need to do:
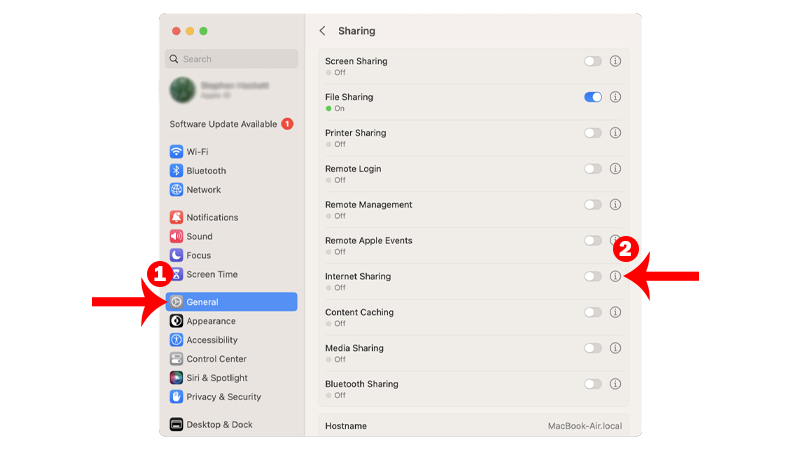
- Click on the Apple Menu in the upper left corner of your screen.
- Open System Settings.
- Go to General > Sharing and click the Info button next to Internet Sharing.
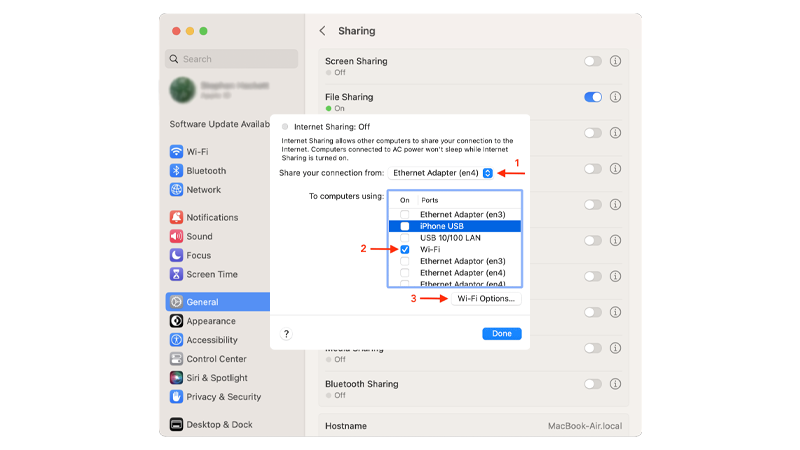
- Now, click the Share your Connection From pop-up menu and select Ethernet.
- In the ‘To computers using’ list, select Wi-Fi.
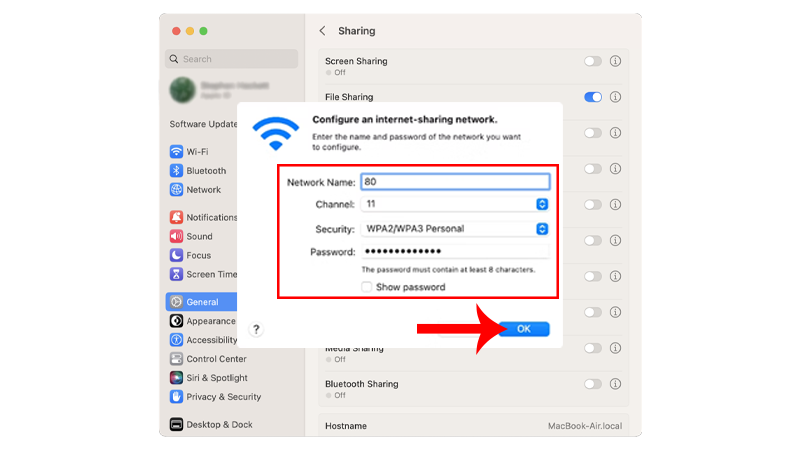
- Click on Wi-Fi options and configure the internet-sharing network.
- Network Name: any name you want
- Channel: you can leave this with the default channel
- Security: select WPA3 Personal or WPA2/WP3 Personal
- Password: provide a password for your network
- Click Done to complete the process.
- Once done, go back to the previous page and enable the toggle switch next to Internet Sharing.

Now you can connect your other devices to the network and enjoy your internet connection with family and friends.
2. Share Internet to iPhone or iPad.
With supported devices, you can also share your Mac’s internet using Bluetooth or USB cable.
Connecting your iPad or iPhone using a USB cable should provide a much more stable internet, allowing you to do things that require faster network speeds.
Share Internet via USB Cable:
- Open the Apple Menu in the upper left corner of your screen.
- Click on System Settings.
- Go to General > Sharing and click the Info icon next to Internet Sharing.
- Choose Wi-Fi in the Share Your Connection From option.
- Next, click the checkbox beside iPhone USB in the To Computers Using tab.
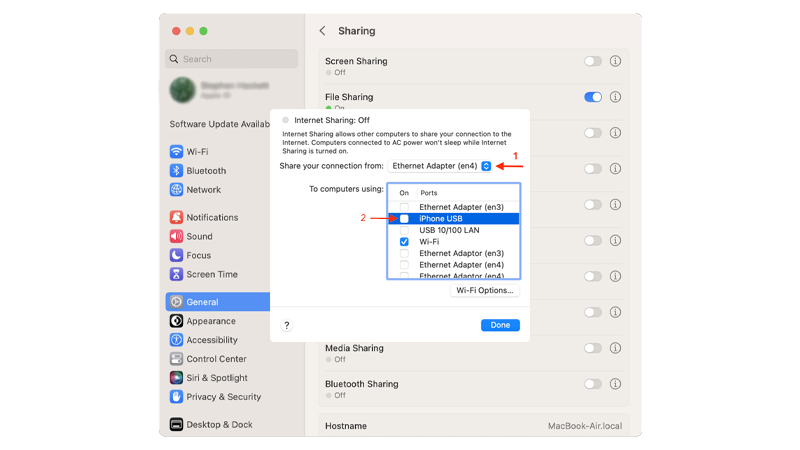
- Click Done and go back to the previous page.
- Tap the toggle switch beside Internet Sharing.
Once done, connect your iPhone or iPad to your Mac using a lightning or USB-C cable.
You should now be able to use your Mac’s internet connection on your iPhone and iPad without needing Wi-Fi or cellular data.
Share Internet via Bluetooth
Note
You can’t use internet sharing via Bluetooth on recent macOS versions, including Monterey and Ventura.
- Click on the Apple icon in the upper left corner of your screen.
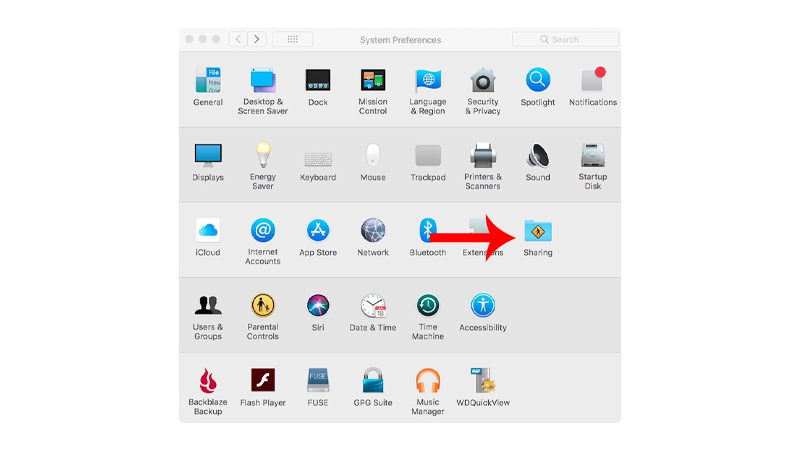
- Access the System Preferences tab.
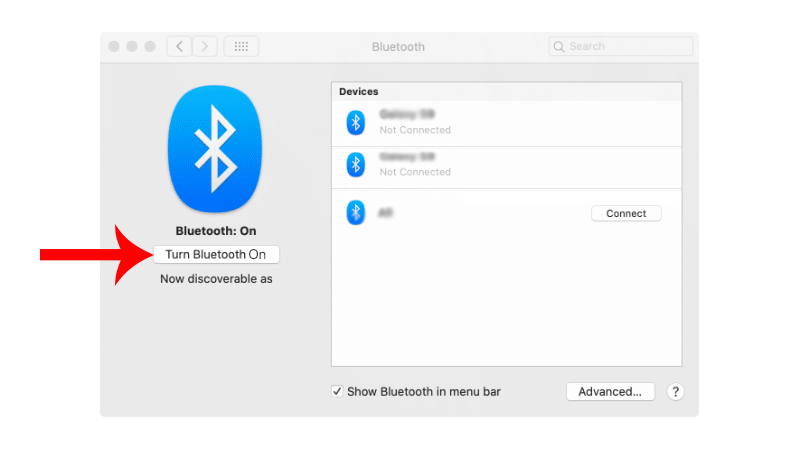
- Open the Bluetooth tab and enable Bluetooth. Stay on this screen.
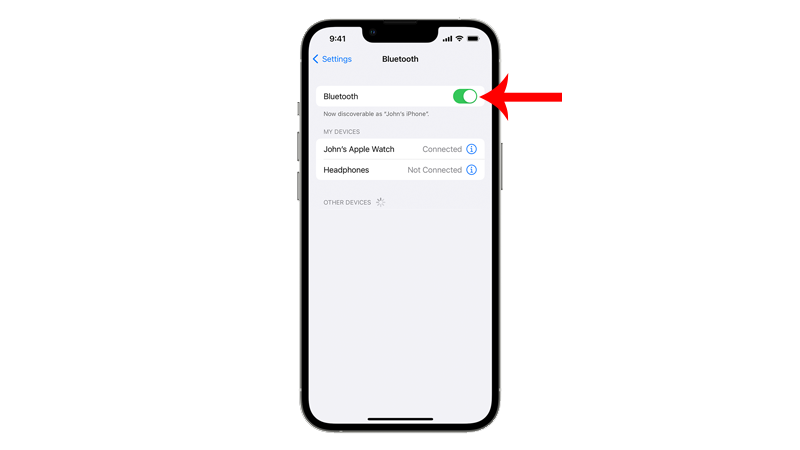
- Go to your iPhone or iPad.
- Navigate to Settings > Bluetooth and enable the feature.
- Go back to your Mac and your device should show up as a new device on the Bluetooth interface.
- Click on Connect beside your iPhone/iPad.
- Confirm the connection by tapping Connect.
- On your Mac, go to System Preferences > Sharing > Internet Sharing.
- For the Share Your Connection From section, select Wi-Fi.
- Now, select Bluetooth PAN beside the To Computers Using tab.
Enable internet sharing on your Mac and you should now be able to use your Mac’s internet connection on your iPhone or iPad.
That’s everything you need to know on how to enable internet sharing on Mac. If you have questions, please leave a comment below, and we’ll do our best to answer them.