

Want to fix File Explorer tabs not showing on Windows 11?
The Windows 11 22H2 update has been a marvelous addition with its outstanding features, such as the File Explorer tabs. These tabs allow you to open various folders within a single window, leading to easier management. Like the web browser, you can quickly switch to other tabs without opening multiple windows on your desktop.
However, if you’re facing an issue and are unable to use File Explorer tabs on Windows 11, you’ve come to the right place. This guide will provide several effective troubleshooting fixes for the stated issue. Some causes may include running Windows 10 or earlier, corrupted system files, malware attacks, etc.
Now, let’s explore the solutions!
1. Ensure the 22H2 Update is Installed.
File Explorer tabs are only available in the latest Windows OS build, i.e., Windows 11 22H2 or later. That means, if your computer runs an older version, you’ll have to deal with cluttering numerous windows to manage your files.
Here’s how to check your Windows OS version:
- First, press the Windows + i shortcut keys to open Windows Settings.
- From the left pane, select Windows Update.
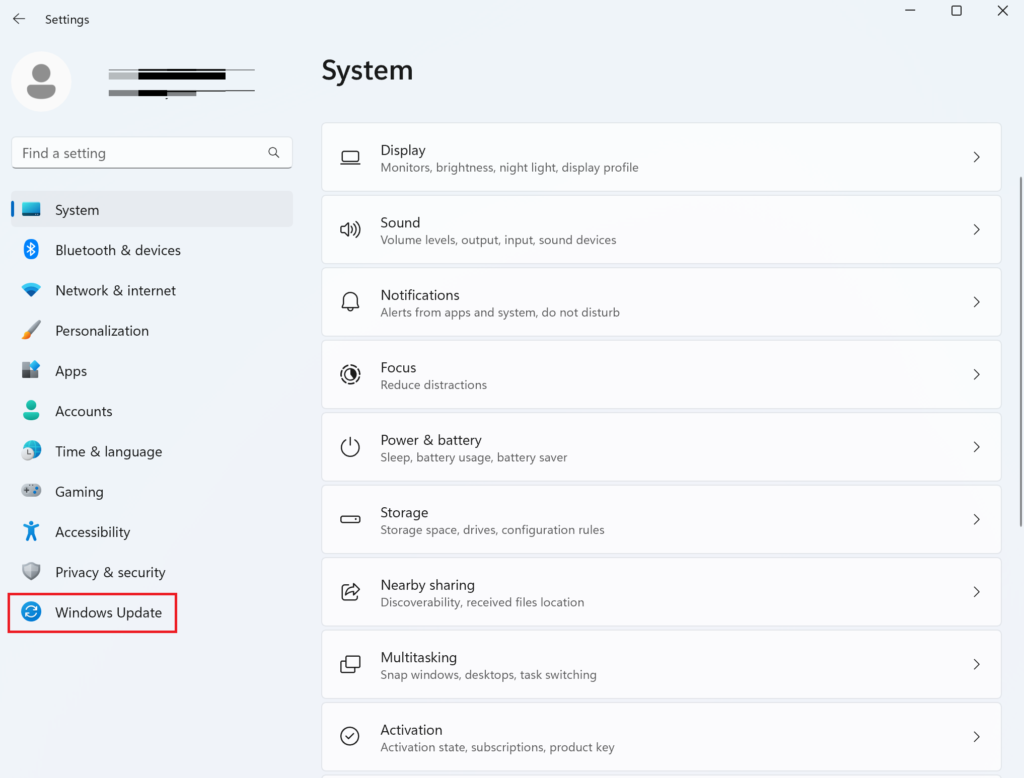
- Then, click on Check for updates.
- Once Windows locates the 22H2 update, click on the Download and Install button.
Once the update is successfully installed, File Explorer will start displaying tabs.
2. Restart Your Computer.
If your computer is up-to-date and you’re still experiencing this issue, there could be a bug within your computer’s software. It’s best to troubleshoot it with the most basic method of restarting your PC. Most temporary glitches or bugs are easily eliminated this way.
Follow the steps below to do it:
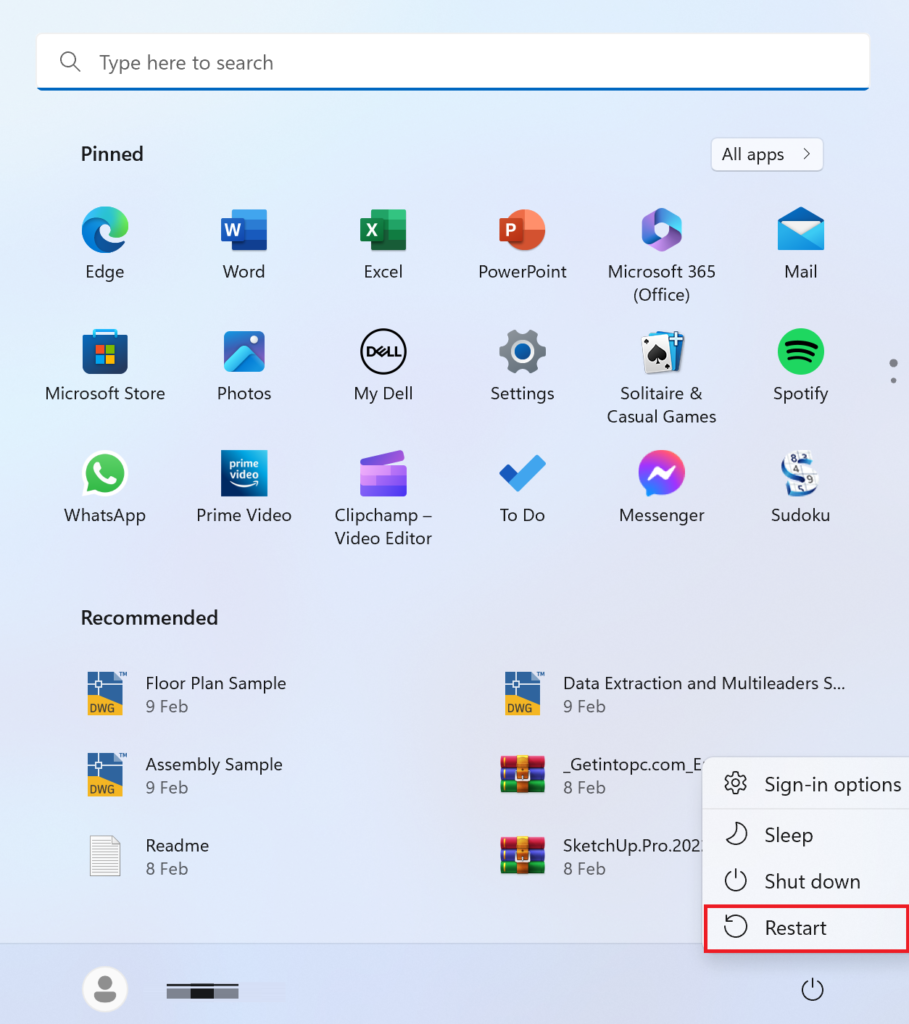
- Go to the Start menu from the taskbar.
- Then, click on the Power icon in the lower right corner.
- Select the Restart option.
3. Restart File Explorer.
Windows Explorer is the default Windows service that operates the GUI of File Explorer. If the service encounters an issue, File Explorer will also face various issues, such as files not opening on File Explorer tabs not showing on Windows 11.
To get rid of any glitches or bugs within the service, simply restart it by following the steps below:
- Press the Ctrl + Alt + Delete keys from your keyboard to open Task Manager.
- Once the window opens, scroll down and find Windows Explorer.
- Right-click on it and select Restart.
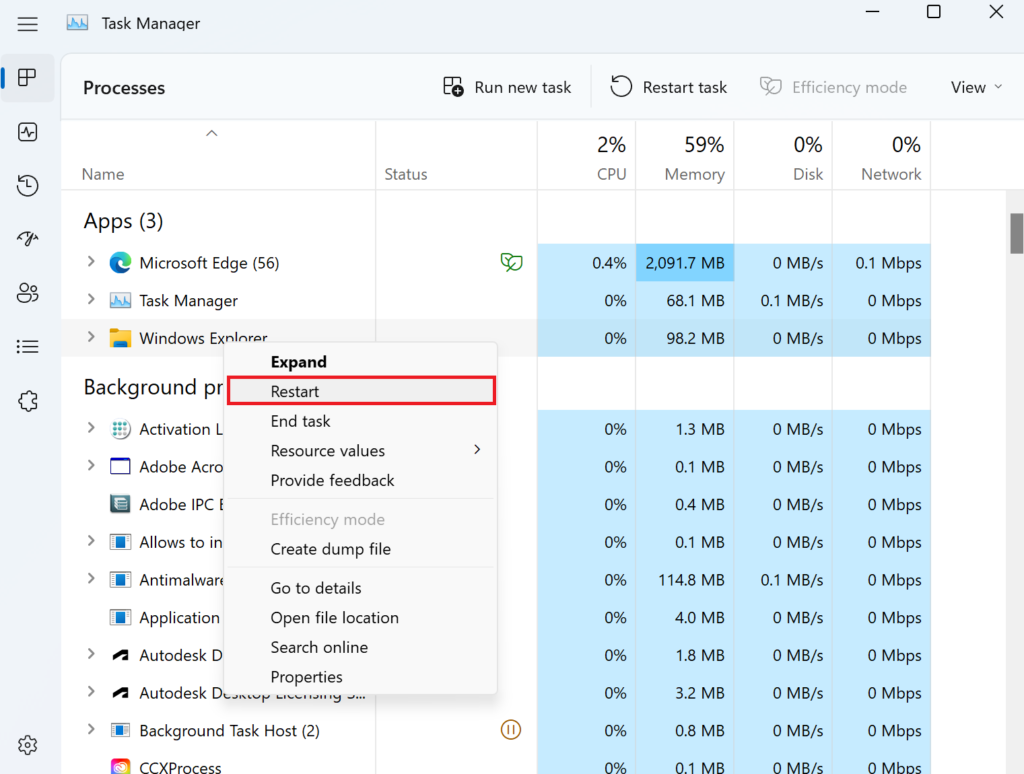
Windows Explorer will then disappear for a few seconds and then reappear, indicating that it has restarted. In case it doesn’t, simply restart your computer.
4. Clear Cache for File Explorer.
File Explorer aims to serve you better by keeping track of your data and search history and saving it as a cache. If, for some reason, it fails to access this data or the cache gets corrupted, File Explorer will fail to function properly.
You can clear this cache to clear all existing data. Hopefully, this will resolve the issue.
Here’s how to do it:
- Click on the Windows icon from the taskbar.
- Search for File Explorer Options in the search bar and click on the top result.
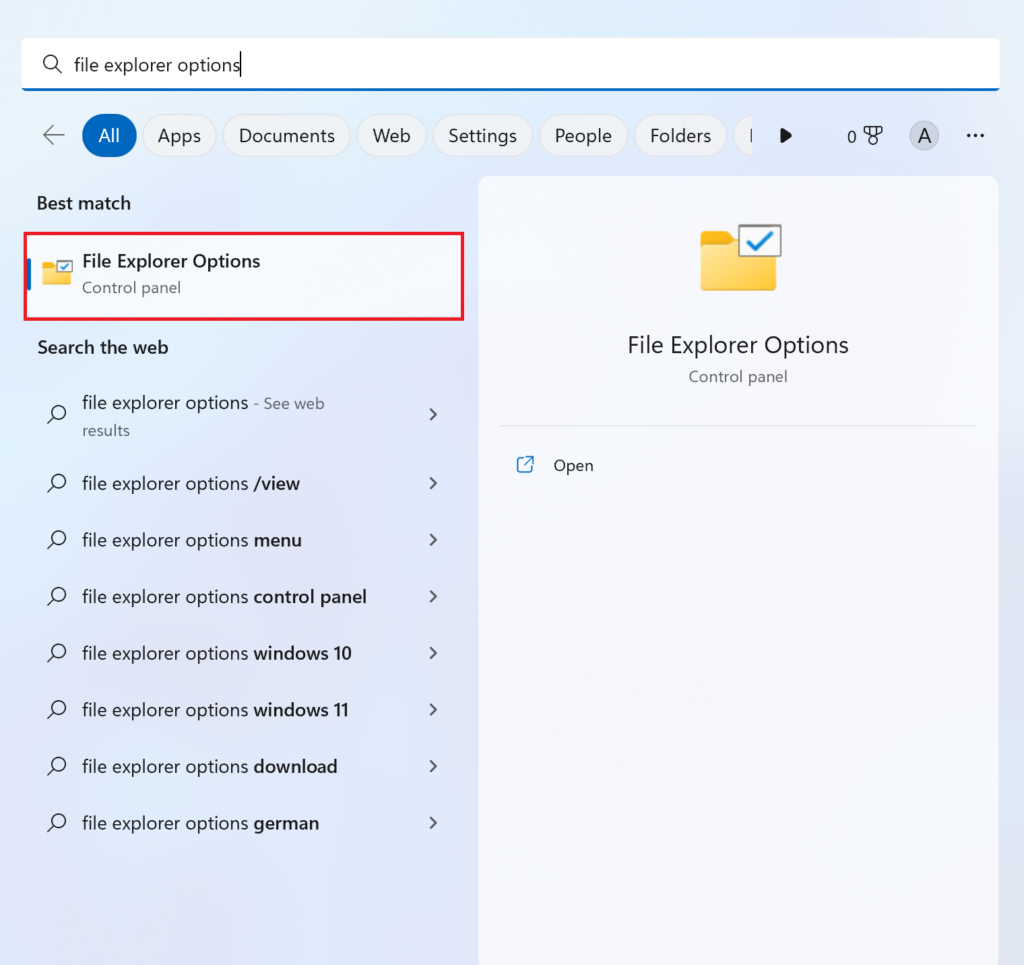
- Once the File Explorer Options dialog box appears, go to the General tab.
- Under the Privacy section, click on the Clear button.
- Then, click on OK to confirm your action.
If the problem continues, move to the following method.
5. Perform SFC Scan.
Another reason behind File Explorer not showing tabs on Windows 11 is corrupted, damaged, or missing system files. But don’t fret. The built-in utilities, such as the SFC scan. This command-line tool detects and repairs the files by restoring them back to their original state.
Follow the steps below to perform the scan:
- Start by clicking on the Windows icon.
- In the search bar, type Command Prompt.
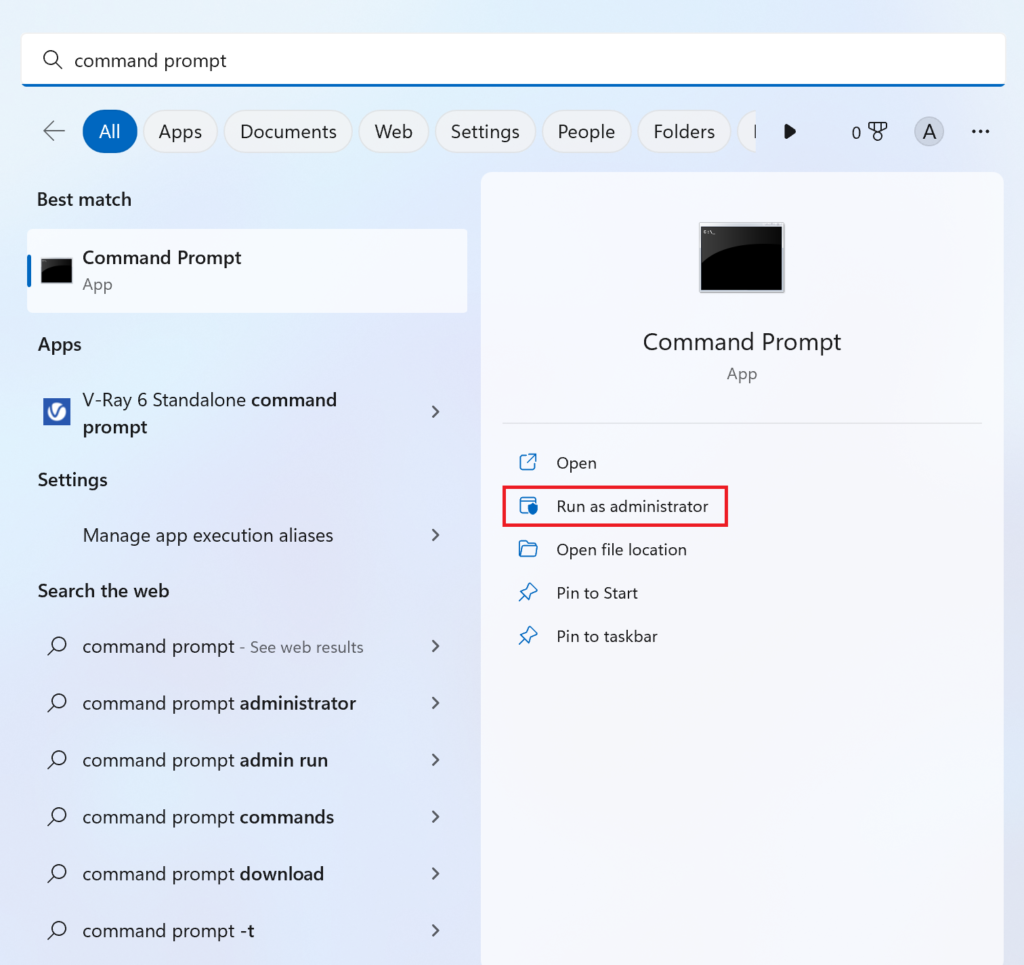
- Then, click on Run as administrator.
- After that, type the following:
sfc /scannow- Press the Enter key.
Once the scan is completed, restart your PC to process the changes.
6. Run the System Maintenance Troubleshooter.
The System Maintenance Troubleshooter helps improve your system’s performance by regularly cleaning up unnecessary data from your computer. This includes desktop shortcuts, unused files, etc. It will hopefully restore the missing tabs issue as well.
Here’s what you need to do:
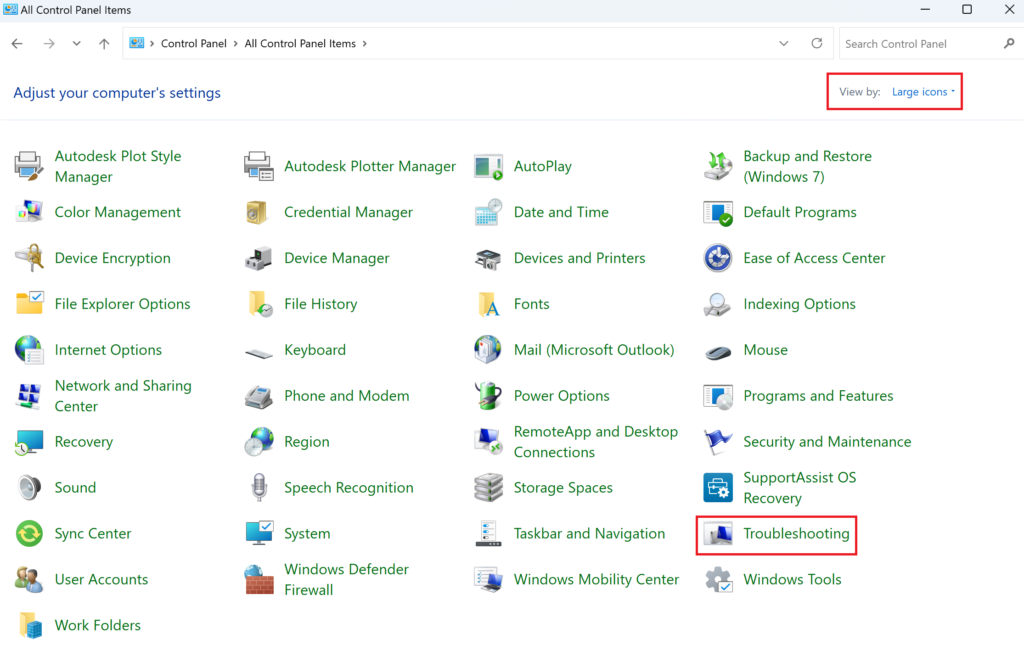
- First, click on the Search icon from the taskbar.
- Then, search for Control Panel in the search bar.
- Click on Control Panel from the results.
- Once the window opens, choose View by: Large icons from the top-right corner.
- Then, select Troubleshooting from the icons.
- Click on Run maintenance tasks below System and Security.
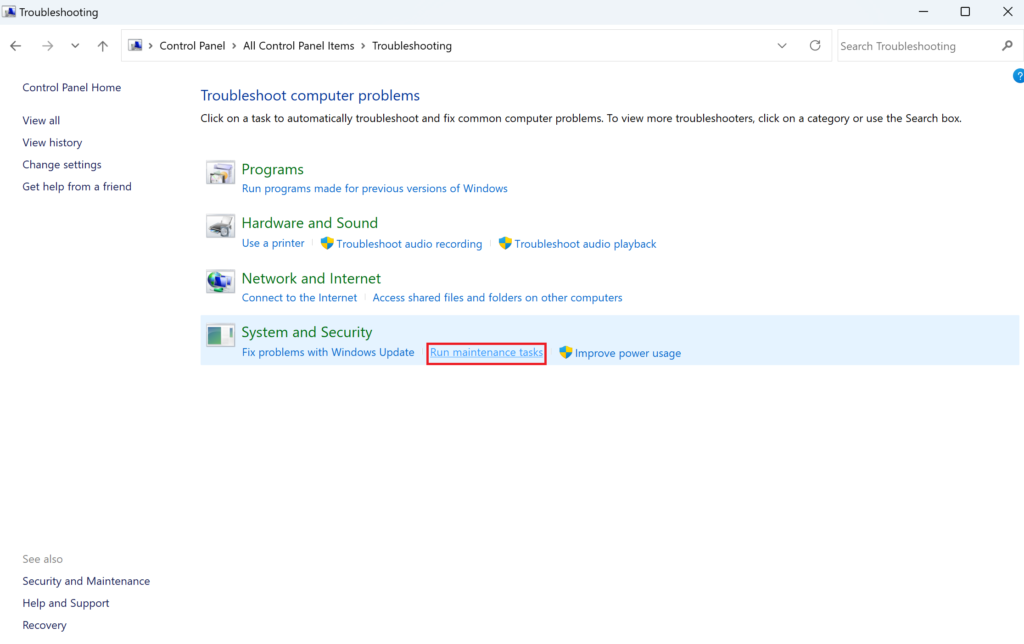
- After that, click on the Next button on the pop-up window.
- Follow the on-screen instructions to run the system maintenance troubleshooter.
Once done, check whether the issue still persists. If so, it’s time to run a malware scan, as explained below.
7. Run a Malware Scan.
In case the tabs on File Explorer are still missing, it’s high time you run a malware scan on your computer. You can rely on either the built-in Windows Defender or a third-party antivirus program to check for the possibility.
To use the former, refer to the instructions below:
- Click on the Windows icon from the taskbar.
- In the search bar, type Windows Security.
- Then, click on Open from the right pane.
- After that, select Virus & threat protection.
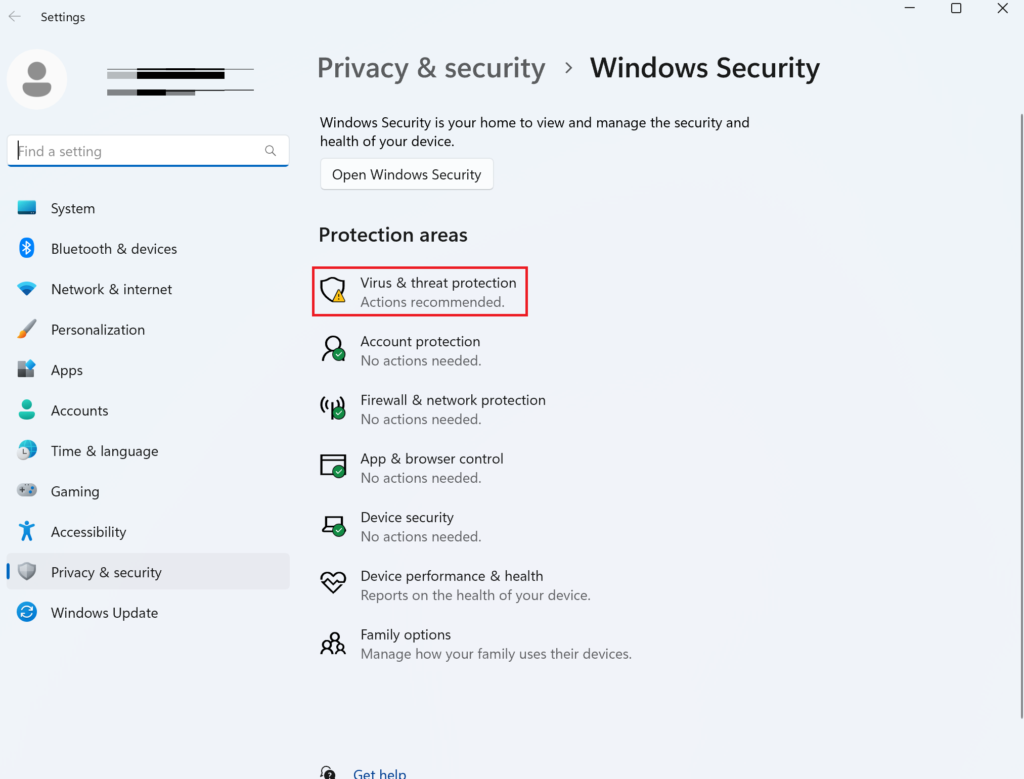
- Under the Current threats section, click on Scan options.
- Choose any of the listed scans and click on the Scan now button.
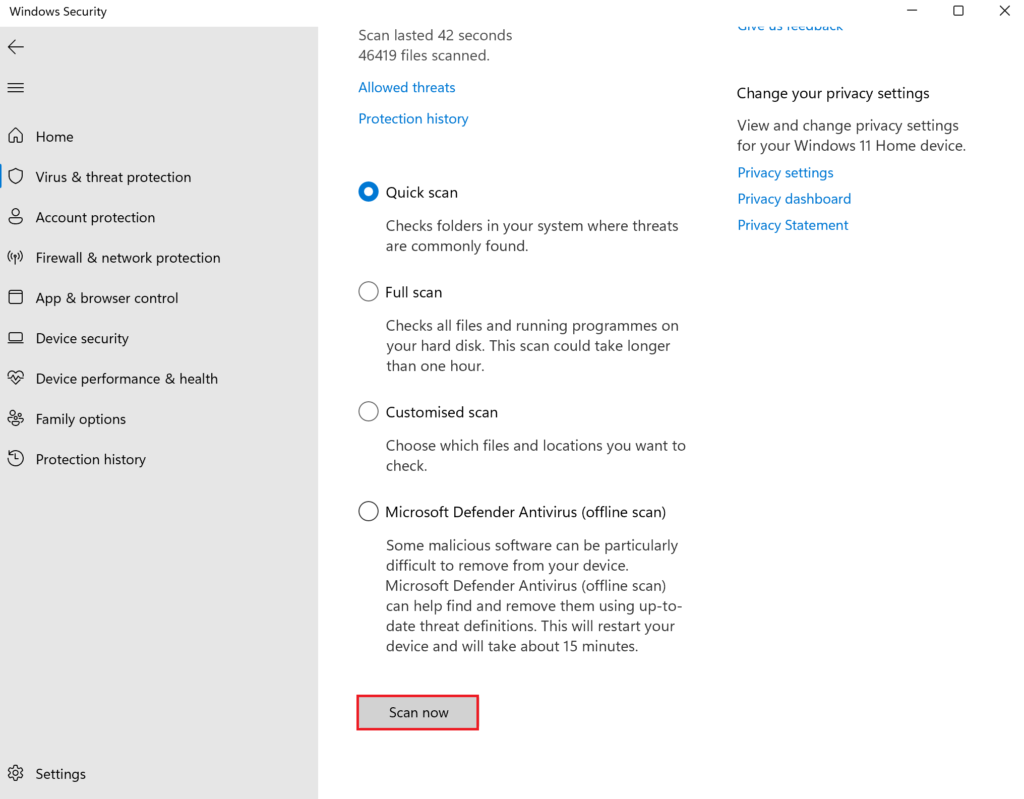
The scan will start and will take a few to several minutes to complete, depending on the selected type.
8. Reinstall Windows Updates.
Even if your computer is updated to the latest build, the update could malfunction, resulting in issues like File Explorer tabs not showing on Windows 11. You can try removing the recent update and reinstalling it later to fix the problem.
Here’s how:
- First, right-click on the Start icon from the taskbar.
- Then, select Settings from the list of options.
- From the left pane, go to Windows Update.
- Then, select Update history.
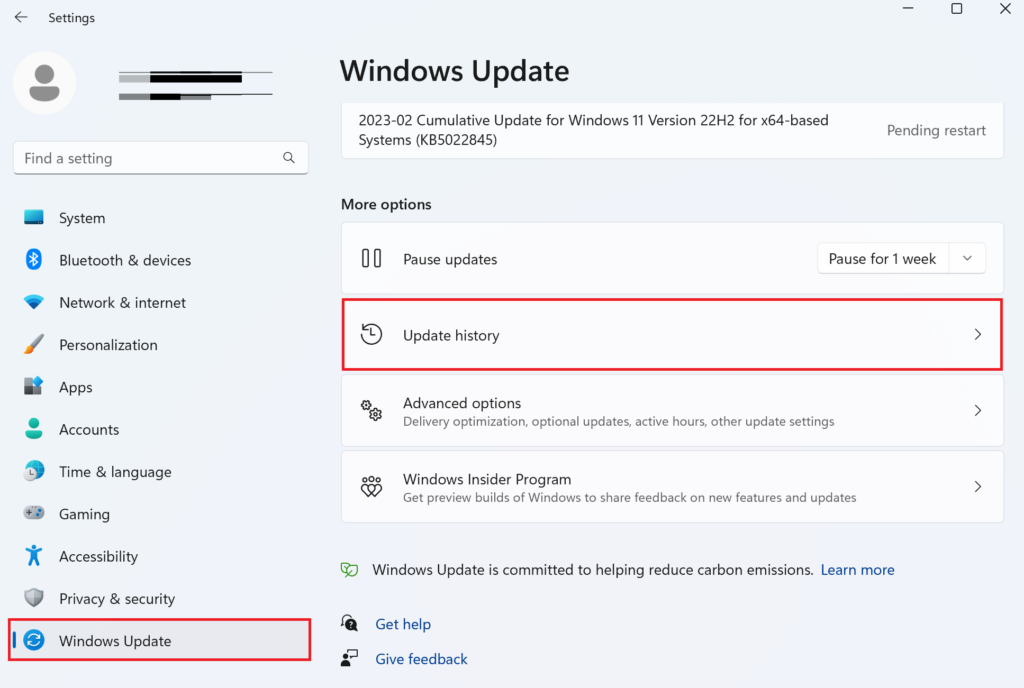
- Scroll down and locate Uninstall updates and click on it.
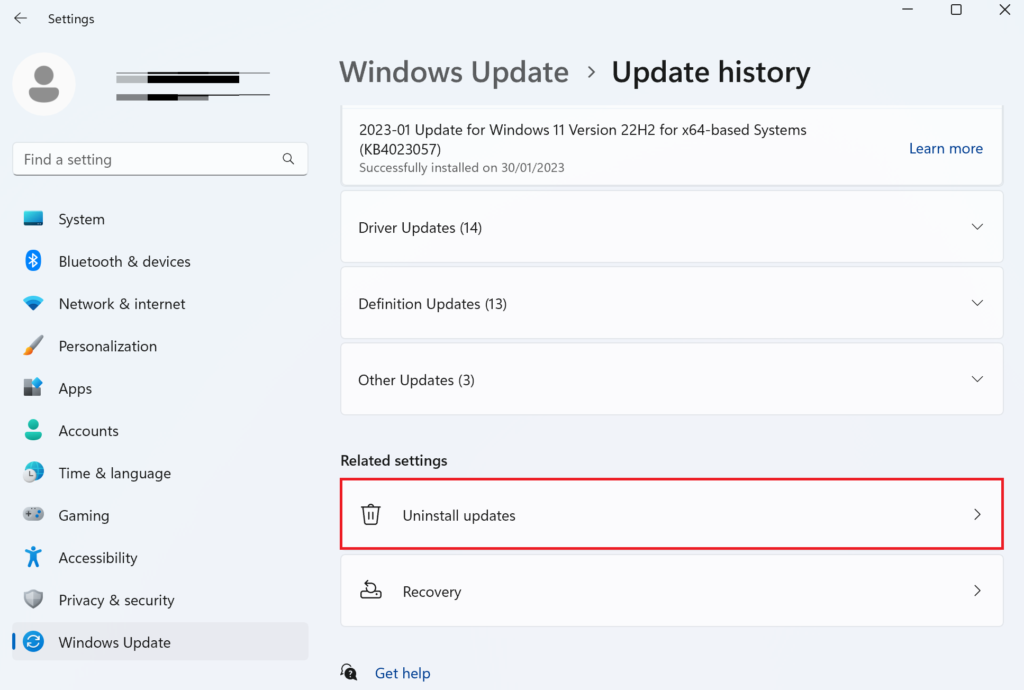
- Look for the recent 22H2 update and right-click on it.
- Then, click on Uninstall.
Afterward, you can reinstall Windows Update, as explained in the first method.
9. Perform a System Restore.
If the File Explorer tabs suddenly disappeared after configuring certain settings or installing a new third-party application, you can revert back those changes to fix the issue. When enabled, your computer constantly creates points that you can restore to bring your system back to the way it was at that certain point. All the changes made after that will be discarded.
This ends our guide on how to fix File Explorer tabs not showing on Windows 11. If you have any more questions, simply communicate with us in the comment section below. We’ll be happy to assist you further.
If this guide helped you, please share it.
