Looking for easy ways to fix the iPad “Location Could Not Be Determined” error?
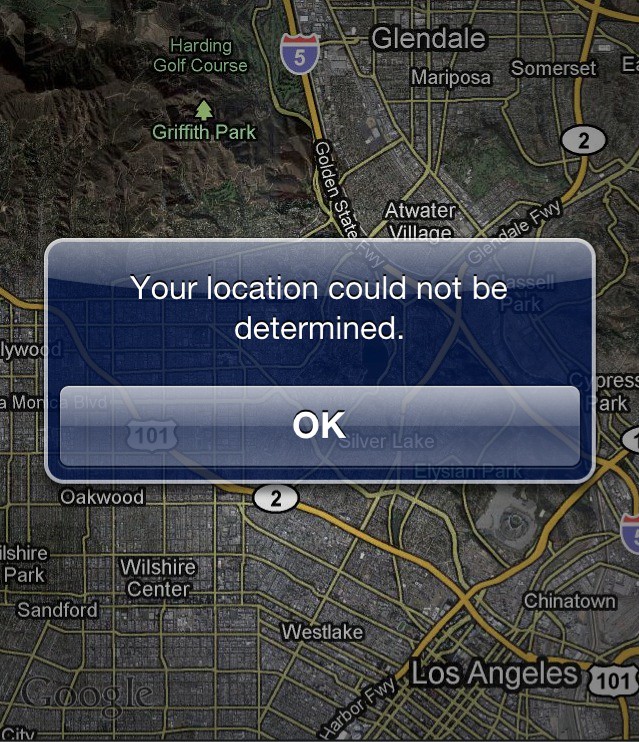
Getting the notification “Location Could Not Be Determined” whenever you use Maps or other applications on your iPad is pretty annoying. Don’t fret. We’ll help you resolve it. But before doing any troubleshooting, it pays to know why the issue happens.
Your iPad’s Location Services utilizes GPS, Bluetooth, Wi-Fi, and cellular towers to triangulate and pinpoint your location. If one of these factors fails to work, expect inaccuracy. You may also have a problem if you’re using a Wi-Fi-only iPad in an area where hotspots are sparse. The device has no other tool to determine your location.
Today, we’re listing potential ways to resolve this location issue on iPads. With these workarounds, we hope your device works flawlessly again. Here’s how to fix the iPad “Location Could Not Be Determined” error.
Let’s get to it!
1. Check for Software Updates.
Often, upgrades are needed for built-in apps like Maps to work smoothly. Before doing more complex troubleshooting methods, check if you’re using an out-of-date device.
Here’s how to check for iPadOS updates:
- First, go to Settings.
- Tap General and then choose Software Update.
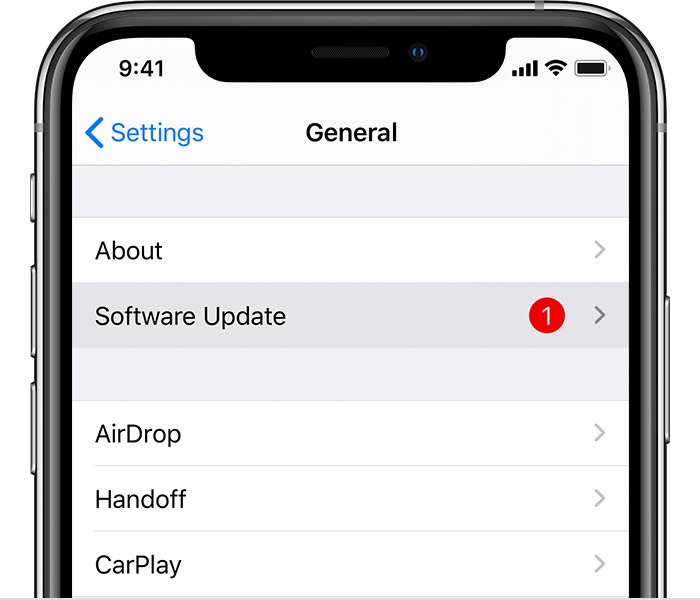
- Lastly, follow on-screen instructions if software updates are available.
For some users, updating your iPadOS was enough to resolve the issue. If this isn’t the case with you, check out our other resolutions.
2. Re-Enable Location Services.
Is Location Services enabled on your iPad? One of the first things to do to fix the iPad “Location Could Not Be Determined” error is to see if Location Services is on. If it is, then you can turn it off and on. Resetting it could help get rid of any random bug.
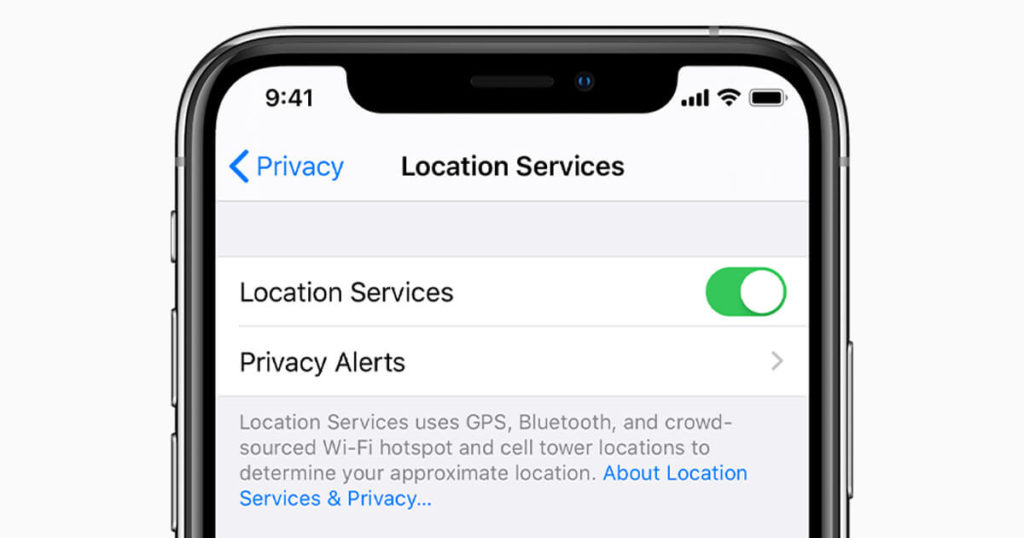
Here’s how to check and re-enable Location Services on your iPad:
- Navigate to Settings.
- Tap Privacy.
- Then, select Location Services.
- If the toggle button beside Location Services is green and active, toggle it off.
- Restart your iPad.
- Once your iPad is back on, go to Settings > Privacy > Location Services.
- Tap the toggle button beside Location Services. Make sure it’s green and active.
- Open Maps and other apps. See if you can use them without a glitch.
If this trick didn’t work, don’t worry. We have more workarounds. Read on below.
3. Check for Any Restrictions.
Have you checked your Location Services setting, and it’s greyed out? You may have accidentally set a restriction on it through Screen Time settings. That could be the reason you encounter the “Location Could Not Be Determined” notification on your iPad.
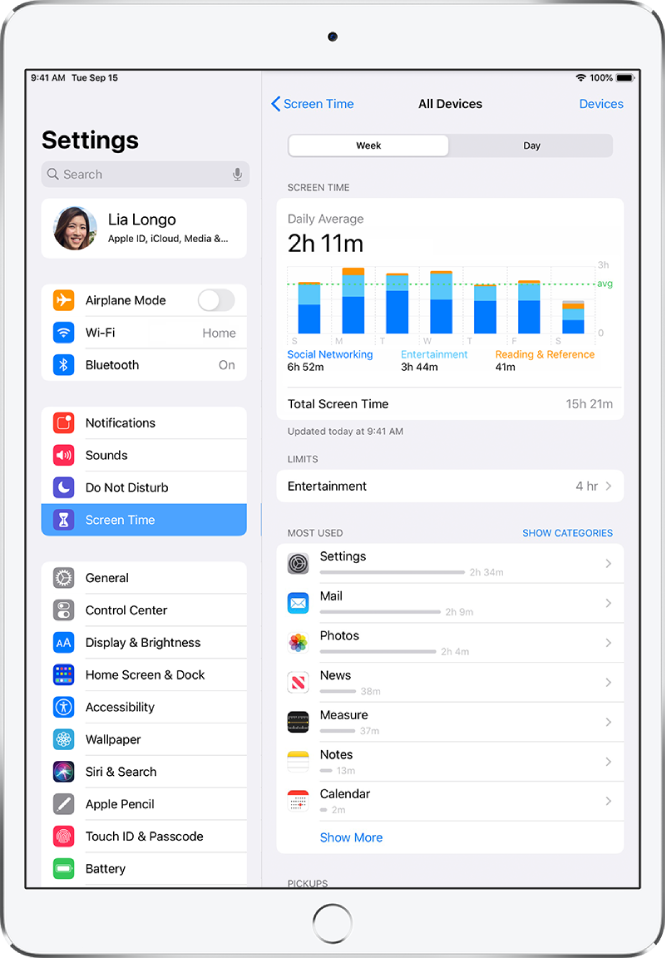
Apple’s Screen Time has all the great intentions. It helps monitor your device usage. It also allows you to control the amount of time you’re spending on each app. But setting Screen Time unknowingly on features like Location Services can lead to an issue.
Here’s how to check and adjust your Screen Time settings:
- First, navigate to Settings.
- Tap Screen Time.
- Next, tap Content & Privacy Restrictions.
- Then, select Location Services.
- Make sure there’s a checkmark beside Allow Changes.
- Lastly, adjust the settings according to your needs and preferences.
See if your Location Services setting is no longer greyed out. If it’s green and active, but you still see the location error notification, try our other solutions below.
4. Check Your Connection.
Again, your iPad uses a Wi-Fi or cellular connection, GPS, and Bluetooth to triangulate your location. So if Location Services isn’t working, you should check your connection.
There are several ways to check your connection. Give the Airplane Mode trick a try. You can also manually restart your Wi-Fi router. Both instructions are below.
Here’s how to use Airplane Mode to check your device’s connection:
- On your iPad, go to Settings.
- Look for Airplane Mode. Toggle the button beside it to turn it on. Or open the Control Center and tap the Airplane Mode button.
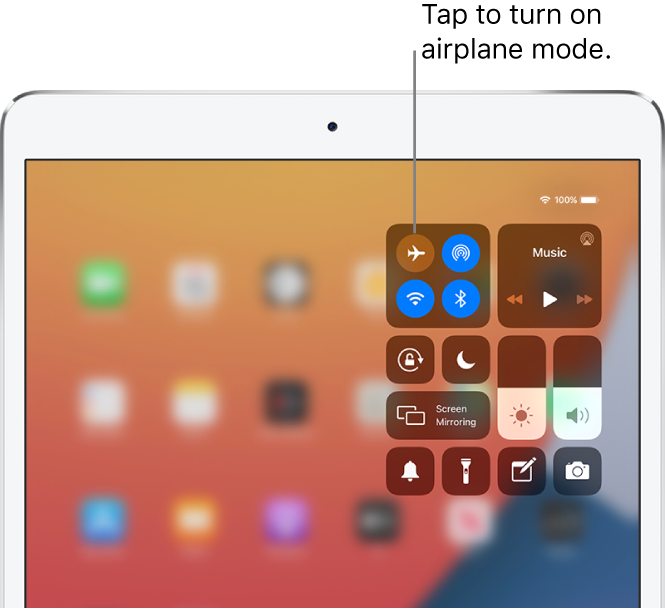
- Wait a few seconds and then toggle the button off.
- Open Maps or other location-related apps to see if you no longer have an issue.
Here’s how to restart your Wi-Fi router:
- Unplug the power cord of your router. Your iPad will automatically disconnect to Wi-Fi.

- Wait 30 seconds and then replug the cord.
- Once your Wi-Fi router is back on, go to Settings to see if you’re already connected. On Settings, you should see your Wi-Fi router’s name beside Wi-Fi.
- Open Maps or other apps that require your location. See if you can use them without any errors.
You can also try switching to a cellular connection. If you’re using a Wi-Fi-only iPad, try connecting to other hotspots or any other available Wi-Fi networks in your area.
5. Reset Your Network Settings.
Are you sure your connection is good? Then resetting your network settings is the next viable step to fix the iPad “Location Could Not Be Determined” error.
Note that resetting the network settings means wiping up all the credentials for your Wi-Fi, VPN, and Cellular connections. So make sure to re-enter them after the reset.
Here’s how to reset network settings on your iPad:
- Begin by opening Settings.
- Hit General. Then, select Reset.
- Next, tap Reset Network Settings.
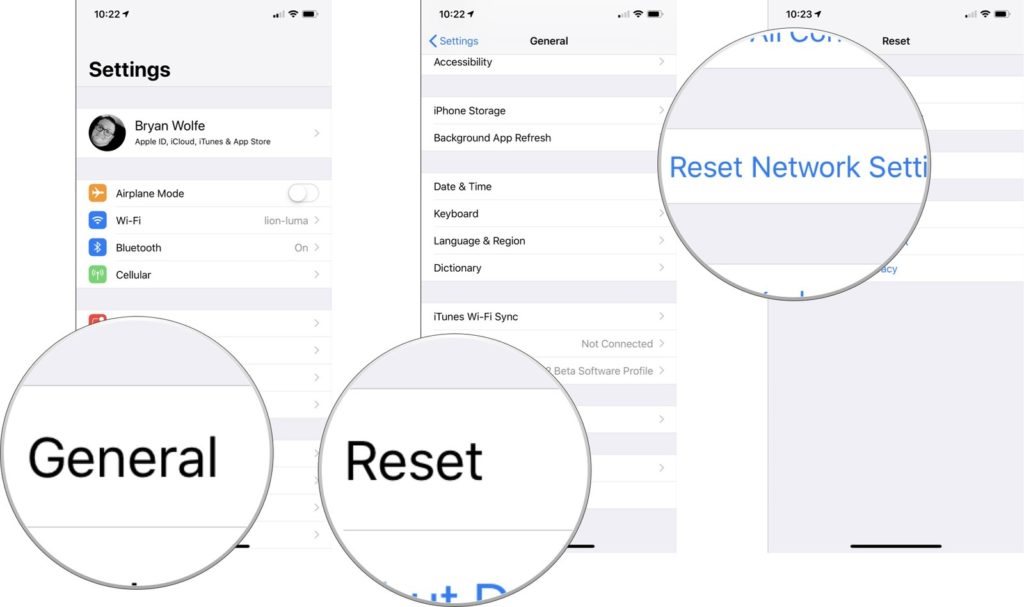
- Enter your passcode.
- Lastly, hit Reset Network Settings to confirm.
Your iPad will turn off to complete the reset. In a few seconds, it will turn on again. See if you still encounter the location error. If yes, we have more potential fixes for you.
6. Check the Date & Time Settings.
Other settings you should check are your iPad’s date, time, and timezone. That’s especially beneficial if you’ve recently moved to another state or country.
If correctly set, your iPad’s date, time, and timezone can improve your device’s GPS accuracy. In turn, you will likely solve the error: “Location Could Not Be Determined.”
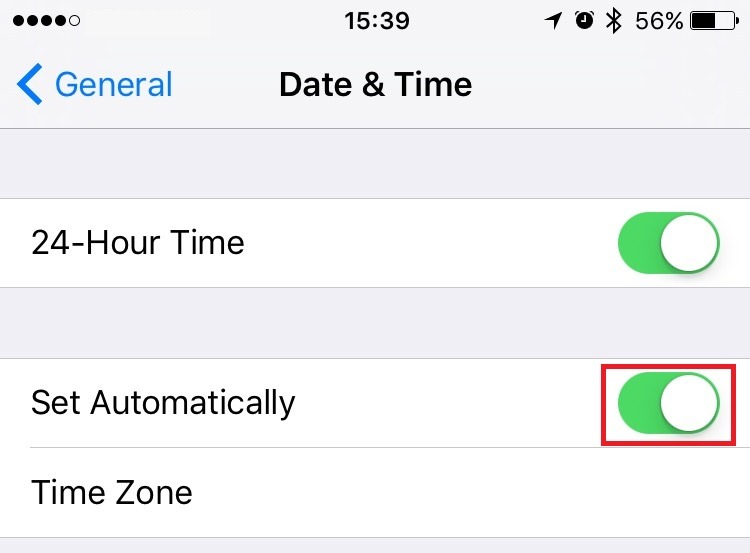
Here’s how to check the date, time, and time zone on your iPad:
- Go to Settings.
- Select General.
- Tap Date & Time.
- Ensure your settings are correct. Otherwise, adjust them.
- You may also want to activate Set Automatically to avoid similar GPS problems in the future.
This should do the trick. But if you still need more options to fix the iPad “Location Could Not Be Determined” error, don’t hesitate to browse through the next methods.
7. Check the App Settings.
Does the problem only occur when you’re using a certain app like Maps or Calendar? Maybe, you’ve accidentally turned Location Services off for that particular app.
Here’s how to check the Location Services setting for an app:
- First, navigate to Settings.
- Select Privacy.
- Then, tap Location Services.
- You’ll see a list of apps. Find the problematic app and tap it.
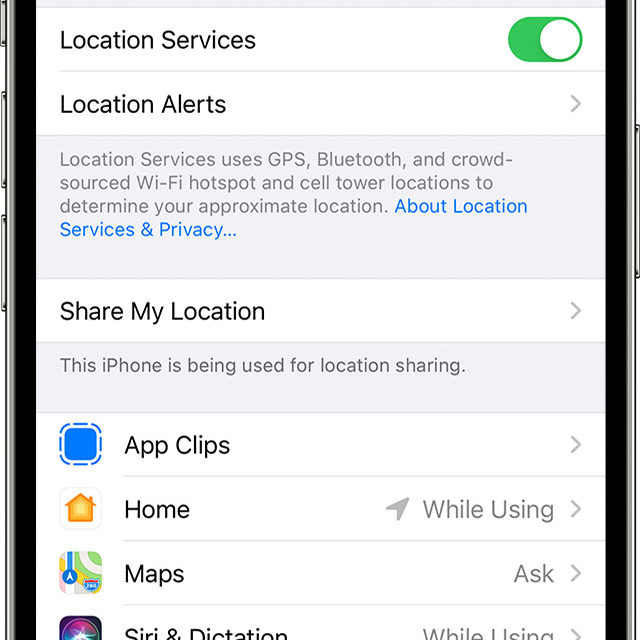
- Make sure there’s a checkmark beside While Using the App.
After that, restart the problematic app. Here’s how to do it:

- Go back to your Home Screen.
- From the bottom of your iPad, swipe up to reveal the most recently used apps. Or you can double-press the Home button to look at all the open apps.
- Find the problematic app.
- Swipe up on the app’s icon to close it.
- Open the app again to test it.
8. Check for App Updates.
Does the problem persist after checking the app settings and restarting the app? You should check if there’s an app update. Sometimes, new updates are needed to ensure the app’s capabilities, including its ability to pinpoint your location, are functioning.
Here’s how to update an app on your iPad:

- First, open the App Store.
- Next, tap your profile icon.
- You will see a list of apps with available updates.
- Tap Update next to the problematic app. You may also want to tap Update All to ensure all apps on your iPad are up-to-date.
If this doesn’t work, try re-installing the problematic app. Here’s how to do it:
- Touch and hold the app until it jiggles.
- Then, tap the X or Delete button.
- A confirmation note will appear. Hit Delete to confirm the action.
- Then, open the App Store.
- Find the app. Download and install it again.
Are you still having issues? Then, it’s time to force restart your device.
9. Force Restart Your iPad.
If the connection or app isn’t the problem, then it’s time to force restart your iPad. This fix may look simple. But this has worked for many iPad issues. After all, restarting your device can eliminate any technical issues that have recently affected its performance.

Here’s how to restart your iPad with a Home button:
- Press and hold the Home and Side buttons until the power off slider shows up.
- Then, drag the slider.
- Then, press and hold the Home button. Wait for the Apple logo to appear.
Here’s how to restart an iPad without a Home button:
- Press the Volume Up (or Volume Down) and the Power button at the same time. Hold these buttons as you wait for the power off slider to show up.
- Then, drag the slider.
- Press and hold the Power button until you see the Apple logo.
If you still need one more solution to fix the iPad “Location Could Not Be Determined” issue, there’s a setting you can restore to factory default. Learn more below.
10. Reset Location Services.
At this point, you may want to reset your location settings to the factory default. This should remove any updates or garbage memory that have affected Location Services.
Here’s how to reset Location Services:
- On your iPad, go to Settings.
- Select General.
- Then, tap Reset.
- Select Reset Location & Privacy.
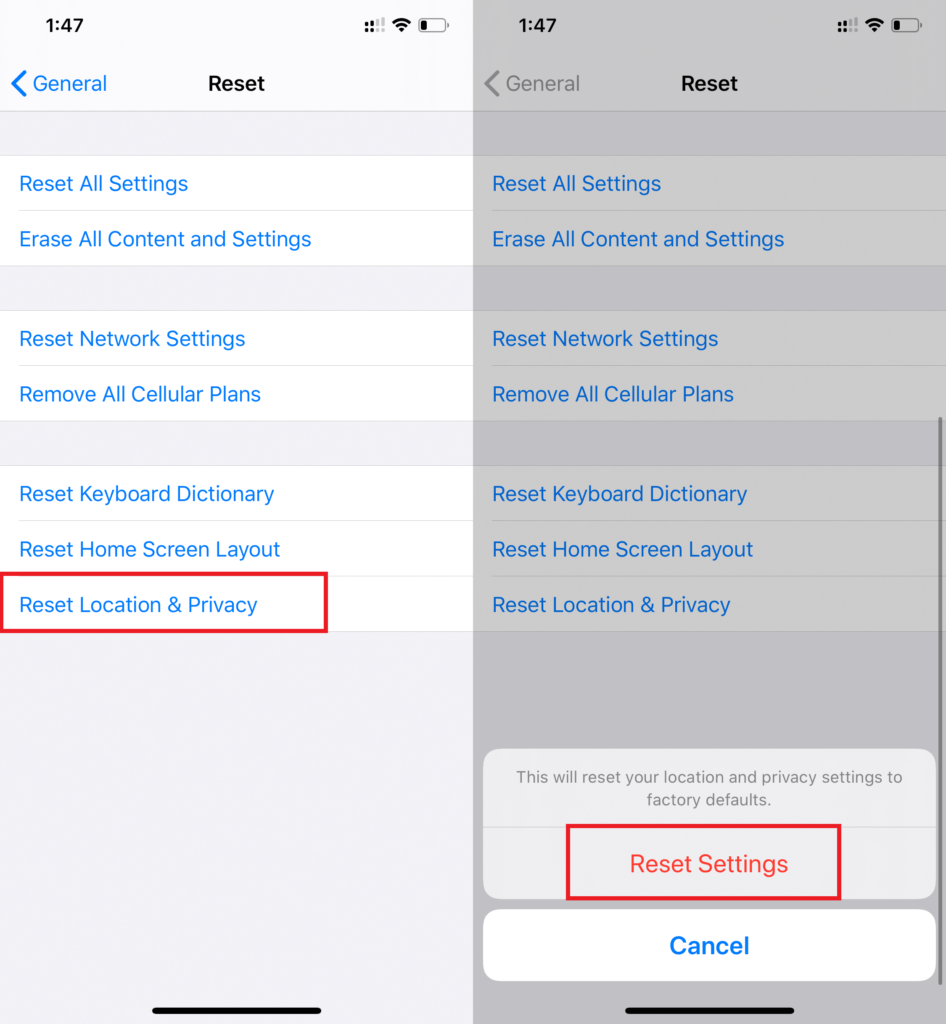
- Follow the on-screen instructions to complete the reset.
If doing all the solutions above did not work, it’s time to report the issue to Apple.
11. Report an Issue.
No matter how great it is, Maps still has flaws. If you think the problem is because your location is a missing place on Maps, you can easily add it to the Maps app.
Here’s how to add a missing place on Maps:
- On your iPad, open Maps.
- Tap the Info button in the upper-right corner.
- Select Add a Missing Place.
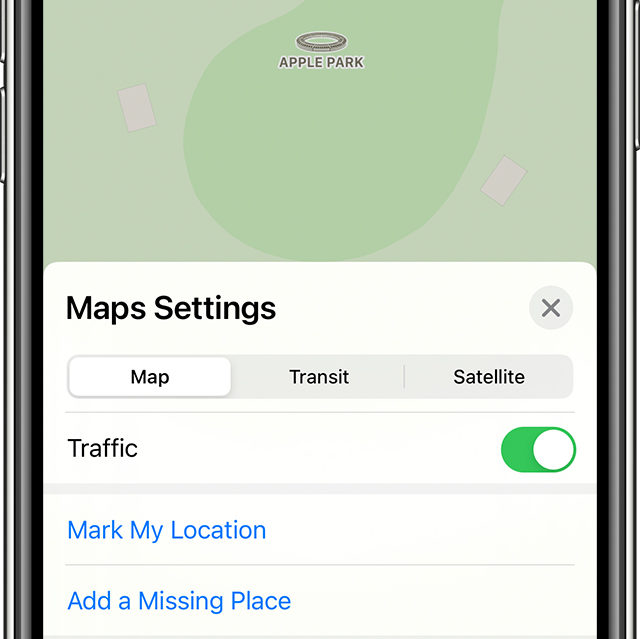
- Follow the on-screen instructions to complete the process.
Otherwise, you can report the “Location Could Not Be Determined” error to Apple Support. You can get in touch with them through email, live chat, or phone. You can also set a Genius Bar appointment online before going to the nearest Apple Store.
That wraps up the article. We hope we’ve helped you fix the iPad “Location Could Not Be Determined” error that has been bugging you. Need more troubleshooting tips? Don’t hesitate to write your questions or concerns below. We’ll do our best to answer them.