Want to learn why you’re getting the fltmgr.sys stop code on Windows 11?
The Microsoft File System Filter Manager, otherwise known as the fltmgr.sys is responsible for ensuring that all the data in your system’s hard drive stays in its specified location and remains readable and accurate. If it doesn’t, you may encounter a Blue Screen of Death (BSOD) error with fltmgr.sys stop code on Windows 11.
This issue is not a rare one, let alone independent. In most cases, it is accompanied by several other BSOD errors, such as Page Fault in Nonpaged Area, Memory Management issues, and more.
Usually, the stated error is caused by a driver error that fails to establish a connection between the computer and its hardware. Other reasons include malware attacks, memory errors, multiple antiviruses installed, corrupted system files, faulty page files, damaged OS, etc. Luckily, we have all the possible fixes for fltmgr.sys stop code on Windows 11.
So without any delay, let’s jump straight to our guide!
1. Check for Hardware Problems.
Hardware components can malfunction not only as the result of physical damage but also due to voltage fluctuations or short circuits. For this reason, we recommend you restart your PC once before proceeding to the fixes below. If the issue occurs right after the system reboot, the fltmgr.sys file might be encountering a problem launching correctly.
To further verify this, you can run a chkdsk scan on your computer, which will diagnose any errors in the hard drive and resolve them if found.
Follow the steps below to do so:
- Launch the Run command box by pressing Win + R keys.
- Type out ‘cmd’ and hit the Enter key to open Command Prompt with administrative privileges.
- Now, type in the following command and press the Enter key:
chkdsk c: /f /r
- Lastly, close the Command Prompt window and reboot your PC to check if it has resolved your problem.
2. Repair Drivers.
The fltmgr.sys file requires drivers to load hardware components during system boot. If, for some reason, the drivers become corrupted or damaged, it hinders the processes, resulting in the fltmgr.sys stop code on Windows 11.
In such a case, uninstall the drivers and reinstall their official versions. Here’s how:
- Press the Win + R keys to open the Run command box.
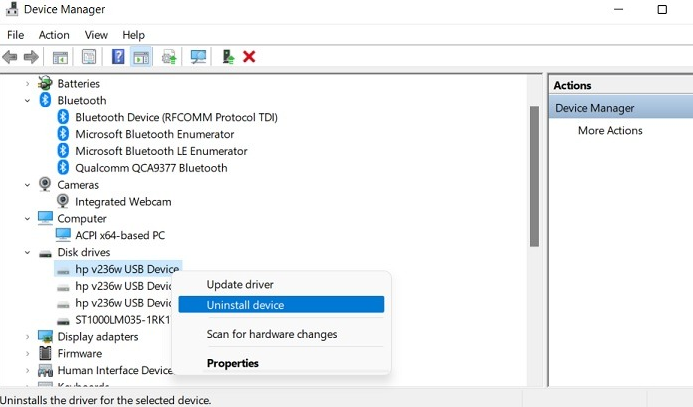
- Type in ‘devmgmt.msc’ in the text field and select OK to open Device Manager.
- Expand the driver that you wish to uninstall by double-clicking on it.
- Then, right-click on a driver and select Uninstall device. Perform the steps mentioned above to uninstall all the suspected drivers.
- To reinstall a driver, head to Windows Settings by pressing Win + i keys.
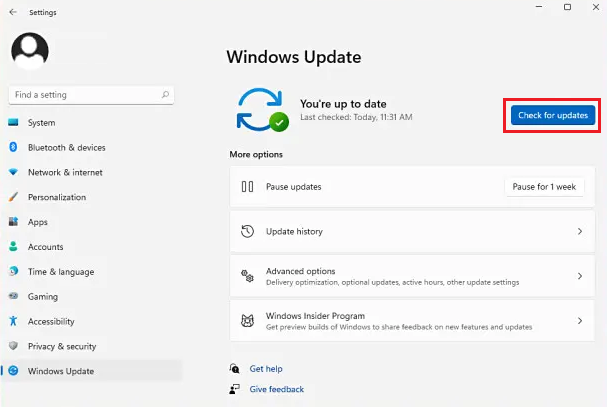
- From the left pane, click on Windows Update.
- Select Check for updates and click on the Download & Install button present under any available updates.
- If your PC fails to show a driver, head to the manufacturer’s website to install it.
3. Repair Corrupted System Files.
Your system files are essential for the working of your computer. If they get corrupted, damaged, broken, etc., you will encounter several types of errors, including the Blue Screen of Death. In that case, you can run a command-line scan known as the SFC to diagnose and repair such files.
Follow the steps below to do so:
- Start by pressing the Win + R keys from your keyboard to open the Run box.
- Next, type in ‘cmd’ in the search bar and press the Enter key to launch Command Prompt as an administrator.
- Now, type in this command to run a DISM scan:
DISM online /cleanup-image /restorehealth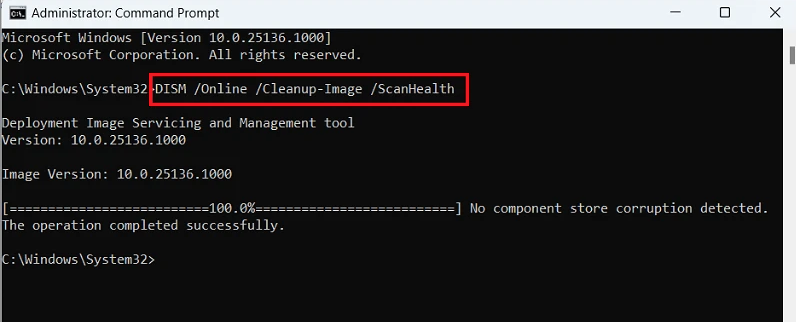
- Afterward, run an SFC scan by following this command and pressing the Enter key:
sfc /scannow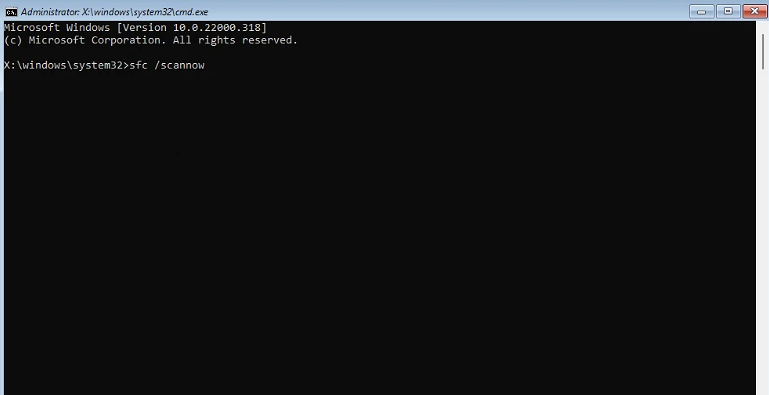
- If it’s done, restart your computer and see if the problem is fixed.
4. Analyze Dump Files.
Windows also stores a memory dump file or a crash dump file that stores information regarding an encounter crash. If you want to dive in deeper into the problem, you can check out the error logs in the dump folder to find possible causes for the fltmgr.sys stop code on Windows 11.
Follow the steps below to do it:
- Go to the Microsoft Store to download and install WinDbg from there.
- Once downloaded, run WinDbg with administrative privileges.
- Next, press the Ctrl + D keys and go to the following location:
%windir%\Minidump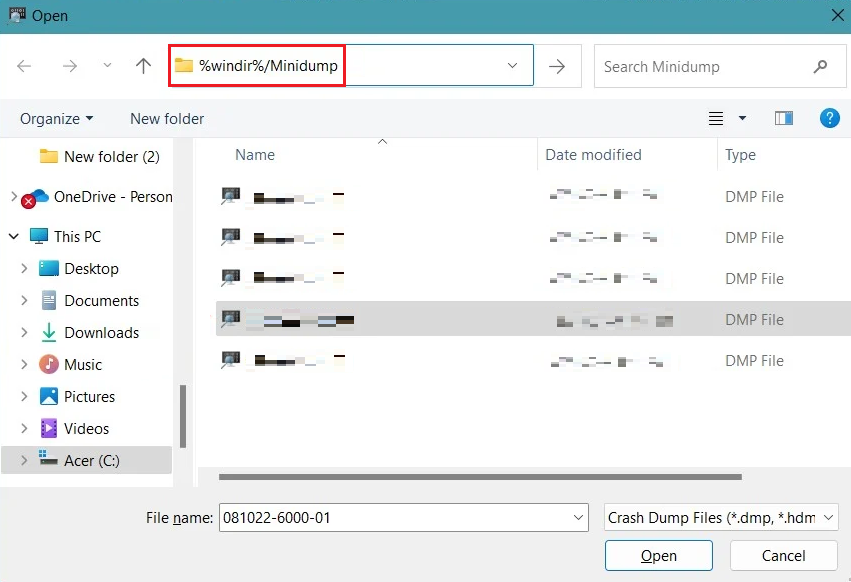
- Once in the Minidump folder, choose a dump file and wait for it to load.
- From the new window, go to the View tab from the top and choose Command.
- In the terminal, type in the following:
!analyze -v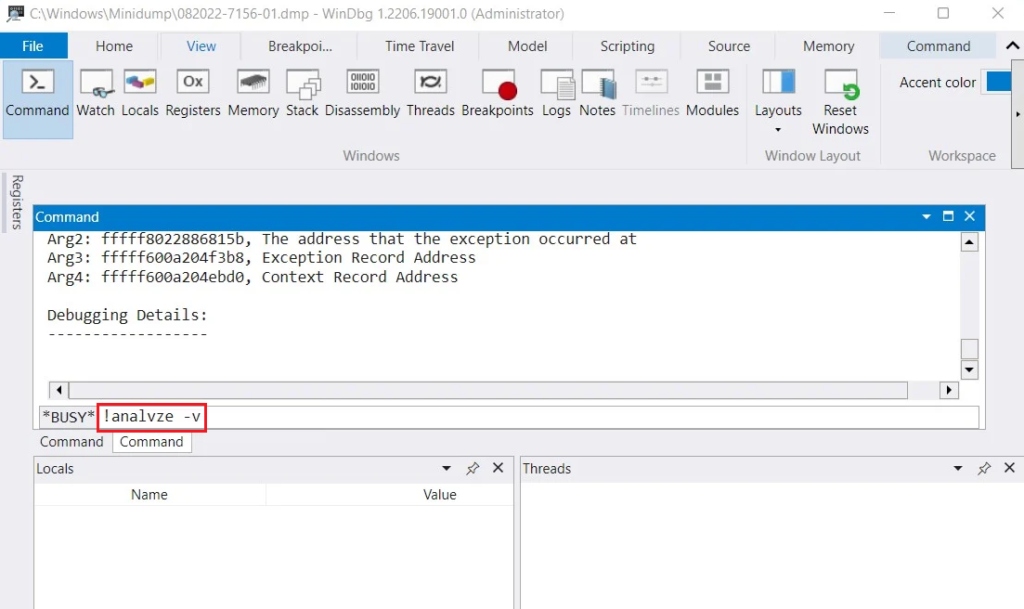
- Go over the details, such as the Module name, Image name, etc., to understand the cause.
- Delete the identified program to resolve your problem.
5. Disable Superfetch Service.
The Superfetch Service preloads the most used applications and services in your system memory to make your PC faster. Before this, it uses the fltmgr.sys file to locate programs in their respective directory. However, your computer may load the applications in advance, causing the fltmgr.sys to malfunction and cause the BSOD error.
To fix this, simply disable the Superfetch Service by following the steps below:
- Open the Run command box by pressing Win + R keys.
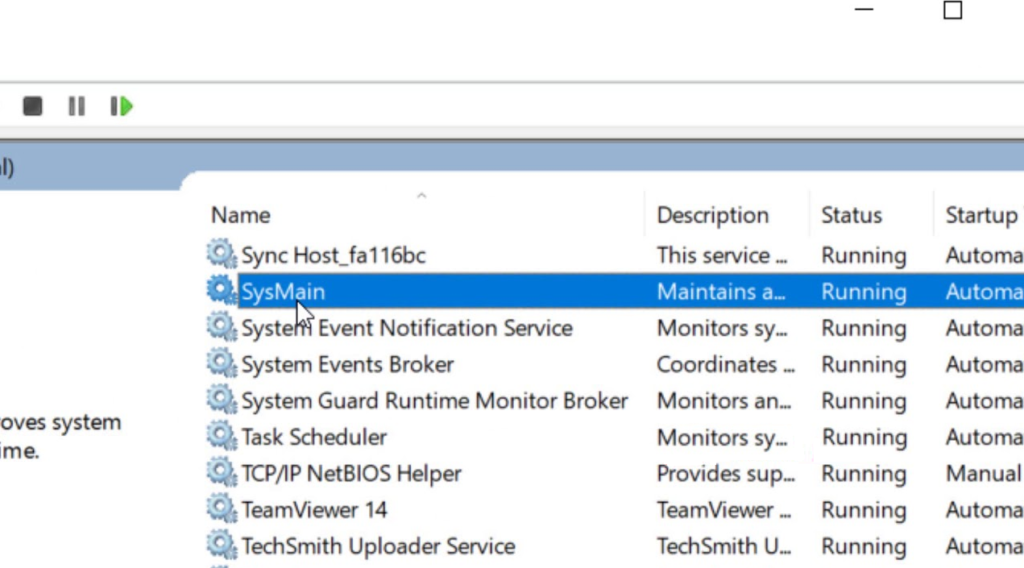
- Type in ‘services.msc’ and click on OK to launch Services.
- From there, look for SysMain and click on it.
- A new window will open. Click on the dropdown menu next to Startup Type and select Manual.
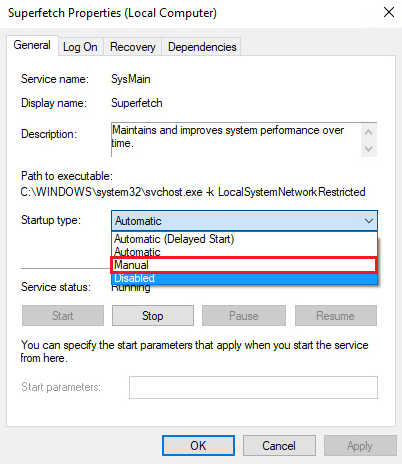
- Click the Stop button, then click OK to save these changes
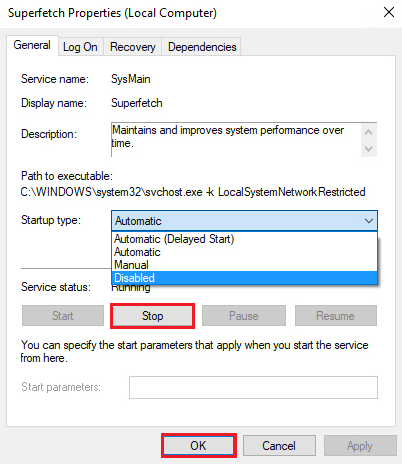
- Finally, reboot your PC and the fltmgr.sys stop code on Windows 11 should be resolved by now.
6. Uninstall Third-Party Antivirus Programs.
Some third-party antivirus programs are so overprotective that they ironically become a threat to your computer. Such software even blocks the necessary default processes and disables required drivers in your computer, resulting in various BSOD errors.
If you believe that’s the cause in your situation, consider disabling the antivirus program by following these steps:
- Open the Run dialog box by pressing Win and R keys simultaneously.
- Enter ‘appwiz.cpl’ in the text field and click on OK.
- Click on the Antivirus and select Uninstall from the top.
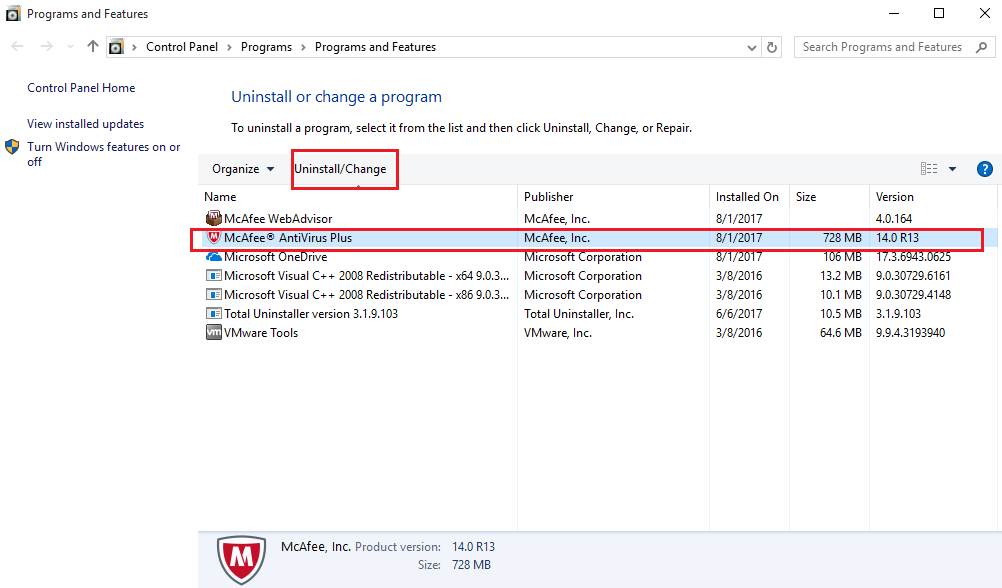
- Once done, restart your system.
7. Perform A System Restore.
If you recently made some changes in your computer and started encountering the fltmg.sys stop code on Windows 11 afterward, you can go back to the previous state by Windows System Restore. When enabled, your PC will automatically create restore points that you can go back to at any time.
Here’s how:
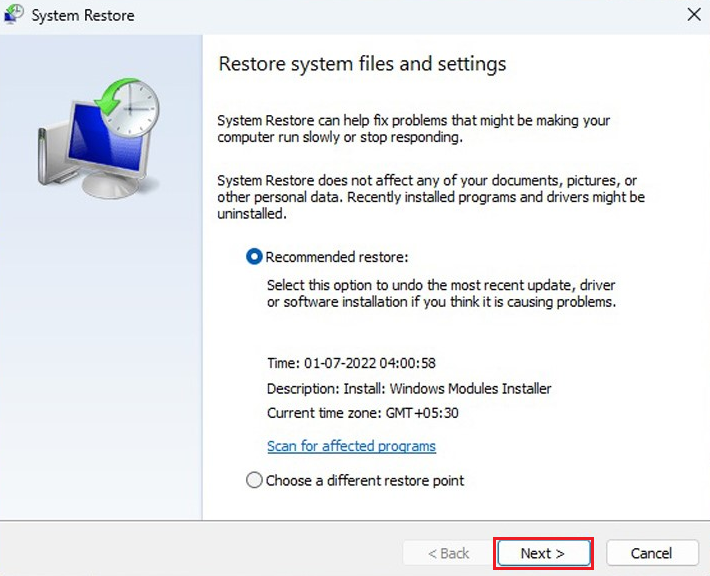
- In the Run dialog box, type in ‘rstrui.exe’ to launch System Restore.
- Either select Recommended restore or Choose a different restore point depending upon whichever one you want to use.
- Click on Next and follow the on-screen instructions to complete the process.
8. Get Help from Microsoft Support.
If all the listed solutions have been unable to resolve the fltmgr.sys stop code on Windows 11, your last option is to seek help from the official Microsoft Support channel. The professional team will assist you in determining the root cause of the error code and suggest a relevant fix.
On this note, we end our guide on how to fix fltmgr.sys stop code on Windows 11. Hopefully, you’ve found our guide helpful. For more questions, head over to the comment section below.
If this guide helped you, please share it. 😊


