

Are you having problems with your Google Meet camera not working in Chrome on Mac?
Video communication tools have been popular during these times. Many people have been utilizing Zoom, Skype, Google Meet, and other related tools and services to communicate with their co-workers, friends, and family.
Google Meet is an online video conferencing tool that allows you to hold virtual meetings, training, interviews, events, and many more. It has become quite popular with many users as it is one of the many reliable tools that Google released in 2017.
However, several users had reported that they had encountered issues wherein the Google Meet camera is not working in Chrome on Mac. What’s even weirder is that this only occurs when using Google Meet. Other tools in Mac can use the camera perfectly fine.
If you are also seeing this issue, fortunately, we have compiled a list of fixes so you can get rid of this problem once and for all.
Let’s get started!
1. Enable Camera Access.
The first and most important thing to check when you are seeing this issue is if you have enabled Mac and Google Chrome access to your camera. If you have not enabled it, it will restrict you from using your camera. This will prevent you from being visible to the other participants.
At the same time, you need to ensure that your camera is turned on. You should see a green light beside your camera to let you know that it is turned on and is being used.
Here’s how you can enable the camera access:
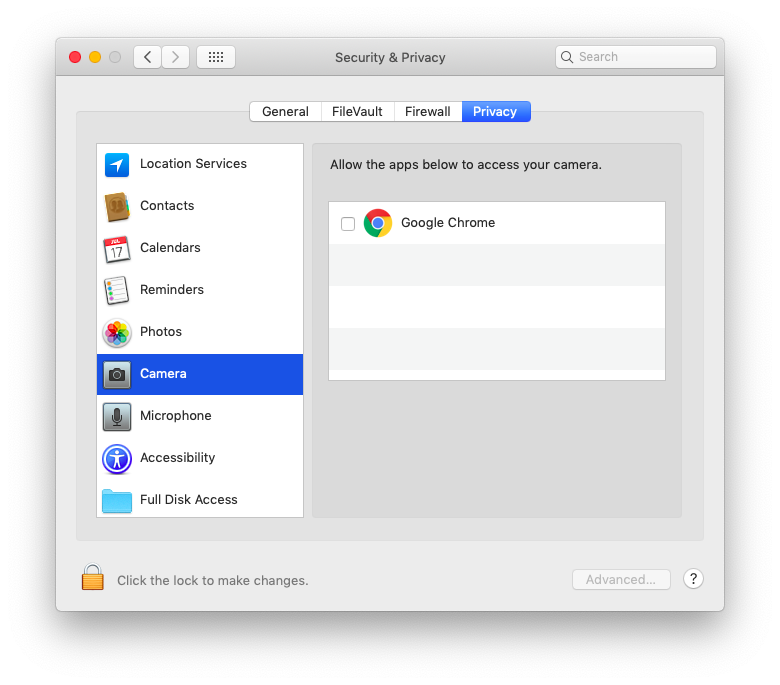
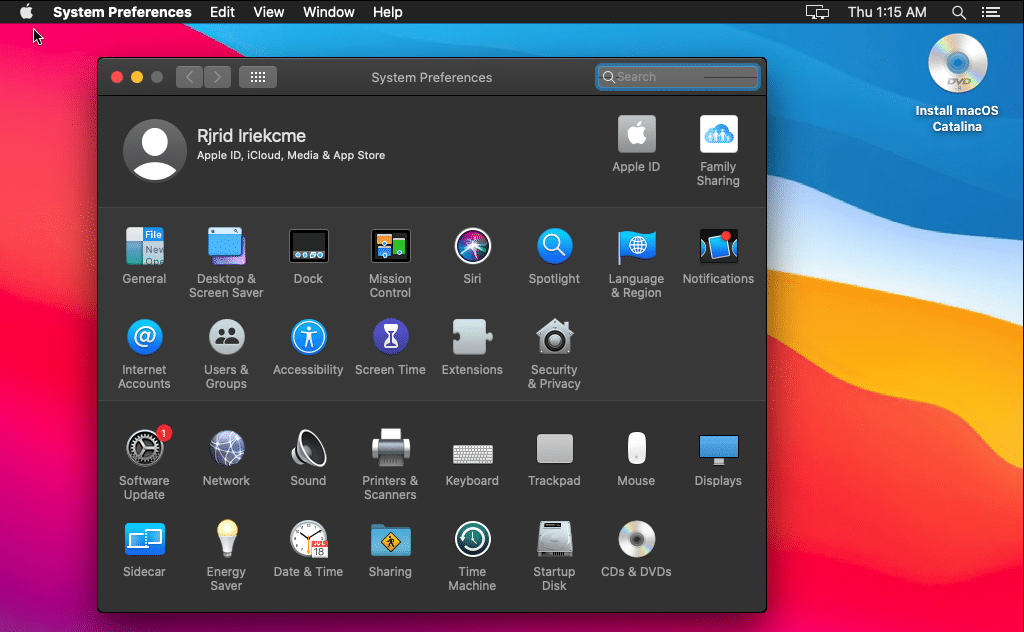
- Start by clicking the Apple menu and choose System Preferences.
- Now, select Security & Privacy and switch to the Privacy tab.
- Then under Camera, enable Google Chrome.
Here’s how you can enable camera access on Google Chrome:
- First, restart Google Chrome and type chrome://settings/content/camera in the address bar.
- Now, disable the setting ‘Ask before accessing’.
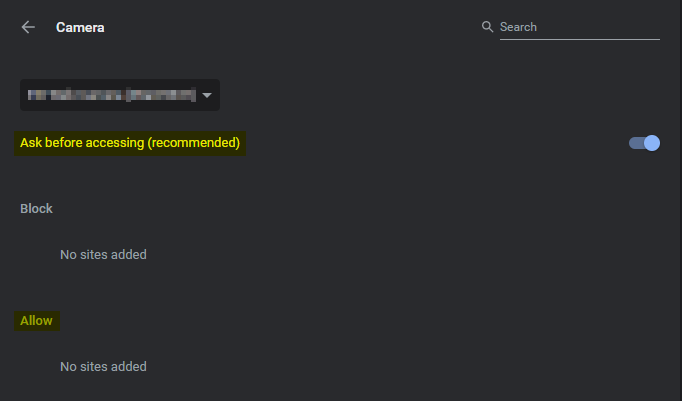
- Then under ‘Allow’, delete https://meet.google.com:443 if it is present.
- After that, refresh the Google Meet page and grant camera access to Google Chrome once you are prompted.
With that out of the way, check if your Google Meet camera is still not working in Chrome on Mac. Hopefully, it has been fixed for you, but if not, see our next method!
2. Turn Off Hardware Acceleration.
If you are still having the issue even after granting camera access to Google Meet, it is time for you to turn off the hardware acceleration. It is not always recommended to turn off hardware acceleration on Chrome. But if your Mac can handle it, you should be good to go.
Hardware acceleration works by moving some of the burdens off of your Mac’s processor. This can help resolve some processing problems.
Here’s how you can turn off the hardware acceleration:
- First, restart Google Chrome and type chrome://settings/system in the address bar.
- Now, disable the setting ‘Use hardware acceleration when available’.
- Then click the Relaunch button that will appear to restart Chrome.

When you are done with that, see if the Google Meet camera is still not working in Chrome on your Mac. This has resolved the issue for some users, so let us know if it did the same thing for you.
3. Restart Mac.
After enabling camera access and turning off the hardware acceleration, you should now restart your Mac. It is a must to perform a restart after modifying your settings, be it on the System Preferences or in Google Chrome itself.
What a restart does is it fixes any malfunctions or temporary bugs in your system. Since it closes all open programs, it allows itself to start fresh. Then it installs any pending updates, which can optimize your Mac’s performance.
Here’s how you can restart your Mac:
- Start by clicking the Apple menu and choose Restart.
- A window should open up on your screen, asking you to restart. Select Restart to proceed.
- After that, wait for a few minutes for your Mac to shut down and completely restart.

Now, monitor if you will still experience the same issue with your Google Meet camera. Fortunately, you are no longer seeing the issue, but if worse comes to worst, you should check out our next method.
4. Downgrade Google Chrome.
Although it is not recommended to downgrade to the previous version, this is an isolated scenario. At times, the latest version of Chrome is the reason why the issue is even present. To fix this, you should revert to the previous version.
But as a disclaimer, you may lose your bookmarks, history, and other saved data on your Google Chrome. This is because, to downgrade, you will need to uninstall your Google Chrome, which will eventually remove your browser’s saved data.
Here’s how you can downgrade Google Chrome:
- First, uninstall Google Chrome by dragging its application icon to the Trash.
- Now, download the previous version of Chrome here.
With that out of the way, check if the problem will still happen again. Hopefully, your burden has been lifted off by now!
5. Update macOS To The Latest.
If any of the previous methods that you tried did not work, the next thing to do is to update your macOS. If you have always been clicking on ‘Remind me tomorrow’ when you are prompted to update, then you should take this opportunity to do the update.
Here’s how you can restart your Mac:
- Start by clicking the Apple menu and choose System Preferences.
- Now, click on Software Update if an update is present.
- Then select Update Now to download and install the update.

- After that, restart your Mac if it did not automatically restart.
Once that is completed, see if you will notice any difference in your Google Meet camera.
If you also happen to see the issue with the mouse cursor disappearing on your Mac, updating your macOS is something you are now required to do to resolve both issues.
6. Try CleanMyMac X.
Don’t be frustrated if you are still experiencing the issue because we’ve got the perfect solution for you!
CleanMyMac X is packed with more than 30 tools to help you fix the most common Mac issues that you may encounter. It can function as a macOS cleaner, a performance monitor, a malware remover, a storage and apps manager, and other things that you can probably think of.
That’s not all there is to CleanMyMac X! It can also clean any temporary files inside iTunes, Mail, and Photos. At the same time, it can find all those hidden, unwanted files that you have been itching to remove for some time now.

As of the moment, CleanMyMac X is being used by many Mac users since it can work for macOS 10.10 and higher. Another good thing about it is that it is available in 13 different languages. What’s even more surprising is that it currently has a rating of 4.9 stars which is based on 539 user reviews in the App Store.
Don’t let these problems overcome you!
7. Contact Apple Support.
However, if you have reached this last part of the list, then you should now contact Apple Support. It’s always a good practice to report any difficult issues that you are facing so Apple can be aware of them. It may be a Google Chrome issue, but it does not hurt to inform Apple about it. You may never know if they have a potential fix for you if you will not try to contact them.

At last, we have come to the last part of our article. Let’s help each other out because you are not alone in this. So please let us know if any of these methods worked for you.
If this guide helped you, please share it. 🙂
