

Having trouble figuring out how to install and use TinyCP on Ubuntu?
Control panels are dashboard-type applications that are great to configure and control your system settings. All of the popular operating systems have built-in control panels from the start. However, you can also install other control panel software as well, per your liking.
TinyCP is one of the most popular control panel applications available in the market right now. It is available for Windows, Linux, and Mac. However, you can use it mostly for Linux systems. It is a web-based application that you can use for multiple utilities other than the basic control panel tasks.
The reason why TinyCP is widely used is that it is a comparatively lightweight application and is web-based. More importantly, you can use it to control domains, mailboxes, databases, VPN, FTP connections, etc.
If you are using Linux and wondering how to install and use TinyCP, you are at the perfect place, as this article will guide you through the installation process and also guide you through the basics of using TinyCP.
So, here we go!
Installing TinyCP.
First, you need to install TinyCP on your system. There are no TinyCP repositories available for Linux right now, so an installer is a need that will aid you in getting TinyCP. The installer is available for different Linux distributions, and each distribution has its own set of commands to download the installer. We will first look at the commands you can use for Ubuntu.
Follow these steps.
- Open the Command Terminal.
- For successfully installing TinyCP, you first need to get “gnupg” and the “ca-certificates”. You can use the following commands for this purpose.
$ apt install gnupg ca-certificates
- Next, you need to add the TinyCP keys to your system. Use the following commands.
$ apt-key adv --fetch-keys http://repos.tinycp.com/ubuntu/conf/gpg.key
$ echo "deb http://repos.tinycp.com/ubuntu all main" | sudo tee
/etc/apt/sources.list.d/tinycp.list
- In the next step, you need to update your system repositories using the following command.
$ apt-get update
- After you are done with the above-mentioned steps, use the following command to install TinyCP.
$ apt-get install tinycp
- You should see the progress of your installation process on the terminal screen
Next, we will discuss the commands that you can use to install TinyCP on Debian.
- For installing TinyCp on your Debian system, you need to get “apt-transport-https”, ”dirmngr” in addition to “gnupg” and “ca-certificates” we installed for Ubuntu. Do this by executing the following command.
$ apt install apt-transport-https dirmngr gnupg ca-certificates
- Next, add the keys for TinyCP as we instructed for Ubuntu.
$ apt-key adv --fetch-keys http://repos.tinycp.com/debian/conf/gpg.key
$ echo "deb http://repos.tinycp.com/debian all main" | tee /etc/apt/sources.list.d/tinycp.list
- Update your repositories using the following command.
$ apt-get update
- Then, install TinyCP on the Debian system.
$ apt-get install tinycp
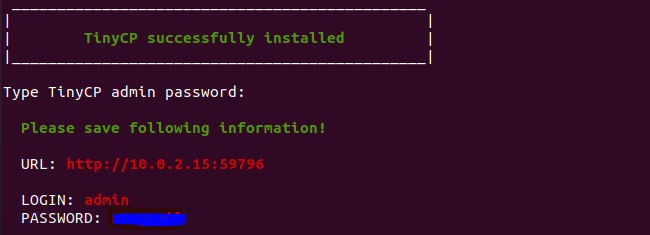
After installing TinyCP, you should see the following on your terminal screen. You should be provided with a URL link that will take you to your TinyCP portal. Furthermore, you are also given the username and password as your login credentials.
How to Use TinyCP?
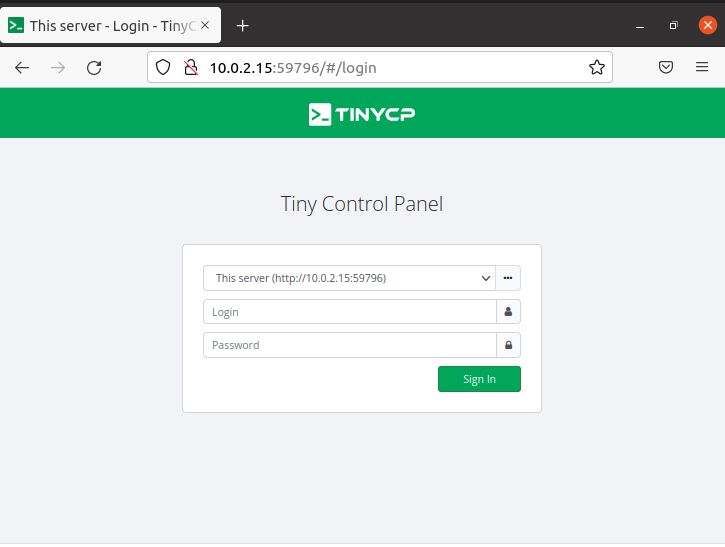
As you now know the URL and the login credentials for your control panel dashboard, you can access the web portal. Enter the URL in your preferred web browser, and you should see this pop on your screen.
Enter the login credentials in the prompts provided on the screen, and you should be able to see the following interface.
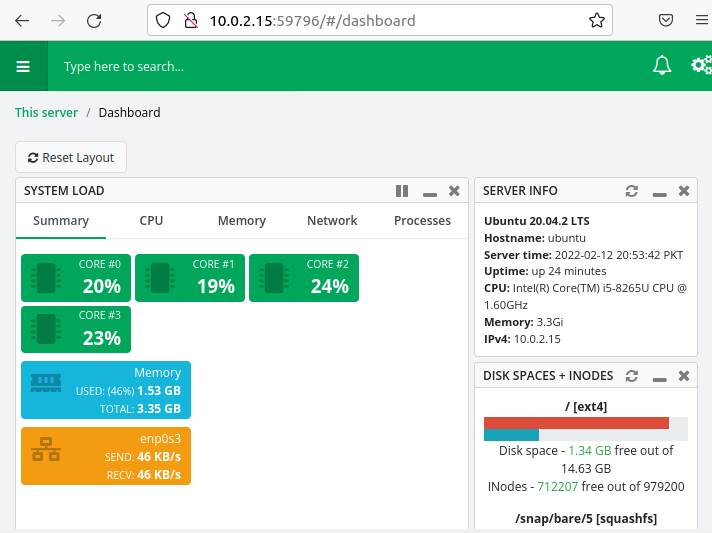
You can see that the application gives you information regarding everything on your system. This includes the system resources consumed, the amount of memory left on your system, and the total processors used.
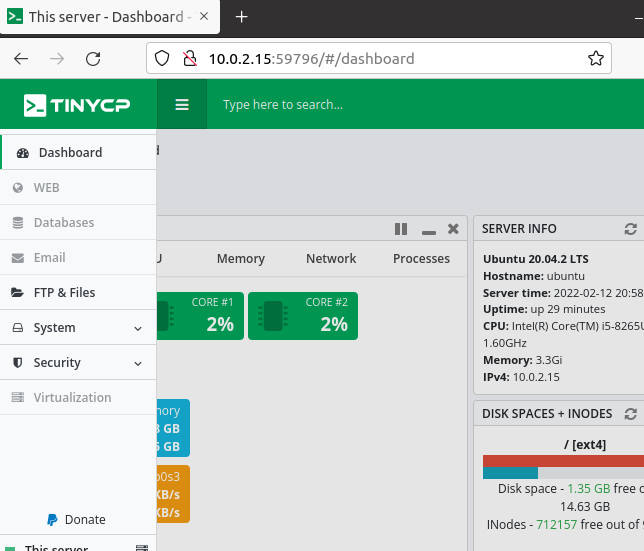
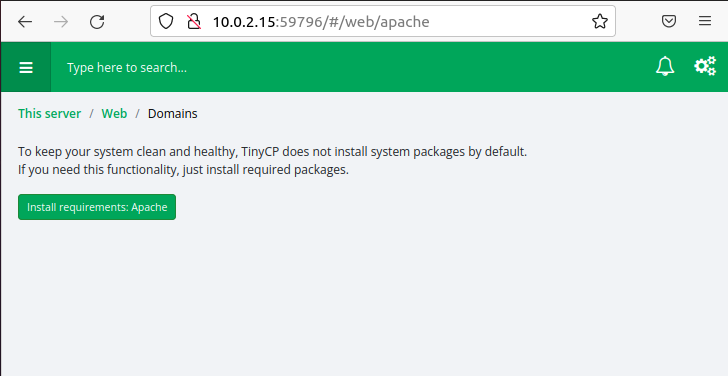
As mentioned before, there are other features available with TinyCP as well. Click on the “options” icon to see the available features.
To access these features, you need to install different packages. You can install these packages from the dashboard itself. One of the packages you can install is “Apache” which allows you to configure your domains, use WordPress and RoundCube, and play around with your PHP settings.
Other Linux packages that are available on TinyCP include an Email application that can be used to manage your email. You can also access Nginx on TinyCP. It is a powerful software using which you can perform various tasks online related to internet traffic being used by your system.
The tasks that you can use Nginx for include reverse proxy, mail proxy, load balancing, and media streaming. You can also install Nginx separately but installing and configuring it on your Linux system is a big hassle. It will be easier for you if you just use TinyCP to install and use Nginx.
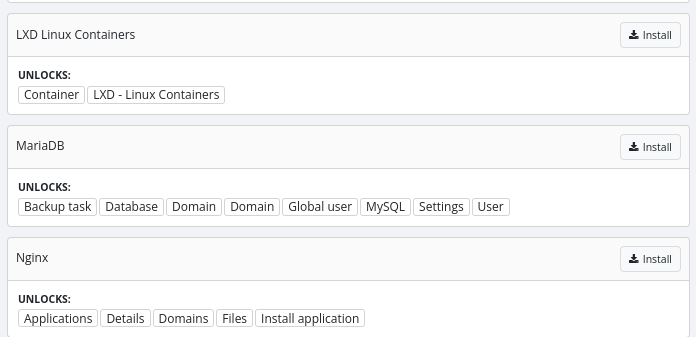
Then there is the provision of creating FTP servers and connections. FTP stands for File Transfer Protocol, and it is a fast and secure way to transfer files from one system to another using a secure network connection. It is usually used for systems connected locally to each other.
As we have looked at TinyCP, let’s have a look at an application that can provide Linux users with the complete Windows experience. Although Linux is quite an accomplished operating system slowly getting more and more popular, there are some features of Windows that Linux lacks.
One of the most valuable features that Windows provides is MS Office. Linux does have its own LibreOffice, but its applications can’t be compared to the applications of MS Office. In cases where a Linux user wants to use MS Office, they can install Wine on their systems.
Wine is an application that aims to provide Linux users with a separate Windows environment. It is different from forming a virtual machine and can be very useful. To understand how to install it, go to this Wine link.
This was an article on how to install and use TinyCP. We looked at the steps you need to follow to install TinyCP and then gave you an overview of the different utilities TinyCP provides. The software itself is resourceful and useful. The features it offers, in addition to the normal control panel tools, are what make it attractive.
If this guide helped you, please share it. 🙂
