Looking for a quick guide on how to organize files on Mac efficiently?
You’re ready to be productive for the day. You sit on your office chair and open your MacBook right away. But then, a little yet extremely annoying hurdle gets in the way—you can’t find the files you need. That’s no matter how many folders you open.
Searching for a single file for hours can be frustrating. It can ruin your day and even delay crucial projects. But we’re here to help. Whether you are a new Mac user or want a new efficient way to organize files on Mac, you can benefit from this guide.
In this article, we’ve listed different ways to organize your files. But here’s a caveat: there’s no one perfect way to organize items and folders on a Macbook. Read all the tips. Then, see which one (or two) works for you. Here’s how to organize files on Mac.
Let’s get started!
1. Organize Items Into Folders.
You can group items into folders easily. You can leave the folders on Documents. But keep in mind that many Mac apps use Documents as a default location to create and store folders. That can confuse you whenever you go there to look for a single item.
One trick is to group items into folders by project or type. You can use subfolders to keep your files in order. Plus, be sure to store them in the most appropriate locations.
For starters, here’s how to create a folder:
- On your Mac, launch Finder. Then, navigate where you want to create the folder.
- Choose File. Then, select New Folder. Alternatively, press Shift-Comand-N.
- Type in a name for the folder. Then hit Return.
Now, here are different ways to move items into a folder:
- Drag one item to the folder.
- Want to put several items in a folder? Select them. Then drag one of the items to the folder. All selected items will then move to the folder.
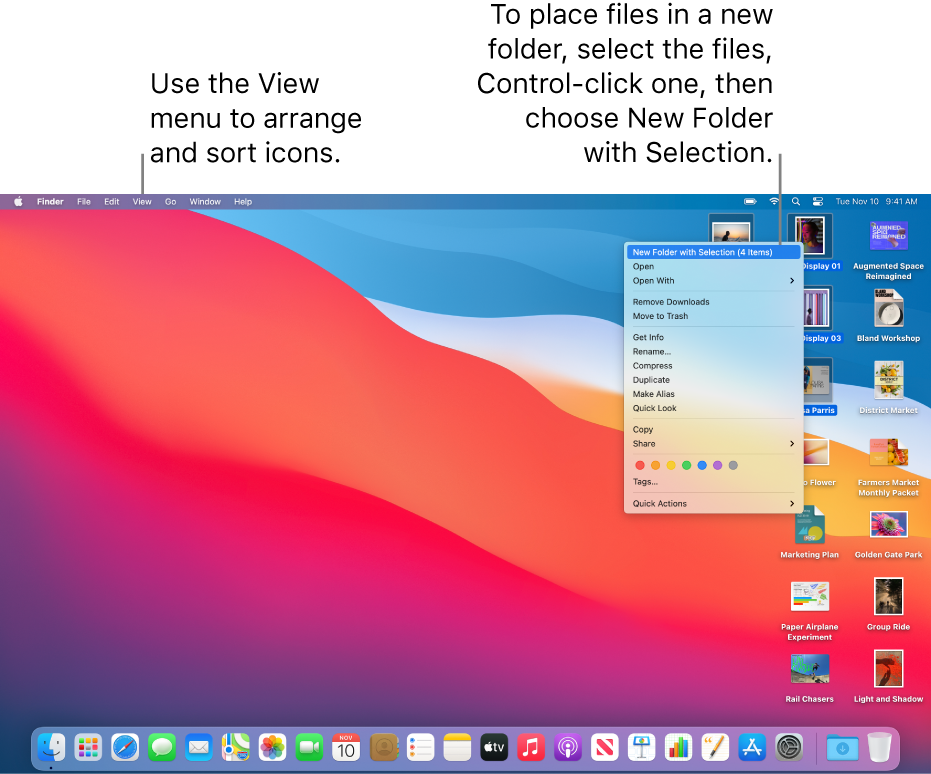
- If the destination is a new folder, select all the items you want to group. Then, control-click one of the selected items. Next, choose New Folder. Enter a name for the folder, then press Return.
- You can also make a copy of an item and move it to a folder. Select the item, then press and hold the Option key. After that, drag the item to a folder.
You can also easily merge two folders with a similar name, even if they’re at two different locations. Here’s how to do it:
- First, press and hold the Option key.
- Drag one folder to the location where a folder with the same name is stored.
- A dialog box will appear. Choose Merge.
Now that you’ve mastered creating new folders, moving files into folders, and merging folders, it’s time to try out more complex organizing tricks. Check them out below.
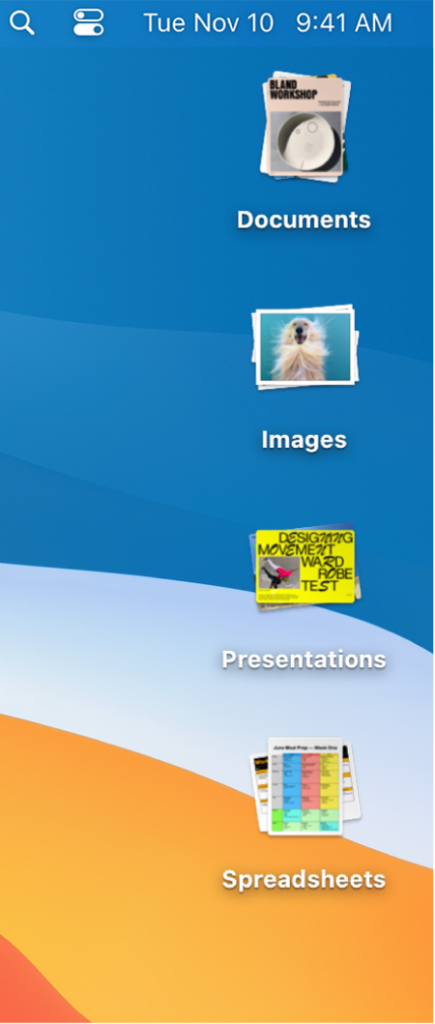
2. Use Stacks to Organize Desktop Files Automatically.
Do you prefer storing your files on the Desktop? That can be convenient if you use these files regularly. You no longer need to launch Finder or Spotlight to hunt for those files. But too many files on the Desktop will look cluttered eventually.
This is where Stacks come in. It is a feature that keeps your files organized in groups on the Desktop. And it does the job automatically! But you have to set your preferred sorting and grouping option beforehand. That way, any new files you add can go immediately to the correct stack.
Here’s how to set the sorting and grouping options for stacks on your Desktop:
- Control-click or right-click on the Desktop.
- Choose either Sort Stacks By (how files are arranged within stacks) or Group Stacks By (how stacks are arranged on the Desktop) on the pop-up menu.
- Then, select the appropriate option from the sub-menu. You can sort and group stacks by file type, size, date added, date last opened, or tags.
After sorting and grouping Stacks, here’s how to activate Stacks on your Desktop.
- Click the Desktop.
- Then, choose View.
- Next, select the Use Stacks option. Your Desktop will automatically be organized depending on the grouping and sorting you’ve set.
- Want to revert to your previous Desktop organization? Deselect Use Stacks in the View menu on the Finder.
Looking for more tips on how to organize files on Mac efficiently? Browse through below.
3. Use Tags to Organize Files Across Locations on Mac.
One thing that can make your file organization more efficient is Tags. This feature makes items in Finder easier and faster to locate. Plus, you can use Tags to connect mixed media stored in different folders across many locations on your Macbook.
Here’s how to tag a file in Finder:
- Launch Finder.
- Right-click the item you want to tag.
- Then, select one of the colored tags in the dropdown menu. Alternatively, click Tags… then a dropdown menu will show up. You can enter a custom name for a tag. Press Return to confirm the new tag you’ve created. That new tag will be available as a colored tag the next time you see a dropdown menu for tagging.
Here’s how to customize Tags and search for tagged items:
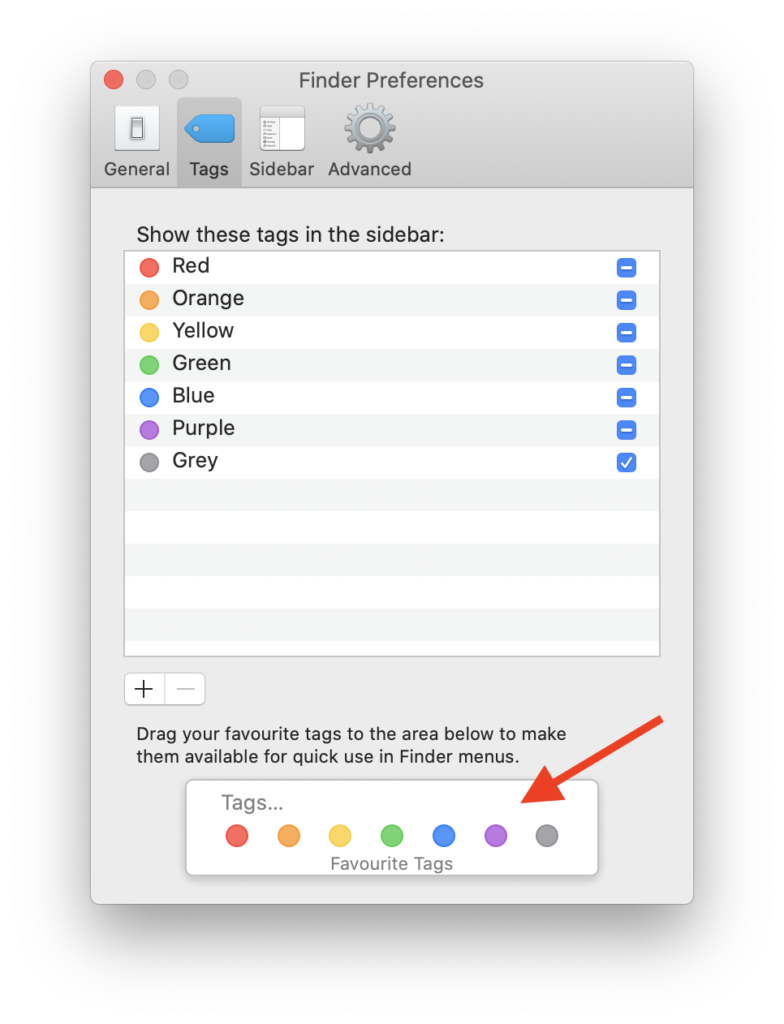
- In the Finder menu, click Preferences.
- Select the Tags tab. Find your favorite tags in the list and drag them to the area at the bottom of the pane. That way, your favorite tags will always be in the dropdown menu for tagging.
- Create new tags and remove unnecessary tags by using the + and – buttons next to the colored tags on the list.
- Rename or change the color of a tag by right-clicking it. Also, tick the checkboxes next to a tag if you want it to show up in the Finder sidebar.
- Search for a tagged item by clicking a tag in the Finder sidebar. Alternatively, you can type the tag color or name in the search box of the Finder.
4. Use Images as Folder Icons.
Have you already arranged files into folders? Are you done creating stacks and tags? Does the Finder still look cluttered? Try using images as folder icons. It is a good trick, especially if you want a folder to stand out from the rest. This trick makes it easy to spot.
Here’s how to set an image as a folder icon:
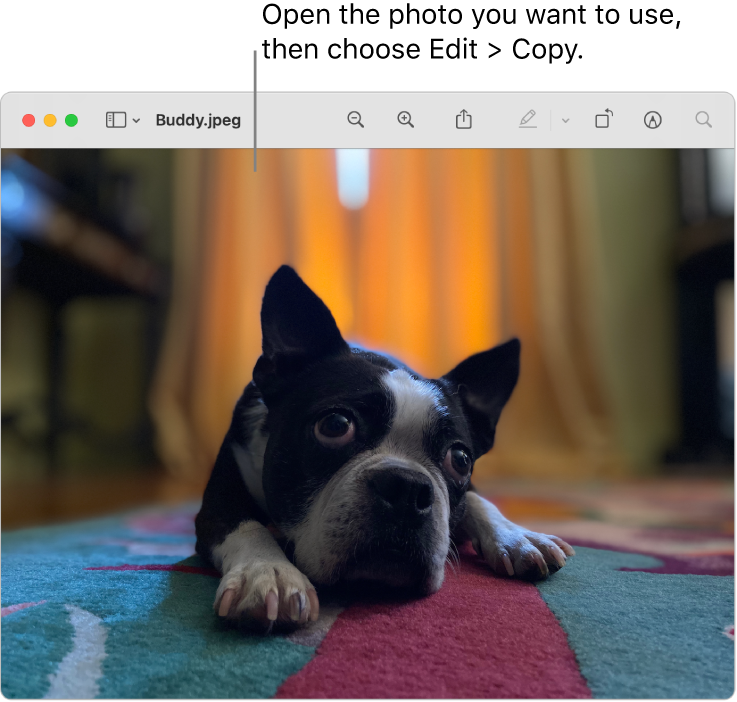
- First, open an image in Preview.
- Then, use Command+A to select it and Command+C to copy it.
- Next, go to Finder. Select the folder icon you want to stand out.
- Hit Command+I. Then, click the current icon and press Command+V.

Want more ideas on how to organize files on Mac quickly? We’ve got more tips below.
5. Create a Smart Folder to Find Certain Items Quickly.
A Smart Folder isn’t a typical folder. If anything, it’s a saved search. macOS only displays these saved searches as folders to make related items quicker to find. You can create a Smart Folder to see recently created documents or duplicate downloads.
Note that Smart Folders don’t store those related items in new folders. These files will remain where you first saved them. Smart Folders only give you a snapshot of all the related items you want to see and point you to their actual location.
Here’s how to create a Smart Folder:
- In the Finder menu, click File.
- Then, select New Smart Folder. Alternatively, you can press Command+Option+N.
- Type your main criteria in the search box. (For example, you can type “Photos,” “Application,” or “File Size.”) Then press Enter.
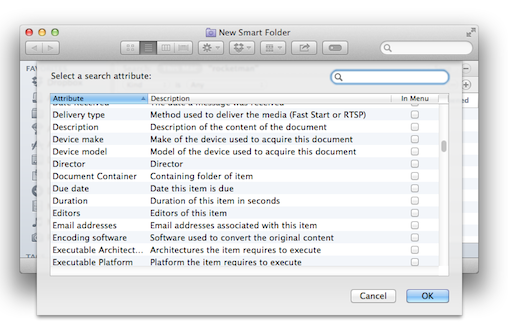
- Click the + sign button next to the Save button and under the search box if you want to add more search criteria.
- A dropdown menu will show up. Select the criteria you want to add. Click Other… if you wish to explore other criteria you can use to refine your search. Search attributes include file contents, date, audio bit rate, and many more.
- Click – sign button if you change your mind and want to remove a search attribute.
- Hit Save to finish creating the Smart Folder.
- Lastly, create a name for your Smart Folder. Click Save after typing a name.
After that, macOS will do the work. You will see a Smart Folder full of files that match your search criteria. You can then locate the files you need quickly. Or you can even use the Smart Folder to see files you can delete to free up some space on your Mac.
6. Use Third-Party Tool to Organize Files Automatically.
Got no time to search and organize all the files you currently have on Mac? Try using a third-party tool like Hazel. This tool can monitor and organize folders automatically. All you have to do is set conditions or rules beforehand. Then, all the files that met those conditions will be color-coded, stored in one folder, or whichever you set it to be.
Here are other things Hazel can do:
- Use a specific software to open a specific file automatically
- Decompress compressed files automatically
- Cleans up the file cache automatically
- Organizes photos in the corresponding folder according to year-month
- Import media files to set destination folders automatically
Third-party organizing tools like Hazel can automate tasks that can be tedious and redundant. That way, you can keep your files on Mac organized for a long time.
This wraps up our guide on how to organize files on Mac efficiently. We hope that you’ve learned great organizing tricks to make your days more productive. Want more tech guides to maximize your Mac? Don’t hesitate to leave a comment below.