So you’re all excited to download the latest version of iOS, but suddenly, you get greeted by a “This update requires a Wi-Fi network connection to download” error.
What’s causing it?
This issue is fairly common, especially on major iOS releases where the update file can reach 5-6 GB in size. Strangely enough, this message can sometimes appear even when connected to Wi-Fi.
Today, I’ll show you what to do if you see this error even when you’re connected to Wi-Fi.
TL;DR Version
If you can’t update your iPhone via Wi-Fi, you can try these troubleshooting steps:
1. Restart Your iPhone
A temporary bug or error may have occurred on your iPhone, causing it to detect that you’re still using cellular data.
Restarting your iPhone should refresh your operating system and resolve any temporary issues.
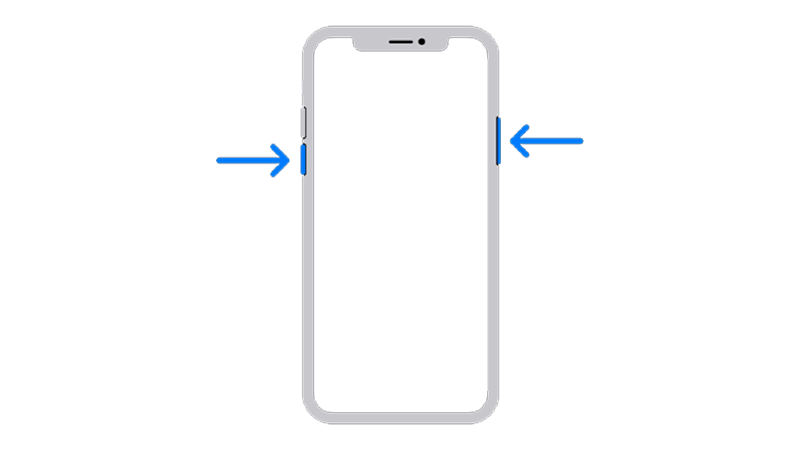
If you’re using an iPhone with Face ID, here’s how you can restart it:
- Hold the Volume Down and Side buttons until the ‘Slide to Power Off’ prompt appears.
- Now, drag the slider to the right and wait for 30 seconds.
- Press the Side button afterward to turn on your device.
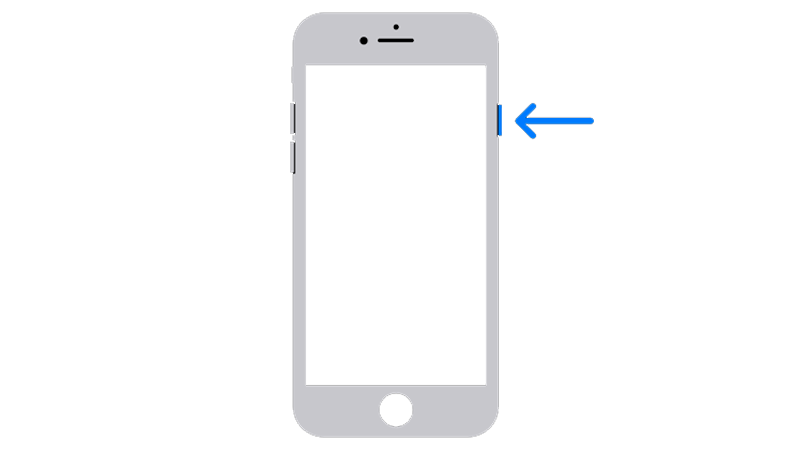
For iPhones with Touch ID, you can restart them by doing the following:
- Locate the Power button on your device.
- Hold the button until the ‘Slide to Power Off’ prompt appears.
- Drag the slider to the right and wait 30 seconds before turning on your device.
2. Restart Your Network
Your Wi-Fi connection could be unstable, which causes problems downloading software updates.
To confirm this, perform a speed test to check if you’re getting the correct bandwidth indicated on your monthly subscription.
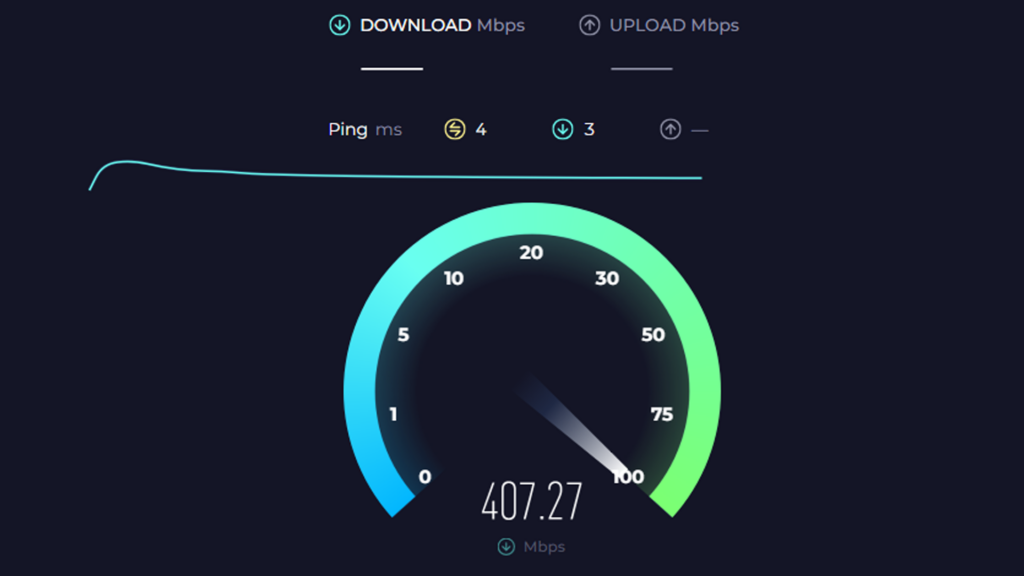
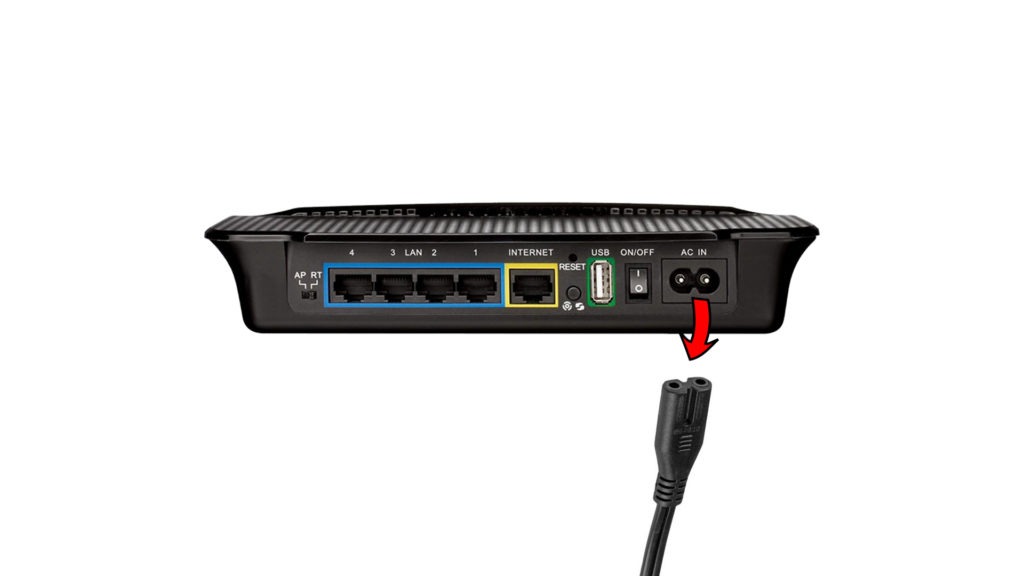
If not, restart your modem or router to re-establish the connection with your ISP:
- Unplug your router from the outlet.
- Wait for 5-10 seconds.
- Plug back in your router.
Note
If your router isn’t plugged into the wall, find the power button to turn it off.
Re-run the test afterward to check if the problem is solved. If not, contact your service provider and ask them to fix their service.
3. Try Another Network
You can also try a different network (if available) to see if the problem is with your home network.
Your ISP might be experiencing issues at the moment, which prevents you from downloading large files and over-the-air updates.
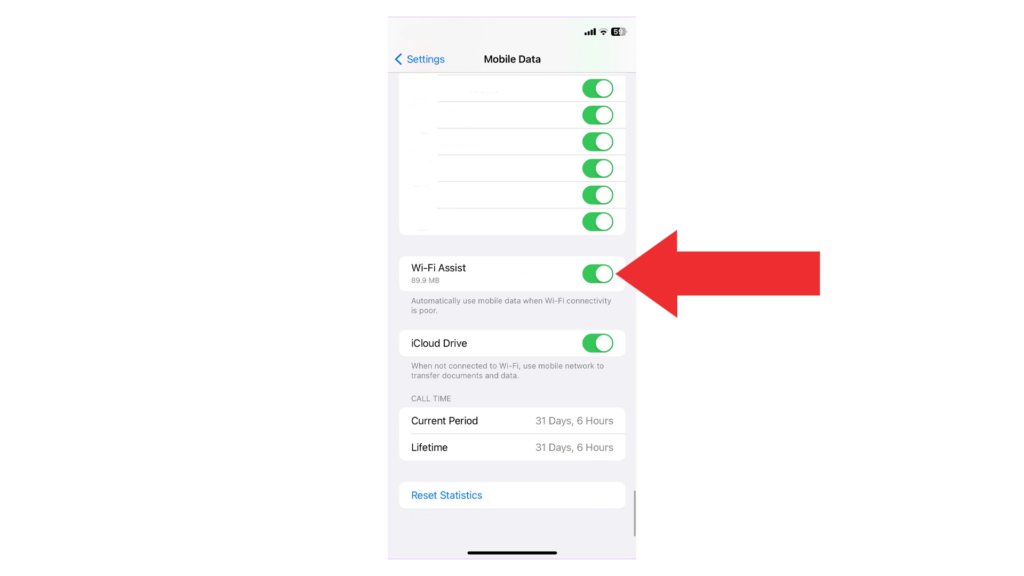
4. Turn Off Wi-Fi Assist
Wi-Fi Assist is a feature that allows you to use mobile data when your Wi-Fi connection is unstable.
If your Wi-Fi is unstable, this could be the reason why you’re seeing the “This update requires a Wi-Fi network connection to download” error.
Here’s how to turn off Wi-Fi Assist:
- Open the Settings app on your iPhone.
- Tap on Cellular.
- Scroll down and find Wi-Fi Assist.
- Tap the toggle switch next to the feature to turn it off.
5. Turn Off Cellular Data
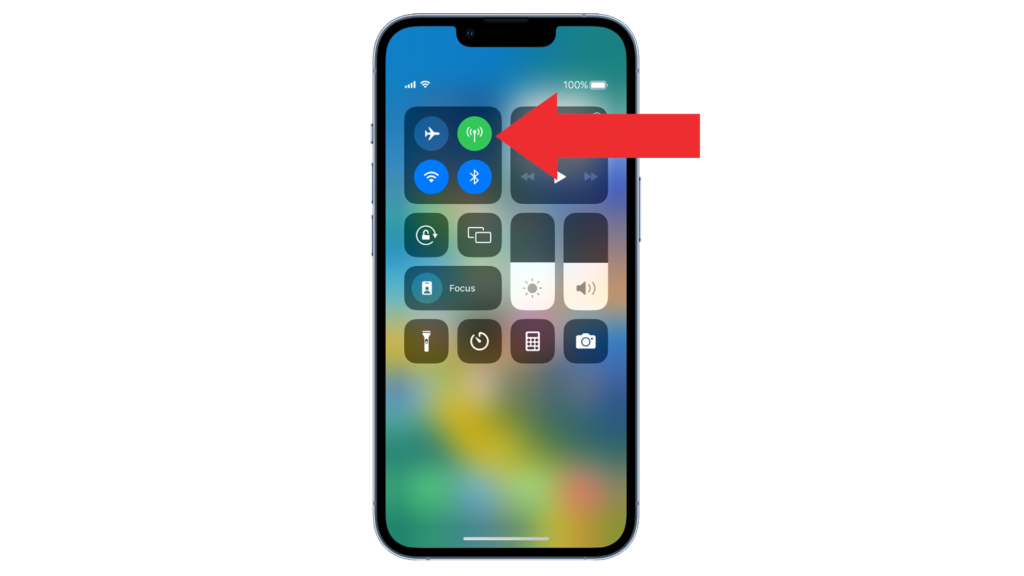
You can also disable cellular data completely to prevent it from being detected by the software update:
- Swipe downwards from the upper right corner of your screen.
- Next, tap the Cellular Data icon next to Airplane Mode.
6. Turn Off Private Wi-Fi Address
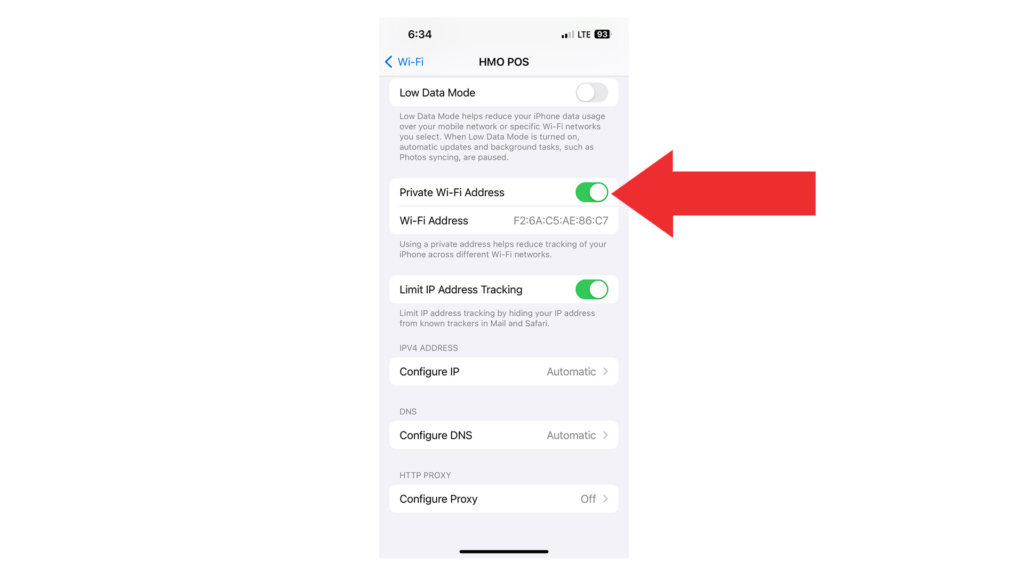
Private Wi-Fi Address is a feature that randomizes your Media Access Control (MAC) address, which is used to identify your device from the network.
If your iPhone keeps changing its MAC address, you might encounter connection issues.
Try disabling the feature and see if you can download the update.
- Open the Settings app on your iPhone.
- Tap on Wi-Fi.
- Next, tap the (i) icon next to your SSID.
- Look for Private Wi-Fi Address and turn it off.
7. Disable Low Data Mode
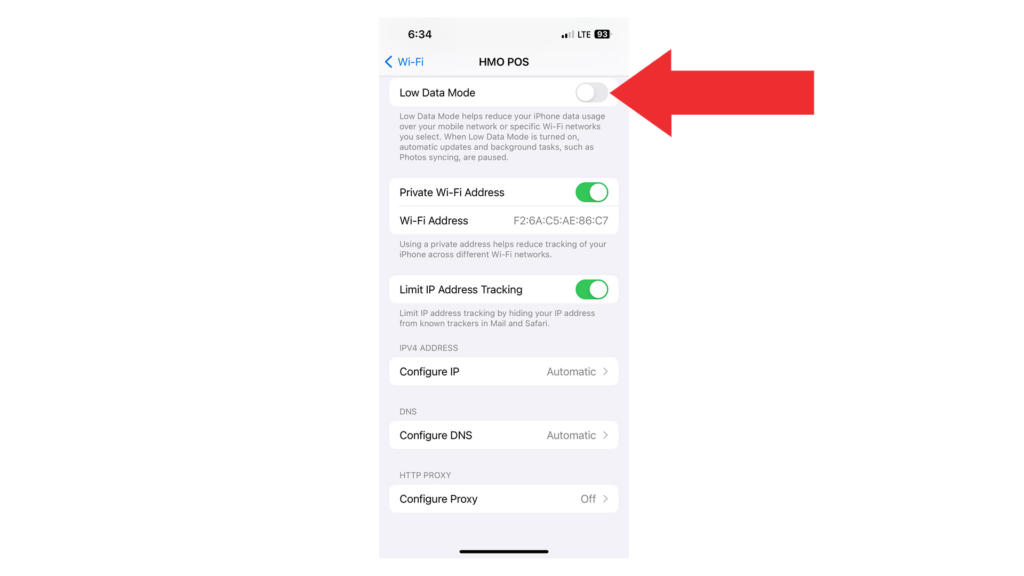
Low Data mode is a feature that helps save cellular and Wi-Fi usage.
If the software update is large, Low Data mode might prevent it from downloading.
Here’s how you can turn it off:
- Go to Settings on your iPhone.
- Now, tap on Wi-Fi.
- Tap the (i) icon next to your SSID.
- Find Low Data Mode and turn it off.
8. Reset Network Settings
If none of the solutions above worked, try resetting your network settings.
This ensures that there are no conflicts with your current configurations that may cause network-related issues.
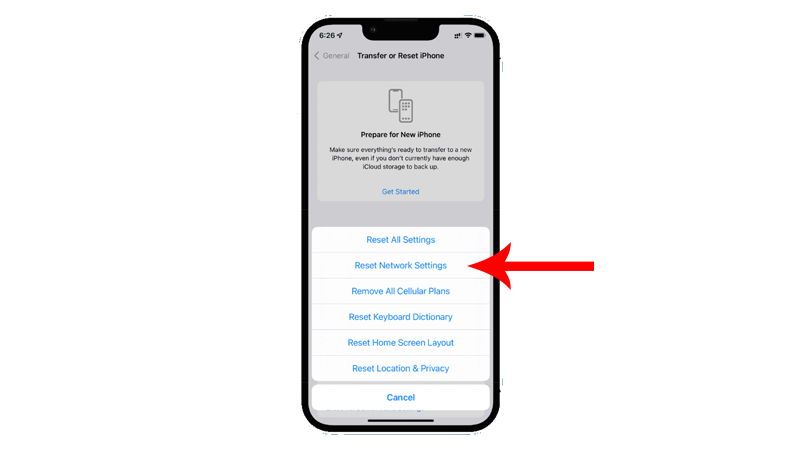
Follow the steps below to reset your network settings:
- Open the Settings app on your iPhone.
- Next, go to General > Transfer or Reset iPhone.
- Tap on Reset.
- Select Reset Network Settings.
Note
- Your iPhone will immediately restart upon resetting your network configurations.
- It may be stuck in the Apple logo. Wait for the process to complete, which usually takes 5 to 10 minutes.
FAQs
Why is my iPhone connected to Wi-Fi but cannot download software updates?
If you can’t download software updates via Wi-Fi, there might be a problem with your network. Try performing a speed test to confirm if there are issues with your connection. Restarting your router usually resolves minor network problems.
Why is my update failing to download?
Failed updates are usually caused by network and storage problems. Before updating your iPhone, make sure you have enough storage, and your internet connection is stable.
How do I fix iOS update error?
To fix an iOS update error, you need to remove the previous update file and restart the download:
- Go to Settings on your iPhone.
- Navigate to General > Storage.
- Find the update in the list of apps.
- Tap on it and select Delete update.
- Try updating your iPhone again.
Can you do a software update with cellular data?
Yes. However, you need to ensure that you have enough bandwidth since cellular data can be expensive. Once you have that in order, here’s how to run the software update:
- First, make sure that your cellular data is enabled.
- Disconnect your iPhone from Wi-Fi.
- Go to Settings > General > Software Update.
- Tap on Download and Install if an update is available.


