

Windows does not boot after the Windows Hypervisor Platform is enabled on your PC?
Windows Hypervisor Platform is a safe place to run virtualization software as well as manage multiple operating systems using a single server. However, this an optional feature and is disabled by default.
Recently, several users reported that their Windows fails to boot after they enable the Windows Hypervisor Platform on their devices. We looked into this issue and found out that this issue can be caused by various reasons, including a corrupt Windows update and outdated drivers.
If you are facing a similar issue on your device, you’re in the right place. We have compiled a list of troubleshooting steps that you can follow to resolve the issue.
Let’s get started.
1. Update Windows, Drivers, and Applications.
There are times when outdated Windows, drivers, and applications cause compatibility issues within the system, and your system fails to perform specific actions.
If your Windows does not boot after the Windows Hypervisor Platform is enabled, then the first thing you should try doing is updating the Windows, drivers, and applications.
Here is what you need to do:
- Go to Settings and click on Updates & Security.
- Select Windows Updates from the left panel.
- Click on Check for updates and if there are any pending updates available, install them.
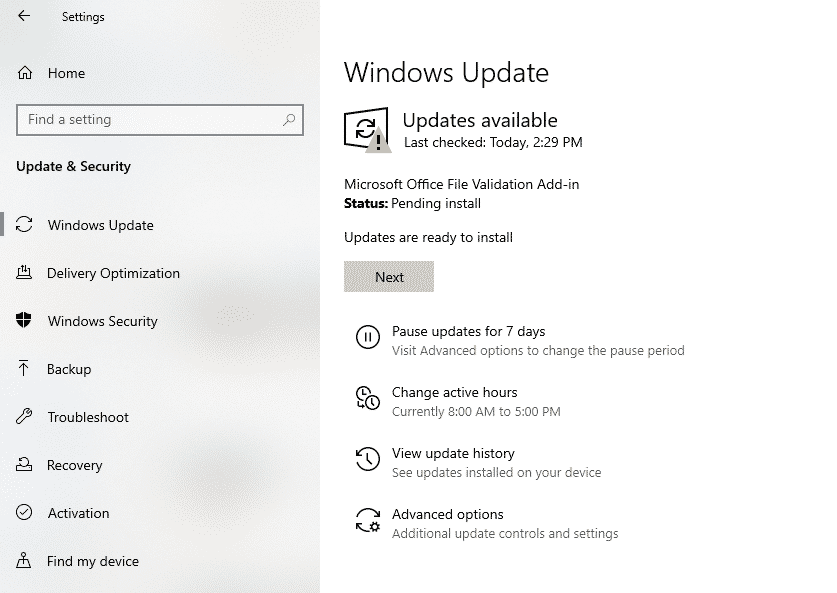
- Once done, restart your PC and check if the issue is resolved.
If outdated apps, Windows, or drivers were causing the issue, updating will fix them.
2. Disable Antivirus.
If you use Windows Defender or have installed third-party antivirus software on your PC, try disabling it.
Sometimes, these enthusiastic antivirus programs tend to get over-protective and start blocking legitimate programs on your PC due to false alarms. A simple solution to this issue is to disable the antivirus program and check if the error is resolved. If the error is resolved, you can shift to another reliable antivirus software, but if the error persists, it implies that the antivirus software is not the root cause. In this case, proceed to the next method below.
3. Disable / Enable Hypervisor Platform and Virtualization.
It is common for Windows to fail to boot due to a glitch in the system. However, these issues are temporary and can be resolved by disabling the program and then re-enabling it.
This process is a bit lengthy and complicated, which is why we suggest executing it very carefully.
Here is how you can do it:
- Enter safe mode with networking after rebooting your computer.
- Type Windows Features in the search bar and click on Turn Windows Features on or off.
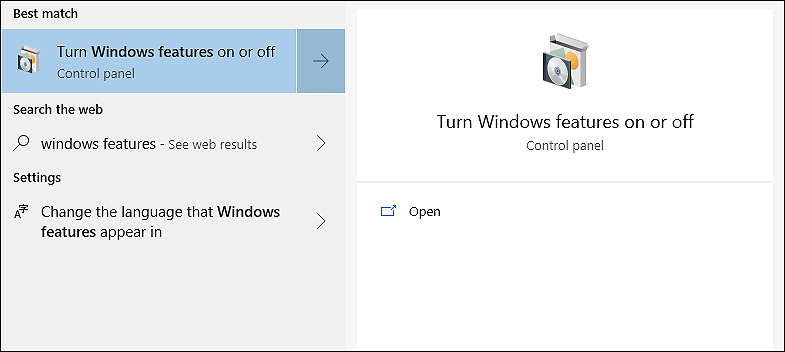
- Locate Windows Hypervisor Platform and uncheck it.

- Click on the OK button.
- Next, click on the Windows icon in the taskbar and select Power.
- Press the Shift key and click on Restart.
- In the startup options, click on Troubleshoot.
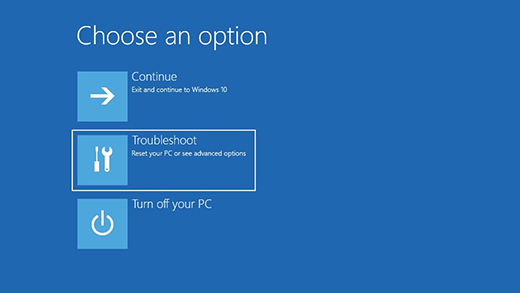
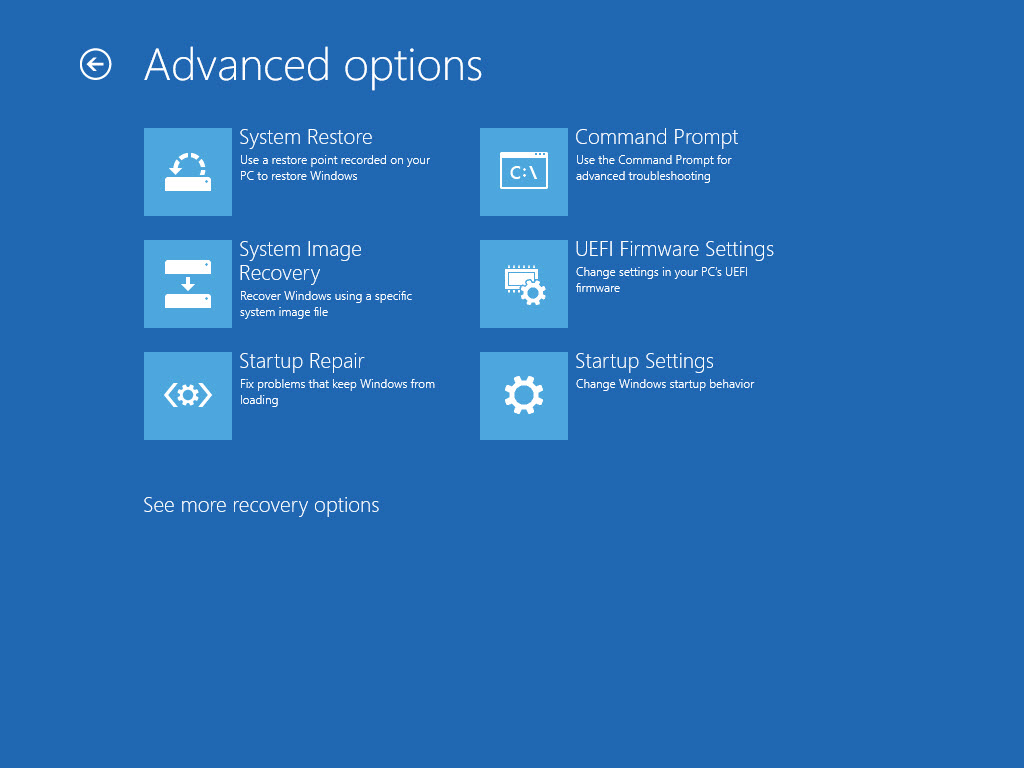
- Inside the Troubleshoot window, select Advanced options and click on UEFI Firmware Settings.
- Now restart your system.
- Locate Virtualization Support from the list of options available on the left panel and click on it.
- Select Virtualization and uncheck the option of Enable Intel Virtualization Technology.
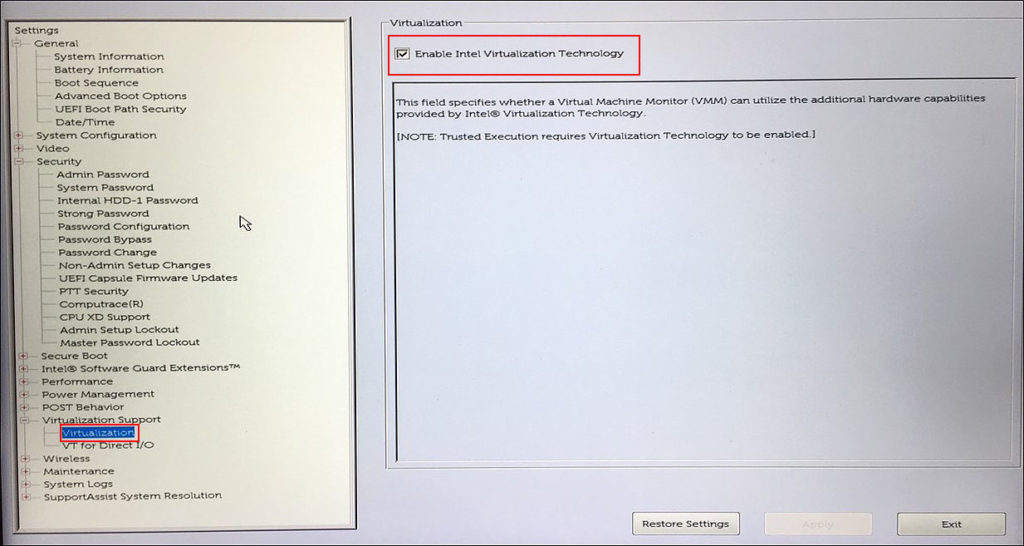
- Click Apply to save the changes.
- Now restart your system and check if the virtualization feature is disabled. If it is, repeat the steps mentioned above (6 to 11) and enable it.
- Once done, reboot your system again and repeat the steps mentioned above (2 to 4) to enable the Hypervisor platform.
- Log out of your user account.
- Finally, log in to the user account and restart your system.
Hopefully, disabling and re-enabling the Hypervisor platform and virtualization will resolve the issue.
4. Use Command Prompt.
Another easy method to prevent Windows errors after enabling the Windows Hypervisor platform is by using Command Prompt.
Command Prompt is a Windows program used to execute commands. It is mainly used to perform advanced administrative functions and solve various kinds of Windows errors.
Here is how you can use Command Prompt to solve the issue under consideration on your PC:
- Enter safe mode with networking.
- In the startup options, click on Troubleshoot.
- Inside the Troubleshoot window, select Advanced options and click on Command Prompt.
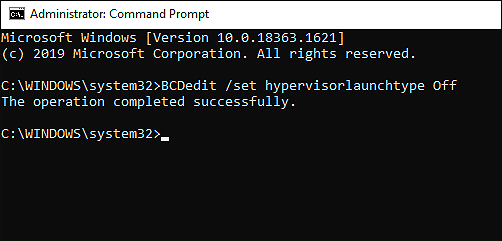
- Run it as an administrator, and inside the Command Prompt window, type the command mentioned below and hit Enter.
BCDedit /set hypervisorlaunchtype Off
- Now reboot your PC and check if the error is resolved. In case you have more than one item on your BCD, you must specify an item to turn Hypervisor on or off. In this scenario, type the command mentioned below. By doing so, your screen will display all the BCD items.
BCDedit
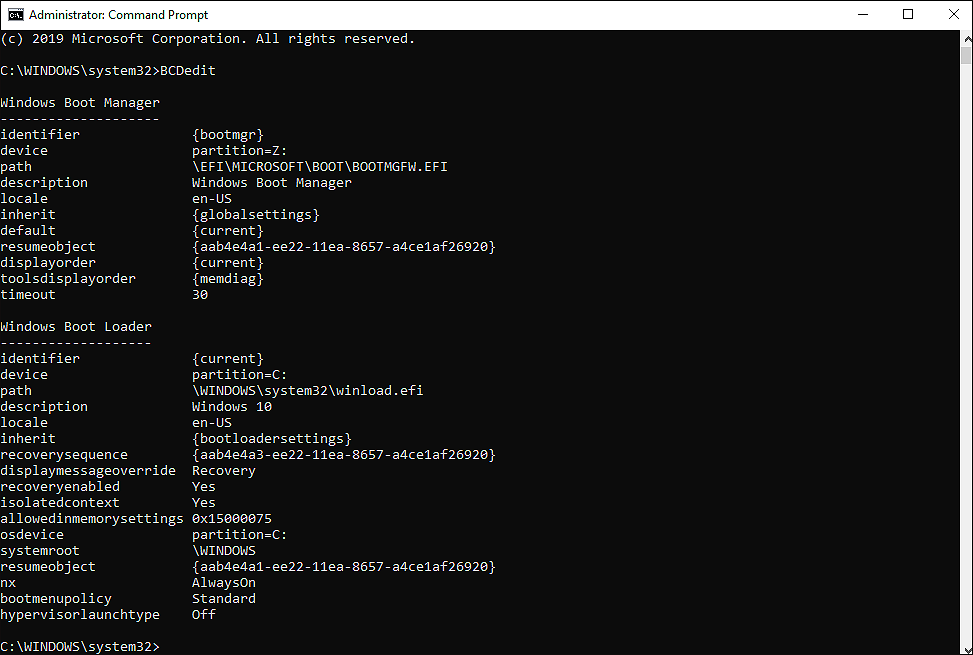
- Finally, type the command mentioned below to specify the item to change.
BCDedit /set {<long string of numbers here>} hypervisorlaunchtype Off
That’s it. You should now be able to boot Windows without any issues.
5. Rebuild the Boot Configuration Data File.
Windows Boot Manager uses the Boot Configuration Data (BCD) File to restart the operating system. Sometimes, the BCD file gets corrupt and prevents the Windows from booting normally.
Luckily, you can always rebuild the BCD file, which can resolve the issue in no time.
Follow the steps mentioned below to rebuild the Boot Configuration Data file on your PC:
- Get a new installation image and wait for the PC to boot from USB successfully.
- Click on Repair and select Startup repair.
- Follow the on-screen instructions to complete the process.
If the BCD file was corrupt, rebuilding it will resolve the issue. However, if Windows still does not boot, see the next method below.
6. Revert to a Previous Working State of Windows.
If the issue started occurring right after installing a Windows update, then there is a possibility of the update being buggy.
Buggy updates are not new for Windows users, as they keep dealing with them now and then. An easy solution to this issue is to revert the Windows to its previous error-free working state. You can also uninstall the faulty updates to eliminate them from your system.
Here is what you need to do:
- First of all, try reverting Windows to a previous error-free state.
- If it does not work for you, go to Settings and go to Updates & Security.
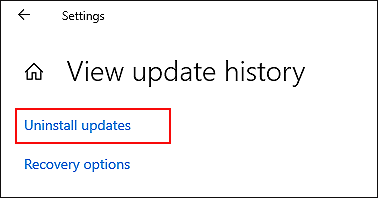
- Select Windows Update from the left panel and then click on View update history.
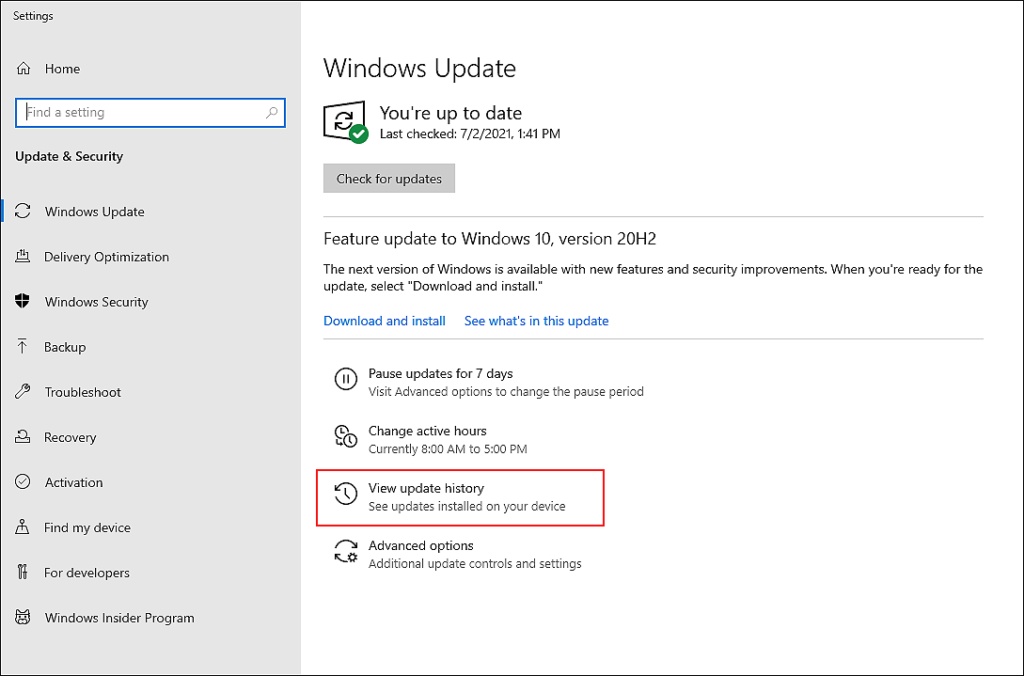
- Select the faulty update and click on Uninstall updates.
- Follow the on-screen instructions to complete the process.
Your Windows should now boot without any issues.
7. Try Using CleanMyPC.
Over time, several unwanted and junk files get piled up in the Windows Registry and get corrupt. In case you haven’t deep cleaned your PC in a long time, then now might be the right time to do it if your Windows does not boot after the Windows Hypervisor Platform is enabled.
While you can clean the system both manually and automatically, we suggest using a reliable PC cleaner to eliminate each junk file. If you are struggling to find one, try using CleanMyPC.

CleanMyPC is an efficient PC cleaner that scans through the system, identifies the junk files, and then cleans them in a single click. Moreover, it can improve the overall system’s speed, boost performance, and protect your online privacy, thanks to its built-in system maintenance tools.
Install CleanMyPC now and enjoy all these perks!
8. Reinstall Windows.
If none of the methods mentioned above works for you, it implies that the corruption error causing the issue cannot be resolved using the conventional troubleshooting steps.
In this case, we encourage you to go ahead and reinstall Windows.
Reinstalling the Windows will revert it to its initial state, a state similar to installing Windows for the first time. However, you will not lose any of your important data. Hopefully, reinstalling the Windows will resolve the issue once and for all.
Now that we have reached the end of this guide, we hope that our methods helped you fix the issue on your PC. If you have any questions, please let us know in the commend section below.
If this guide helped you, please share it. 🙂
