

Experiencing overheating issue on Windows 11?
Overheating is a serious concern as it can lead to your device’s hardware damage in the long run.
Unfortunately, many Windows 11 users are experiencing this issue after upgrading to the latest operating system.
There are many factors to consider when your computer overheats, such as, the cooling system may be faulty, the system is infested with malware, and more.
Whichever the case, we’re here to help.
In this guide, we’ll show you how to fix the overheating issue on Windows 11.
Let’s begin!
1. Check Your Cooling System.
When you experience overheating problems on your computer, the first thing to check is the cooling system.
Here’s a list of things to check with your cooling system:
Basic Users
- Make sure all fans are working.
- Ensure that the fans are getting proper airflow and any wires or panels do not restrict them.
- Check and clean your fans to improve airflow.
Advanced Users / Enthusiasts
- If you know your way around computers, check the cooler and ensure it is properly seated against the CPU.
- Check the thermal paste and make sure that the right amount is applied.
After checking these things, your computer should run without issues. If it still overheats, there might be a problem with your software.
2. Manage Your Applications.
Applications on your computer could be consuming system resources in the background. This can cause the CPU to work harder than usual and heat up.
Excessive background applications can also cause your system to slow down or overheat even on idle.
Here’s how you can manage your apps:
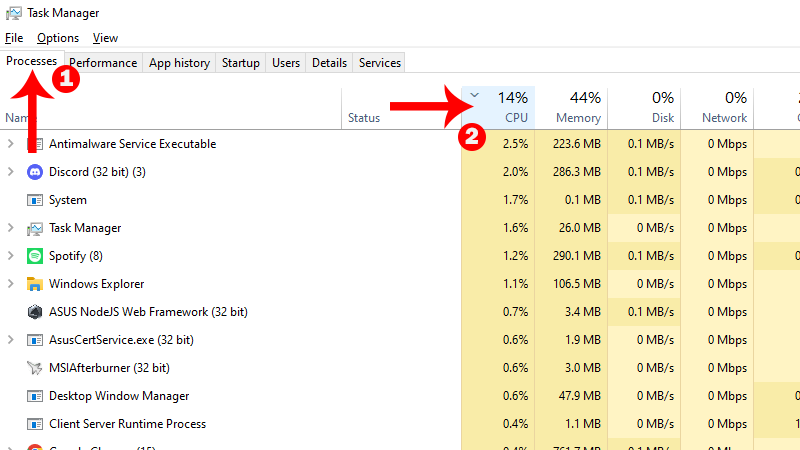
- On your keyboard, press CTRL + SHIFT + ESC to open the Task Manager.
- Go to the Processes tab and click on CPU. This should sort your apps based on their CPU usage.
- Identify the apps that you are not using and close them.
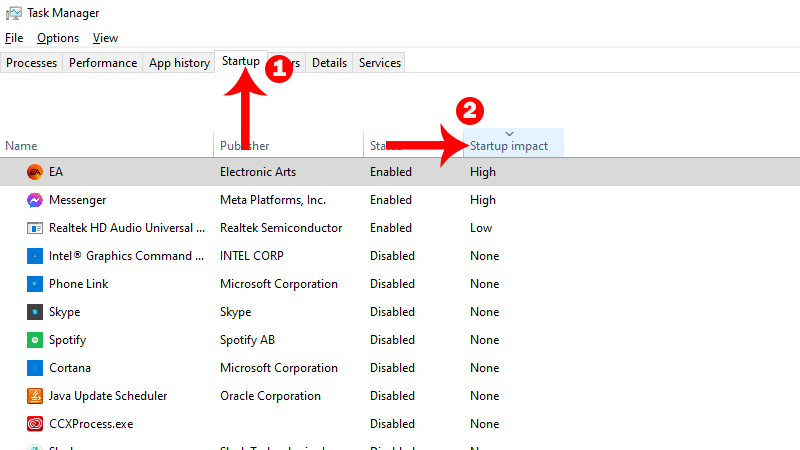
- Now, go to the Startup tab.
- Click Startup Impact to sort your apps based on their impact during boot.
- Select the applications you don’t need to start automatically and disable them.
Use your computer for a few minutes to check if you’ll still encounter overheating issues.
3. Restart Your Computer.
A temporary bug or glitch may have occurred on your system and caused problems with power management.
To rule this out, restart your computer to reload system resources. This should clear corrupted data from the system memory.
Follow the steps below to restart your computer:
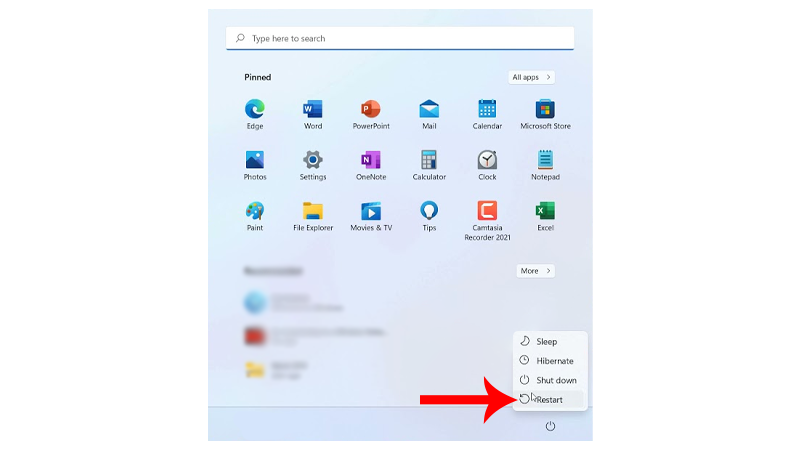
- Press the Windows key on your keyboard.
- In the Start Menu, click on the Power Options tab.
- Choose Restart from the options.
Wait for your computer to boot and check if the problem is solved.
4. Update Your System.
Windows 11 is quite new and still needs optimizations to run efficiently. If you haven’t updated your computer for a while, try doing so to improve its overall performance.
See the steps below to update Windows 11:
- First, press Windows + I on your keyboard to open Windows Settings.
- After that, click on Windows Update in the side menu.
- Click on Check for Updates.
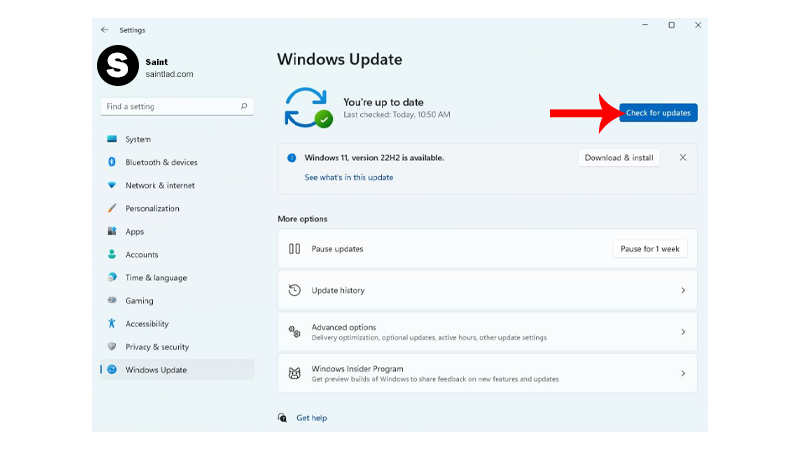
- If an update is available, click Download and Install and follow the prompts.
Note
If you are using a laptop, make sure that you have at least 50% battery before updating your system to avoid issues.
Proceed with your normal workflow and observe if you’ll still encounter overheating issues on Windows 11.
5. Scan for Virus and Malware.
Your system could be infected with a virus or malware. Computer viruses consume system resources, resulting in poor performance and overheating.
If you’re using third-party antivirus, perform a full system scan to remove viruses.
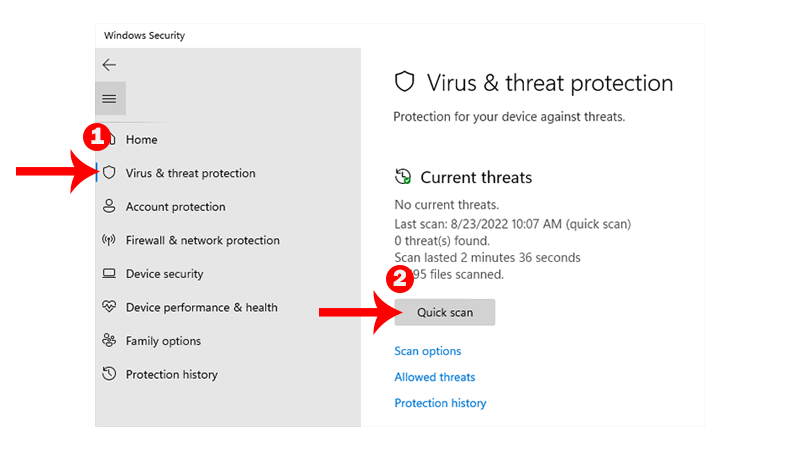
You can also use Windows Defender to remove malware and viruses from your computer.
- Open the Start Menu and find Windows Defender.
- Now, click on Virus & Threat Protection.
- Click the Quick Scan option and follow the prompts.
Wait for the scan to complete and follow the suggested actions by Windows Defender to remove viruses and malicious files.
To avoid problems in the future, avoid downloading files and software from untrusted sources.
6. Limit Background Apps.
If you still experience overheating issues on Windows 11, try limiting applications that can run in the background.
Here’s what you need to do:
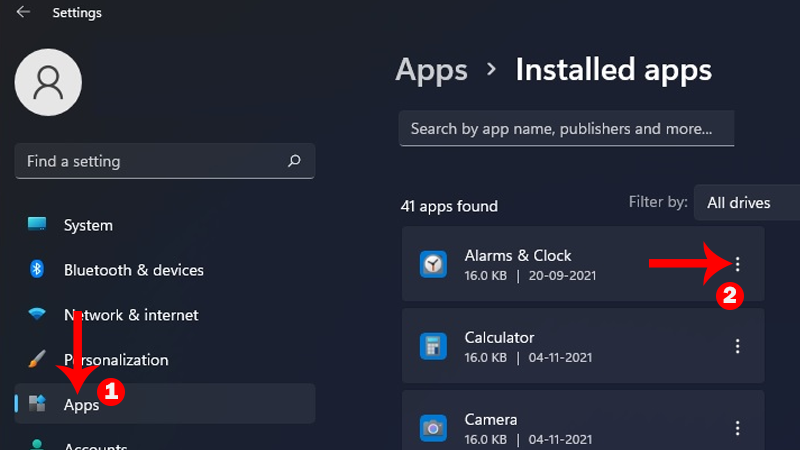
- Open Windows Settings by pressing the Windows + I keys.
- After that, click on Apps in the side menu.
- Now, access the Apps & Features tab.
- Identify the applications that you don’t need in the background.
- Click on the vertical dots beside the app and select Advanced Options.
- Under Background App Permissions, change it to Never.
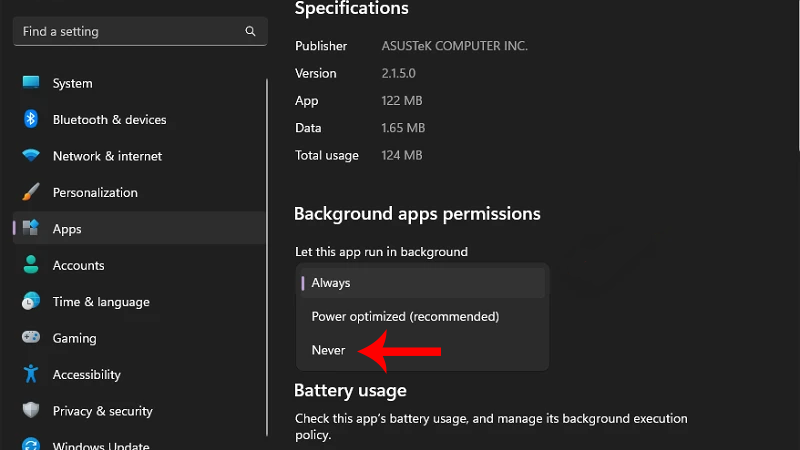
- Repeat this process for other applications.
Try running various applications afterward to check if your computer would still overheat.
7. Check Minimum Processor State Settings.
In normal situations, your CPU should throttle down when there’s less load on your system. This happens when your computer is idling or when running light applications.
However, if the minimum processor state settings were changed, your CPU can continue running at higher clock speeds.
To verify this, follow the steps below:
- Click the Windows icon in the Taskbar to open the Start Menu.
- Next, look for the Control Panel and open it.
- Go to System and Security > Power Options.

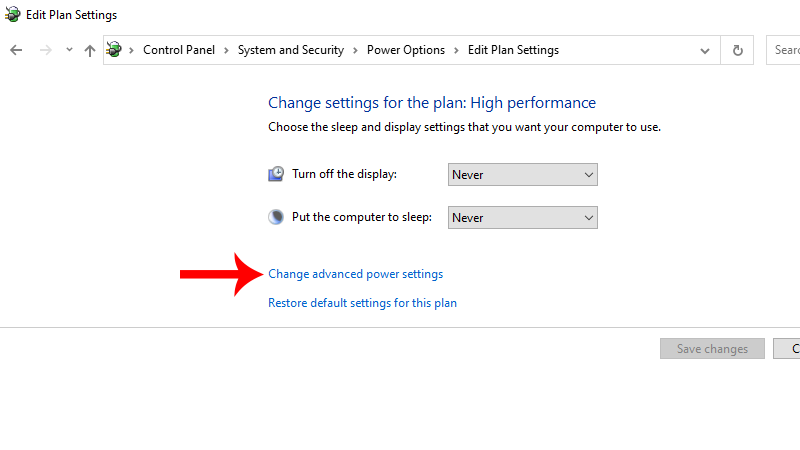
- Look for your active power plan and click on Change Plan Settings.
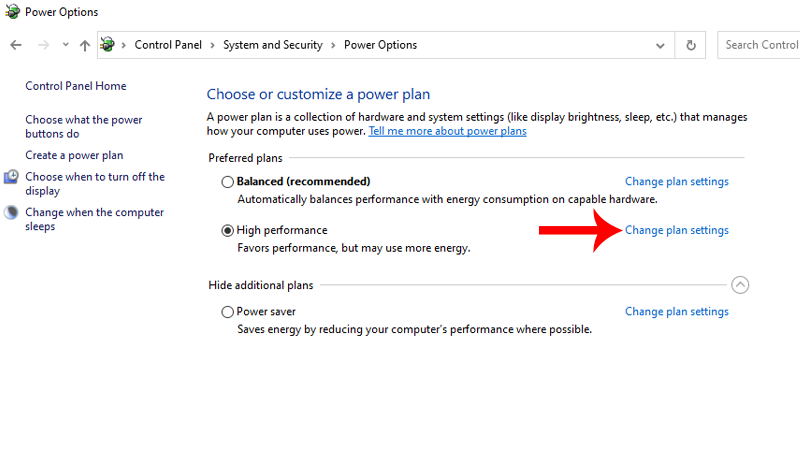
- Now, click on Change Advanced Power Settings.
- Expand the Processor Power Management tab.
- Click on Minimum Processor State and change it to 5% or 10%.
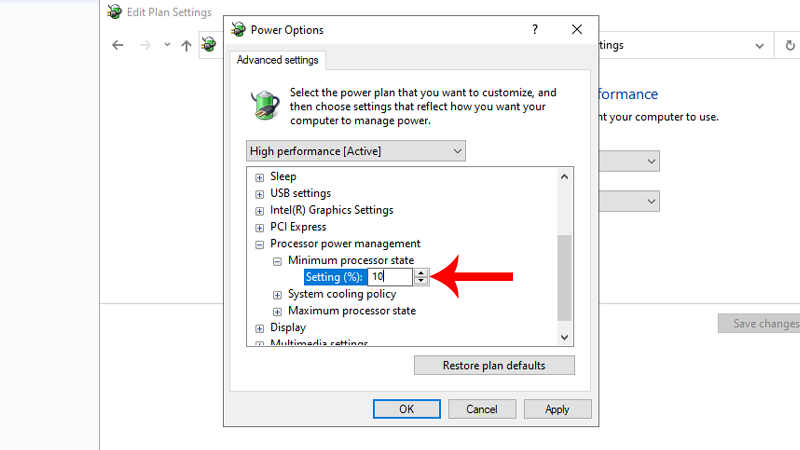
- Lastly, click OK to save the changes.
Leave your computer idling for several minutes to see if it will still overheat.
8. Uninstall Unused Applications.
You can also try uninstalling unused apps on your computer. This way, you don’t have to worry about unnecessary applications running in the background.
Check out the steps below to remove apps on Windows:
- Click the Windows icon in the Taskbar to open the Start Menu.
- Next, look for the Control Panel and open it.
- Under Programs, click on Uninstall a Program.
- Identify the applications you don’t need.
- Right-click on an app and choose Uninstall. Follow the prompts to continue.
Repeat this process until you’ve removed unnecessary applications from your system.
That wraps up our guide for fixing overheating issues on Windows 11. If you have other concerns, please leave a comment below, and we’ll do our best to answer them.